Handle your first return
To handle your first return in WPReturns, you approve the request, send a return label, mark the parcel as received and resolve the request. The customer starts it in My Account and gets an email at each step. This page follows one real return from start to finish.
Available in: Free and Pro (return labels, the packing slip and store credit need Pro)
The example return
Section titled “The example return”Amara Okafor returns a Heavyweight Pullover Hoodie from order #1348. It cost $49.50 and she picks the reason Changed my mind. She asks for a refund.
The store charges a $4.95 return shipping fee. That leaves $44.55 to pay back.
The order was paid cash on delivery. WPReturns records the refund in WooCommerce and the store pays the money back by hand.
1. The customer opens the request form
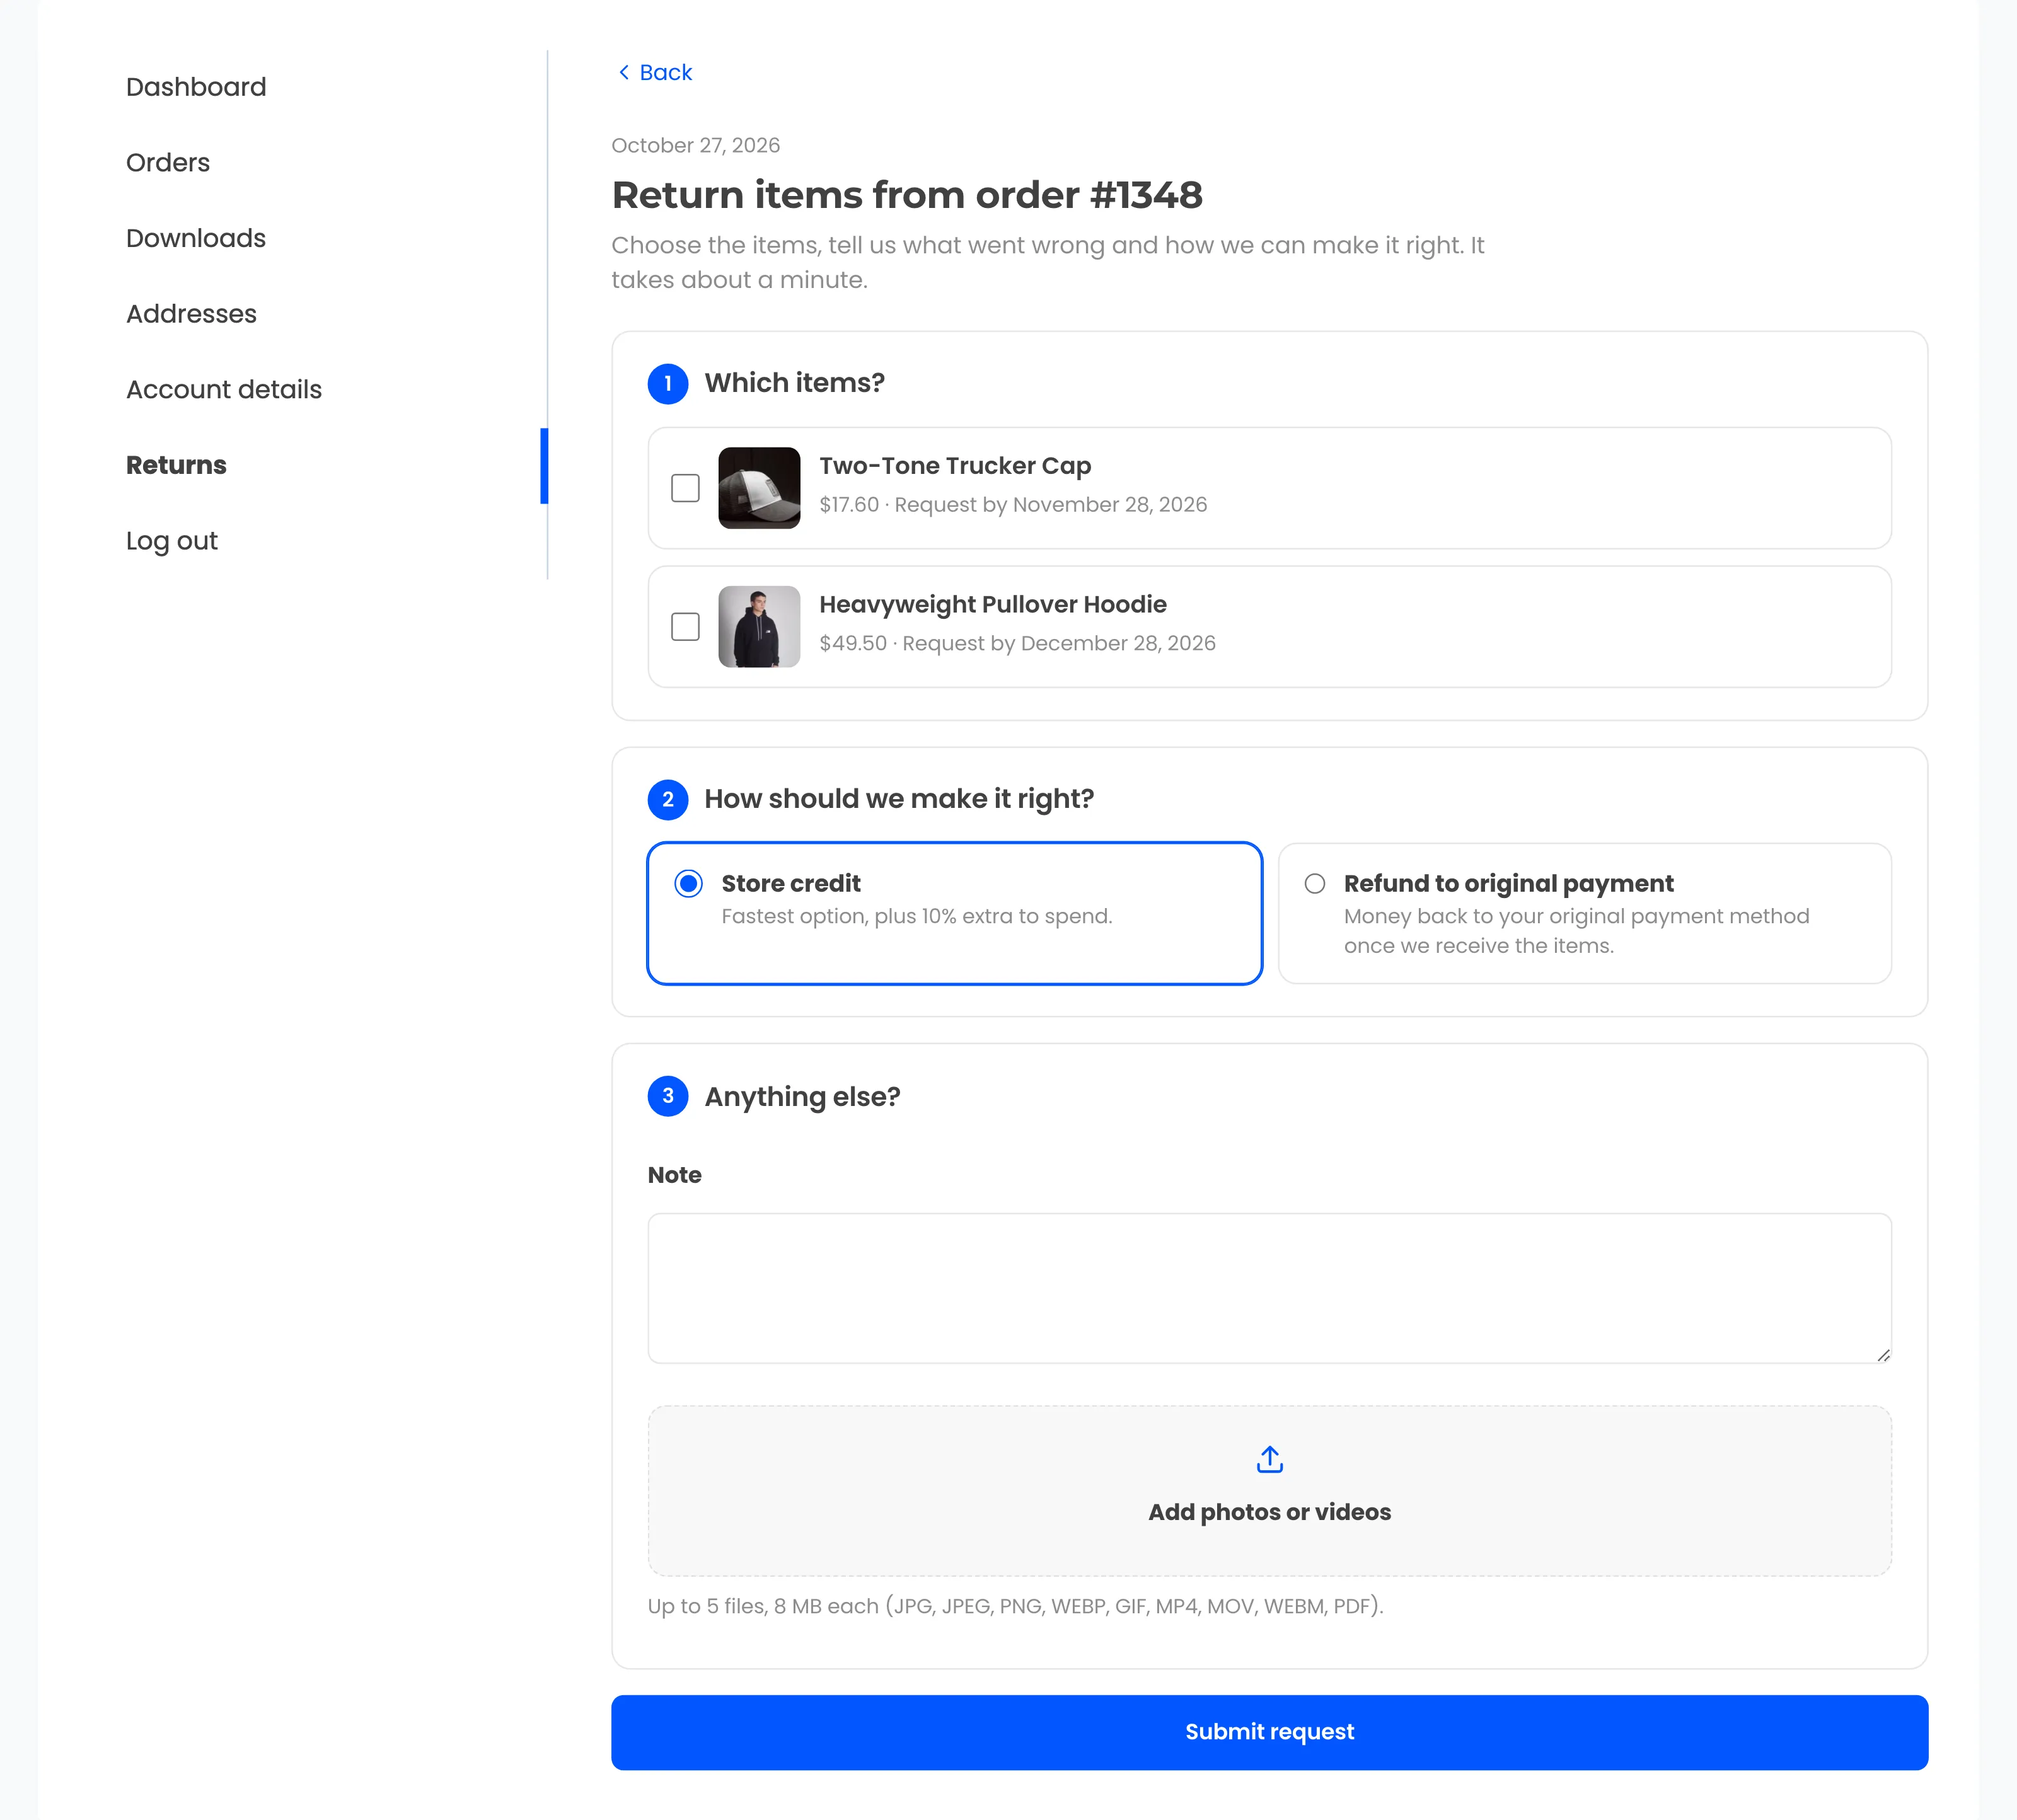
Section titled “1. The customer opens the request form”From My Account > Returns or the order itself, the customer selects Return or refund. The form “Return items from order #1348” opens with three steps. Each item shows its price and the last day she can ask for a return.
2. She picks the item and the reason
Section titled “2. She picks the item and the reason”Under Which items? she ticks the hoodie. Quantity, Reason and Condition appear under it. She picks the reason Changed my mind and leaves the condition at Unopened.
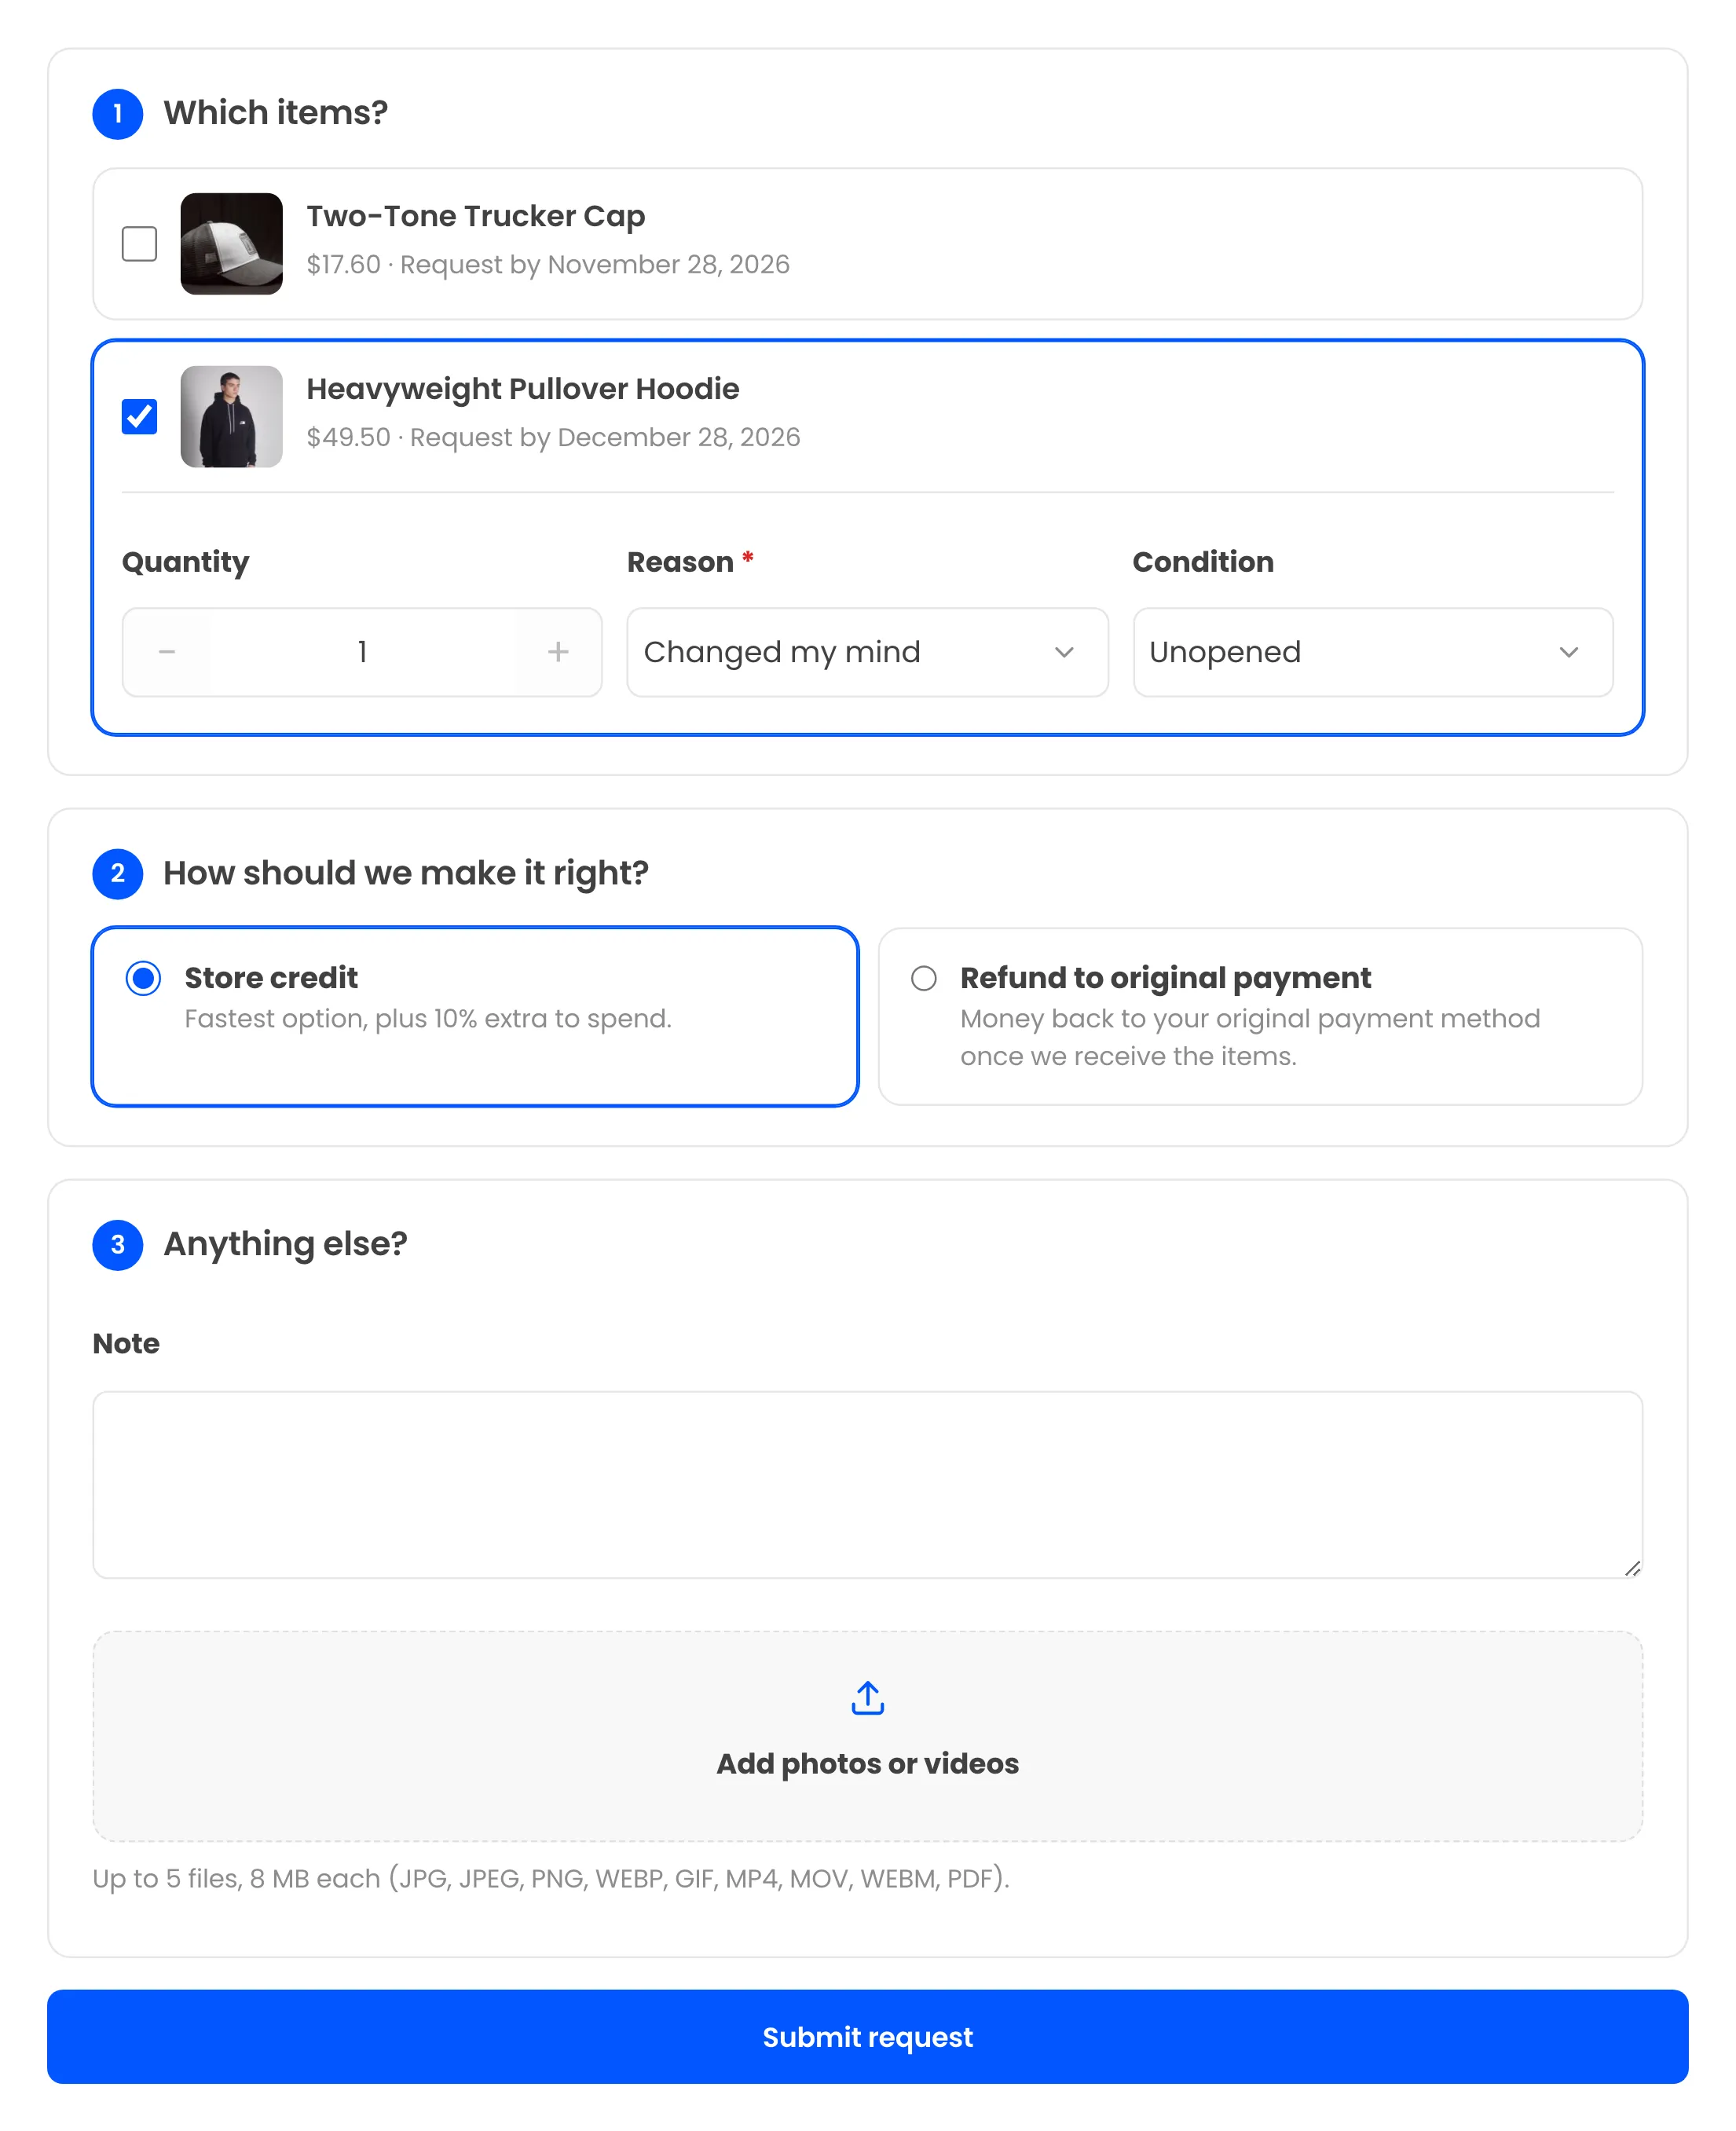
The reason is required. A note that photos are needed only shows when a picked reason asks for photos.
3. She picks a refund and sends the request
Section titled “3. She picks a refund and sends the request”Under How should we make it right? she picks Refund to original payment. Under Anything else? she writes a short Note. Then she selects Submit request.
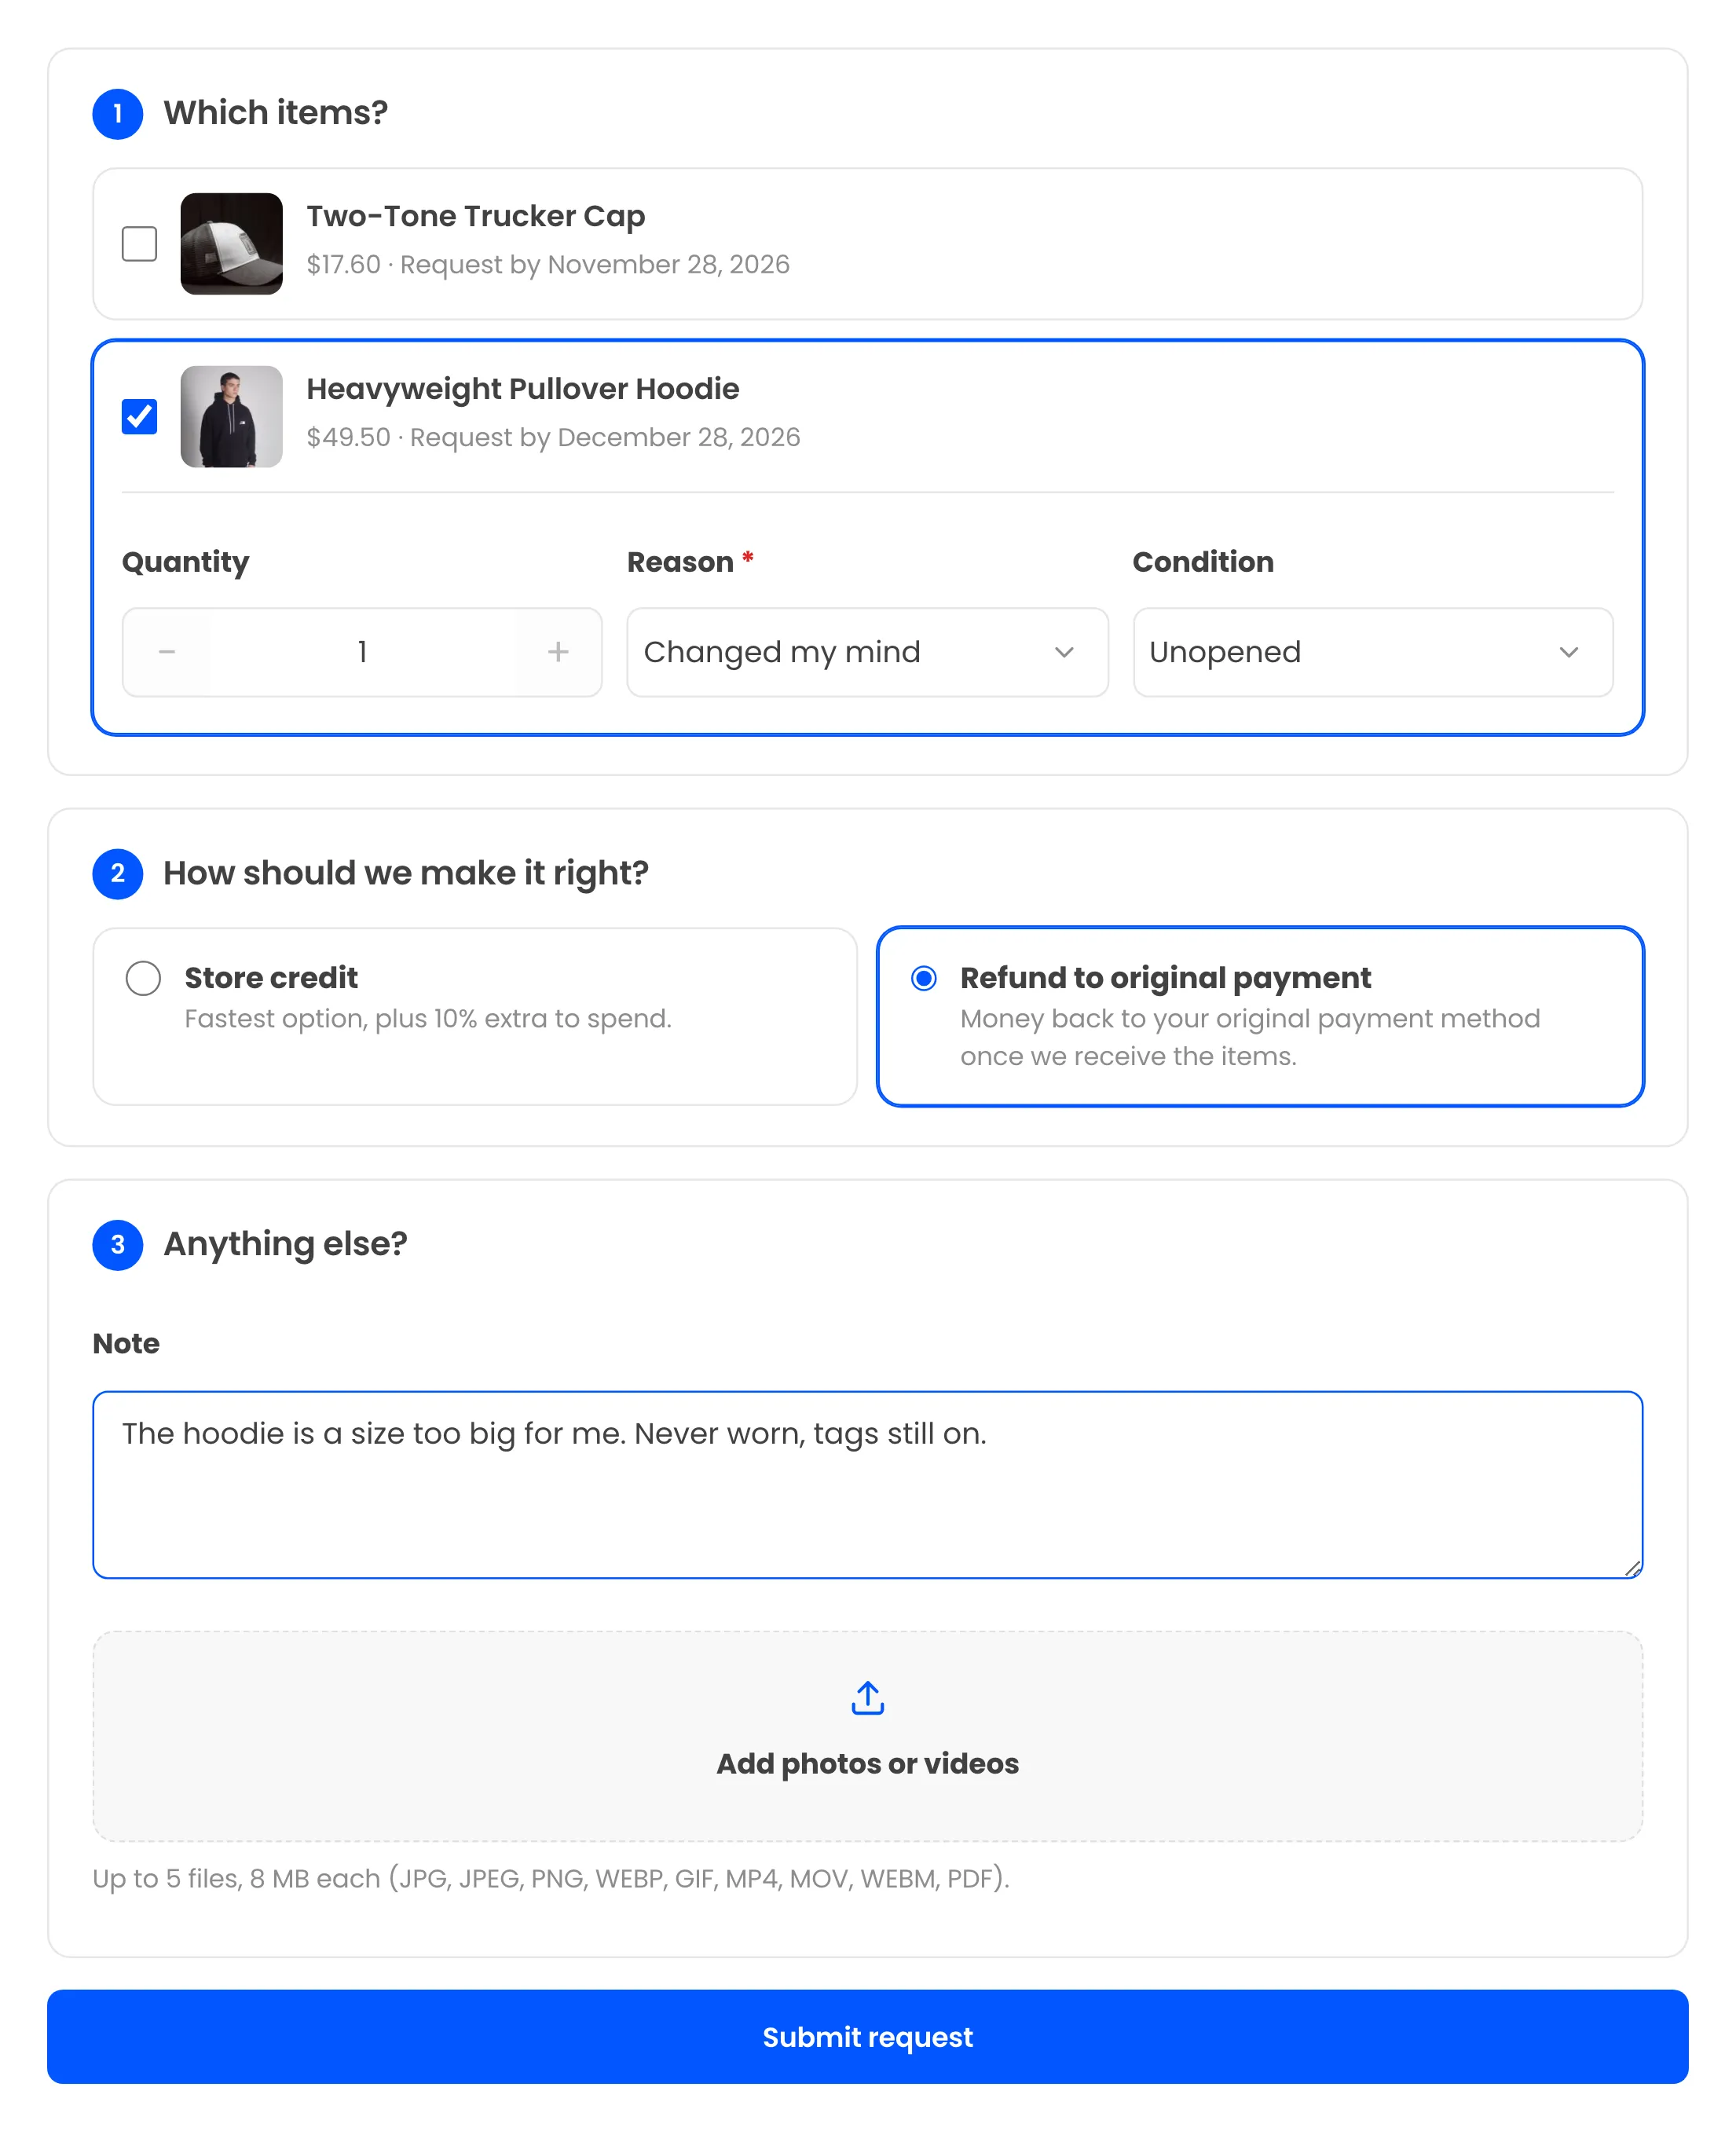
Store credit appears only when you offer it. With a store credit bonus, its card reads “Fastest option, plus 10% extra to spend.”
4. The request is submitted
Section titled “4. The request is submitted”Her request page opens with “Thanks! Your request RMA-00061 has been submitted. We have emailed you a copy.” The status reads Requested and the box says “We are reviewing your request”.
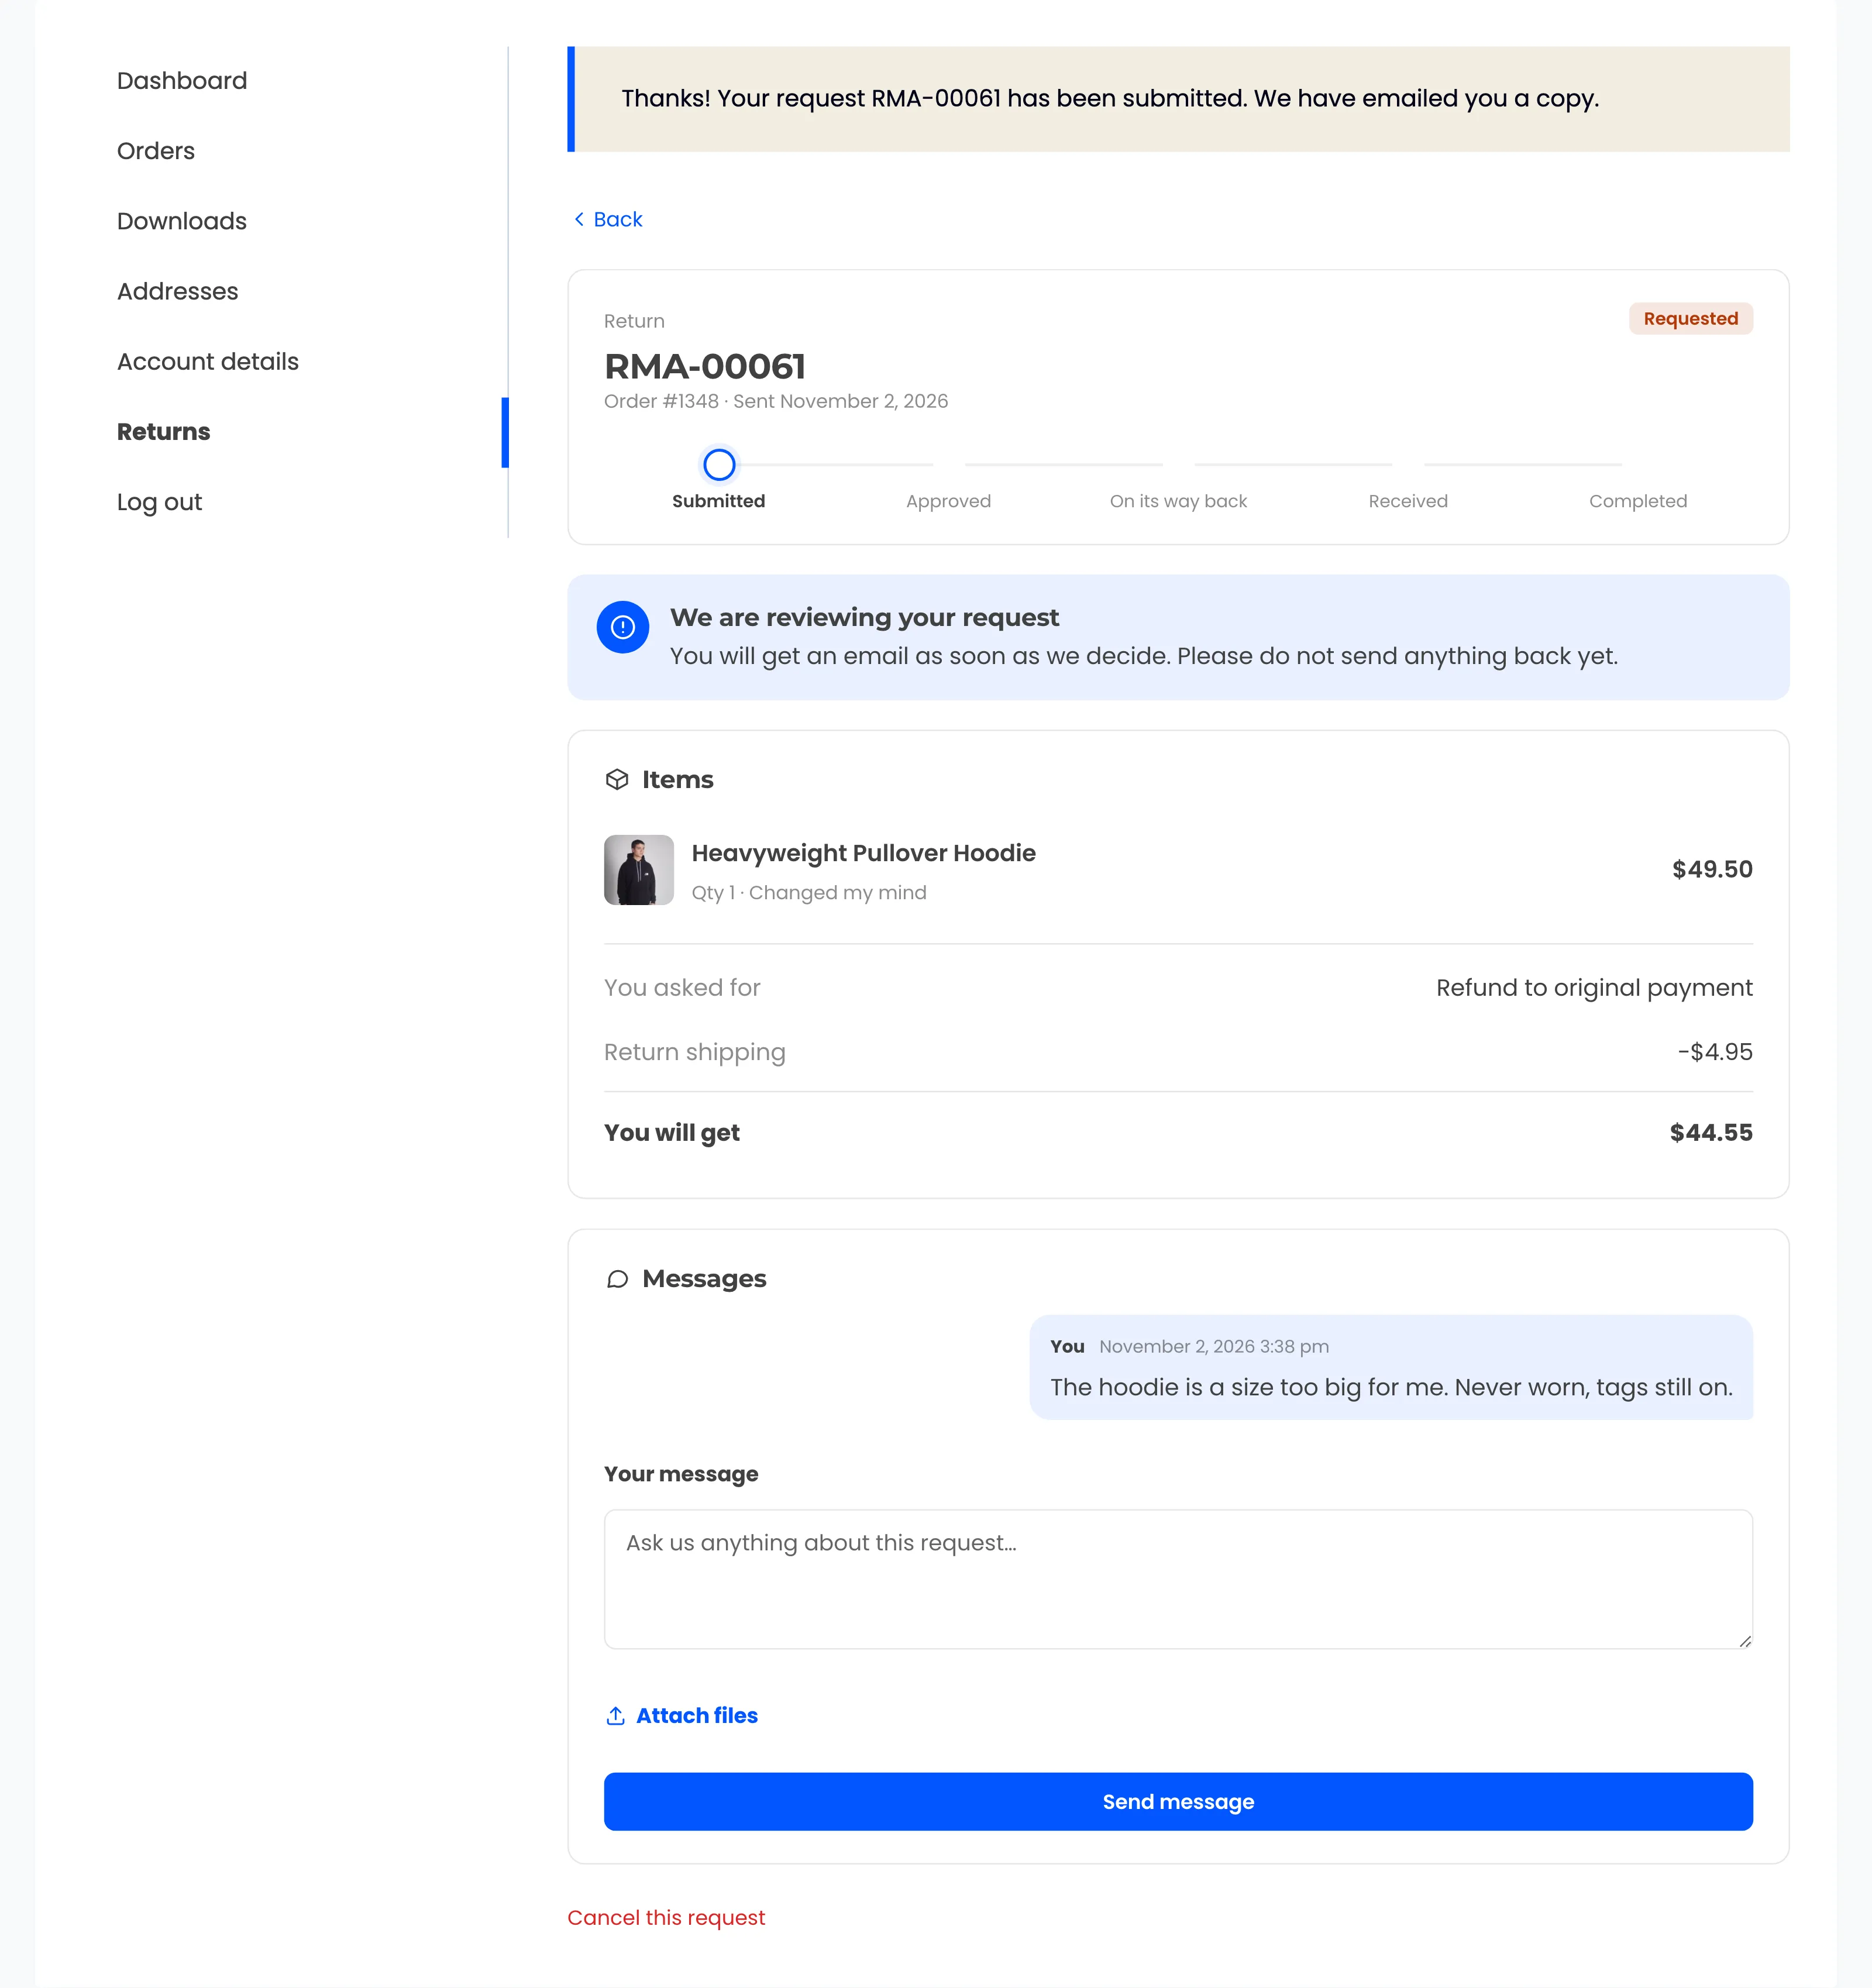
The Items card already shows the math: Return shipping -$4.95 and You will get $44.55. Her note is the first entry under Messages. She can still select Cancel this request while it waits for review.
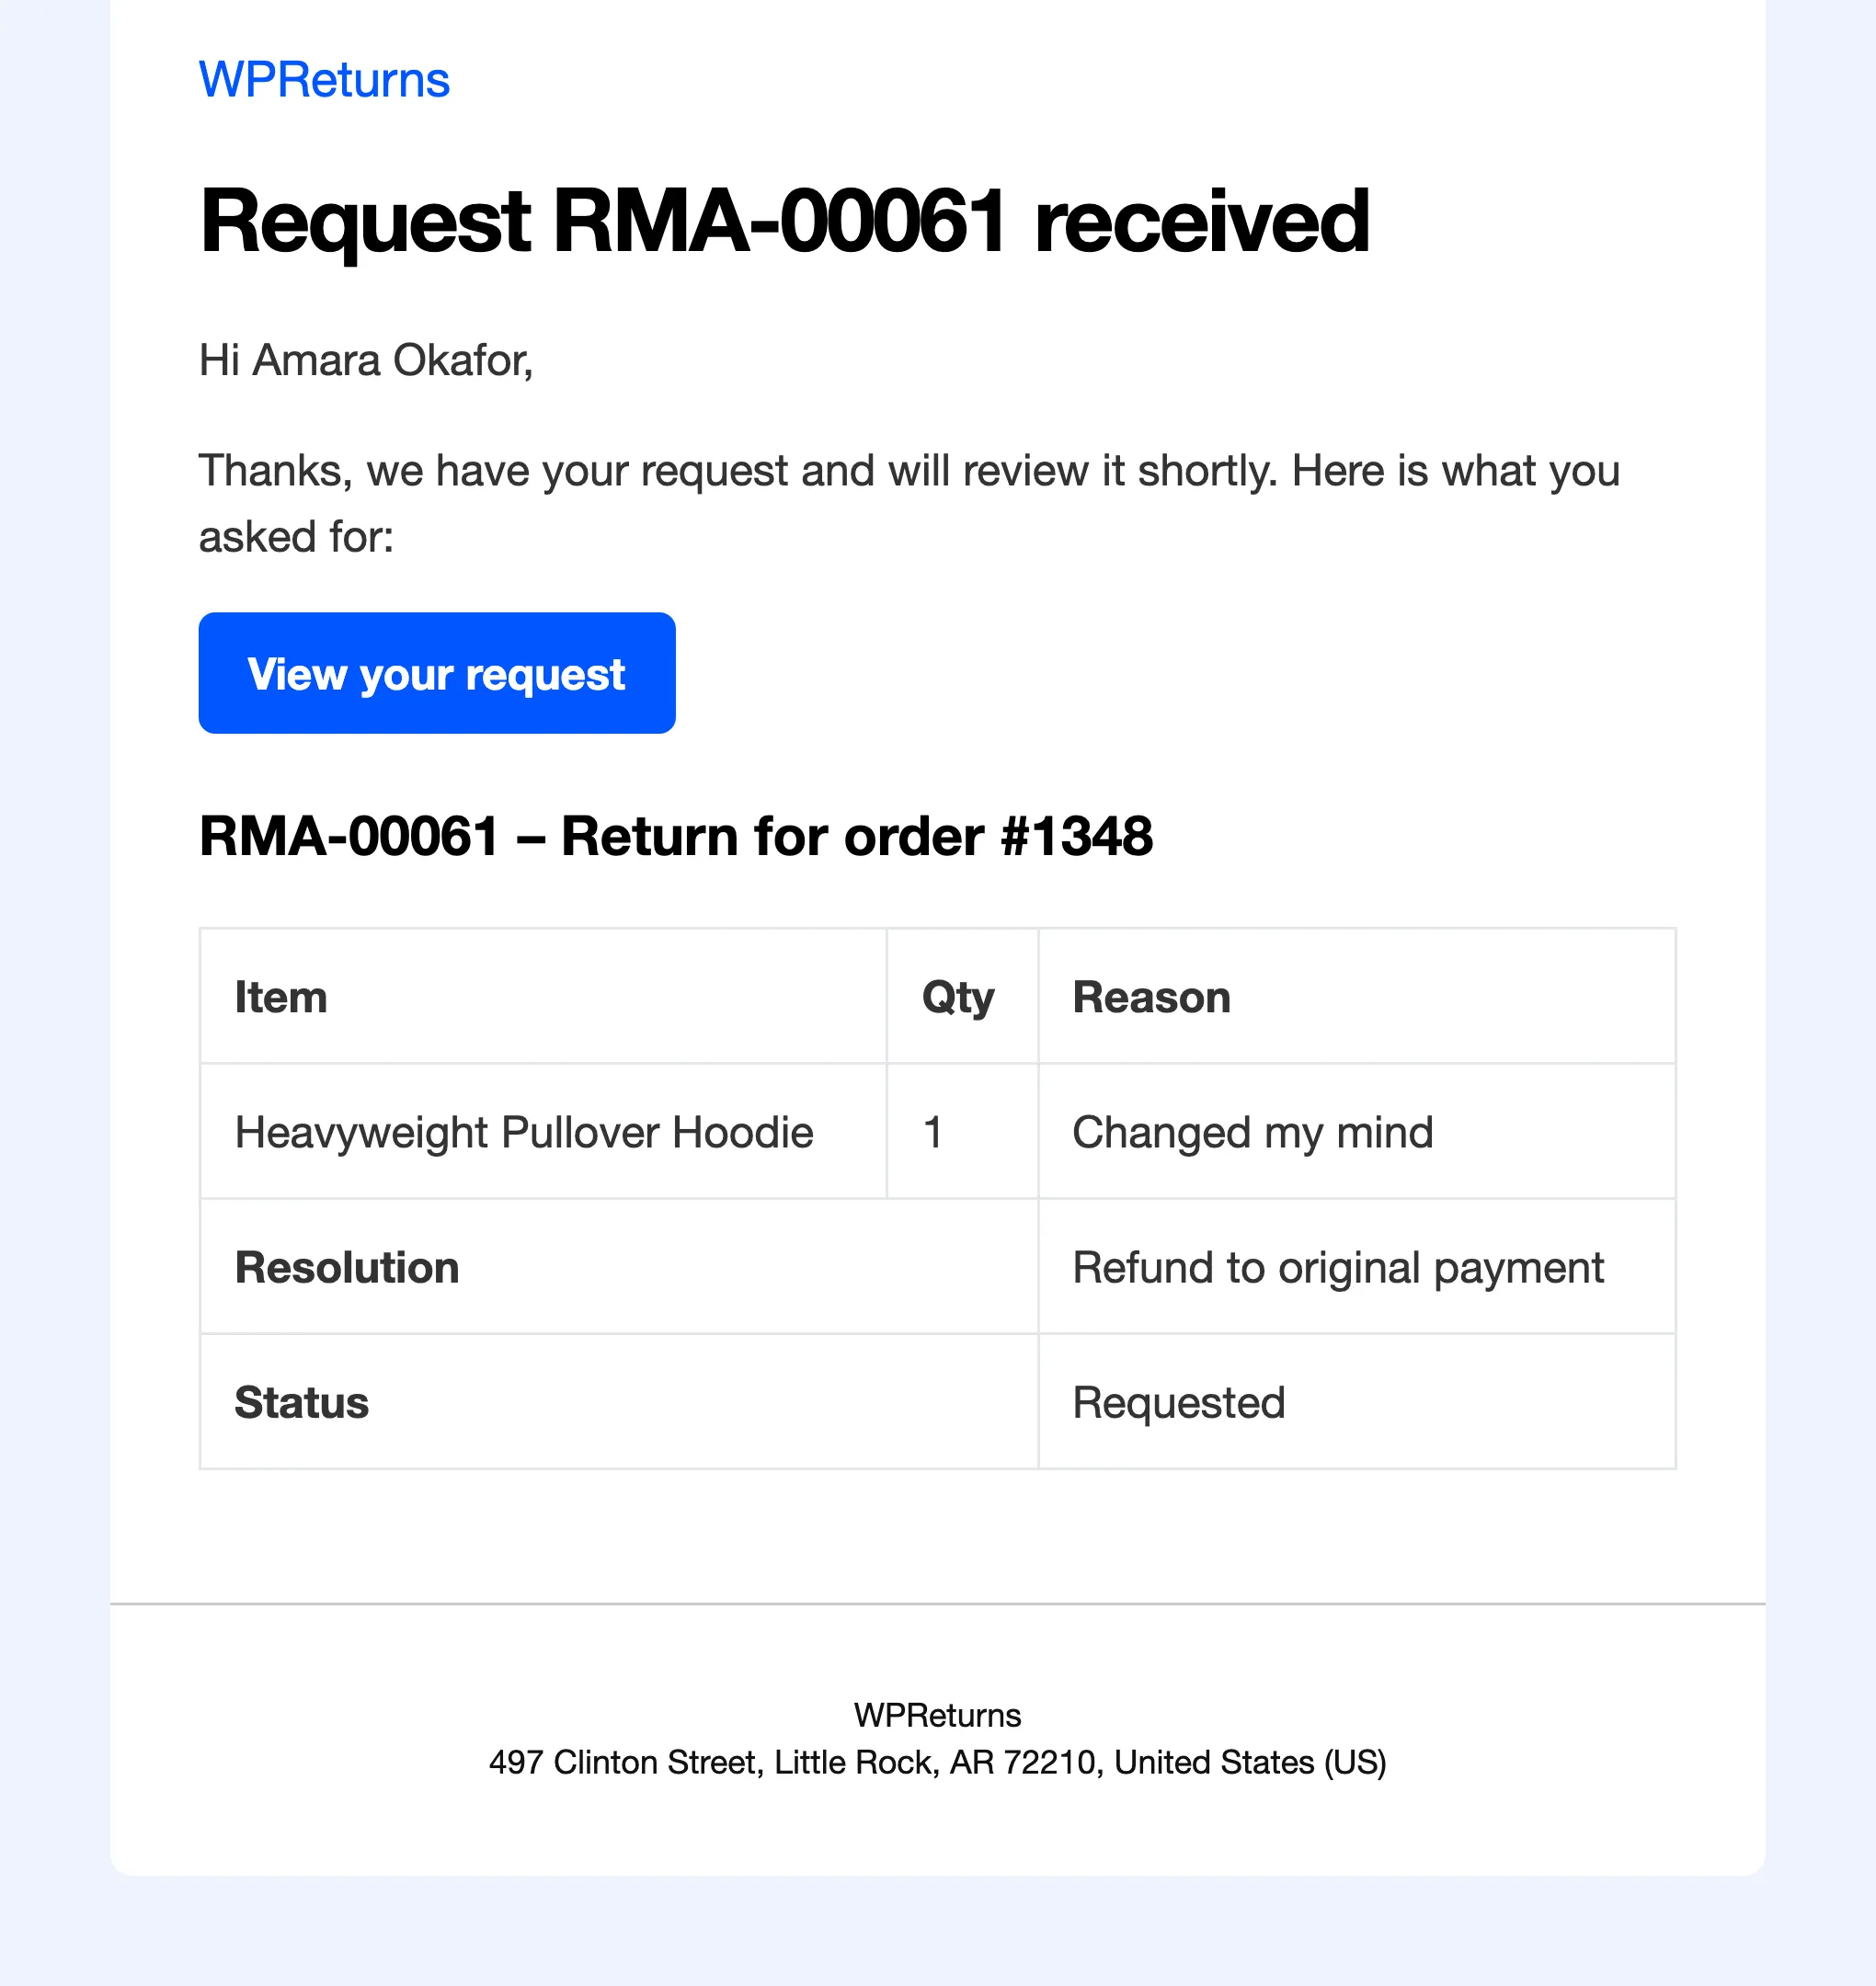
She gets the “Request RMA-00061 received” email with a View your request button.
5. You approve the request
Section titled “5. You approve the request”Open DevDiggers Plugins > WPReturns > Requests and select RMA-00061. The Review the request card sits at the top. Type a note for the customer and select Approve.
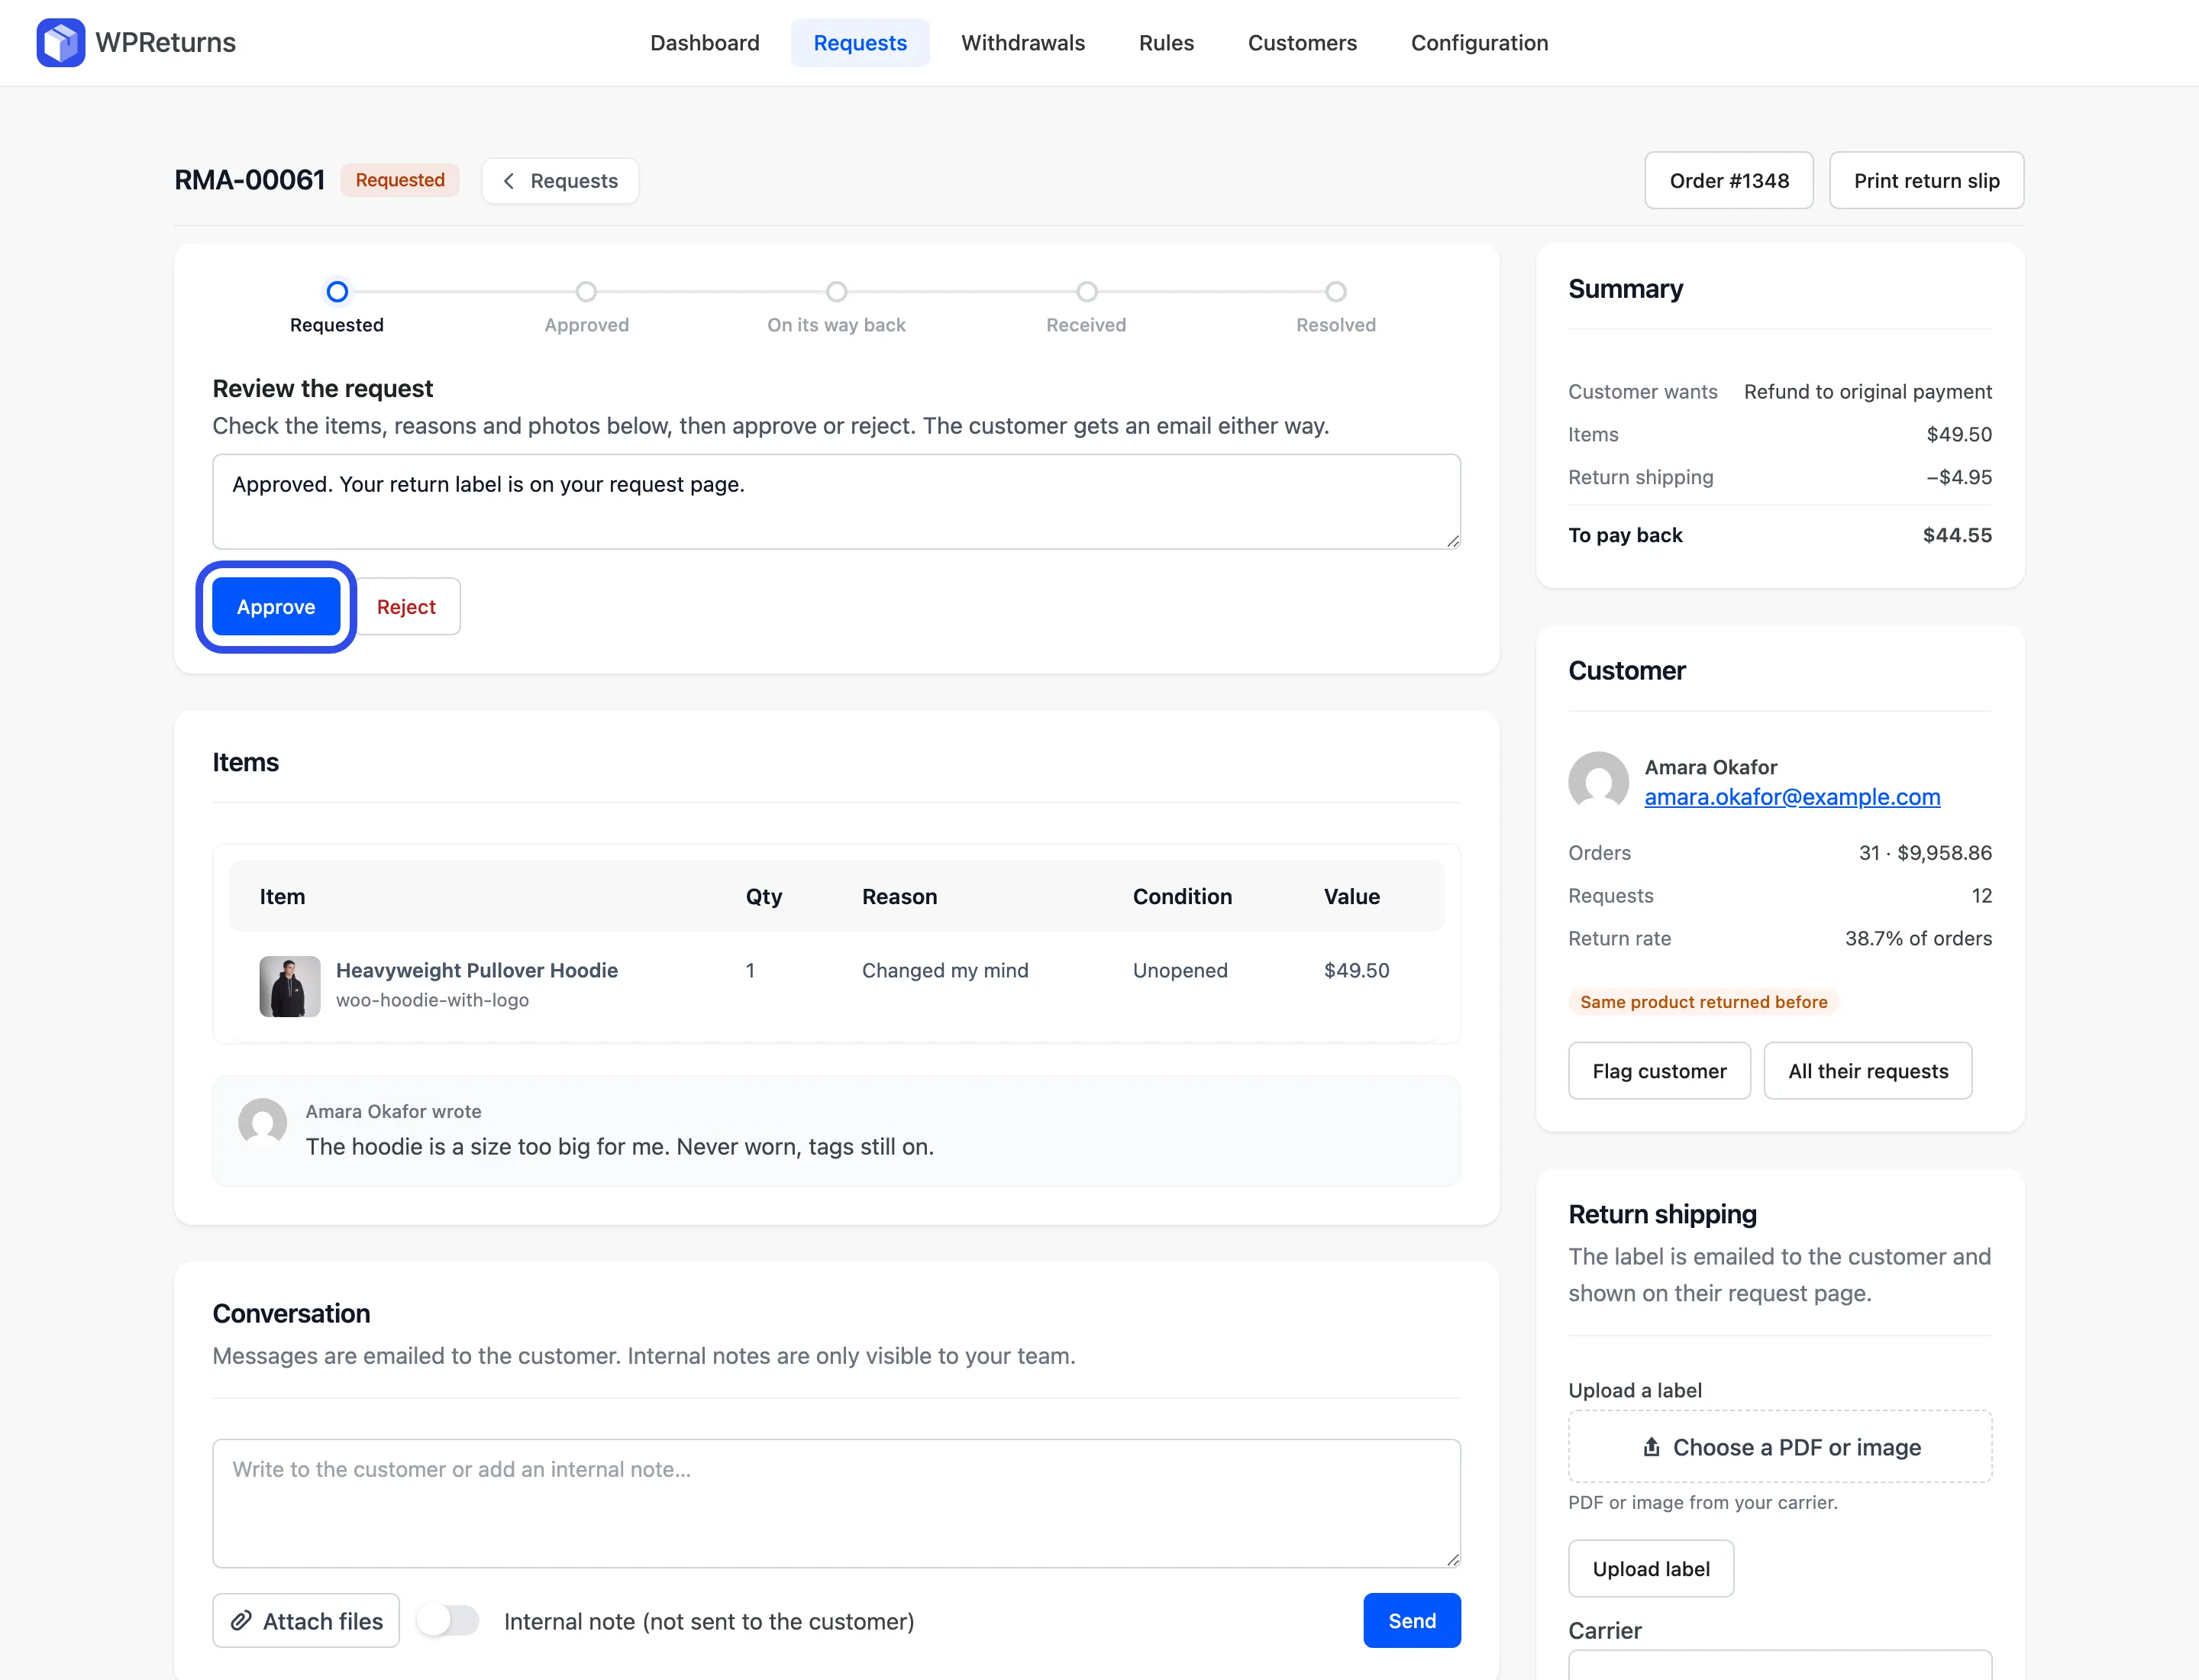
The Summary card on the right shows To pay back $44.55. Reject sends the customer an email too.
6. The request is approved
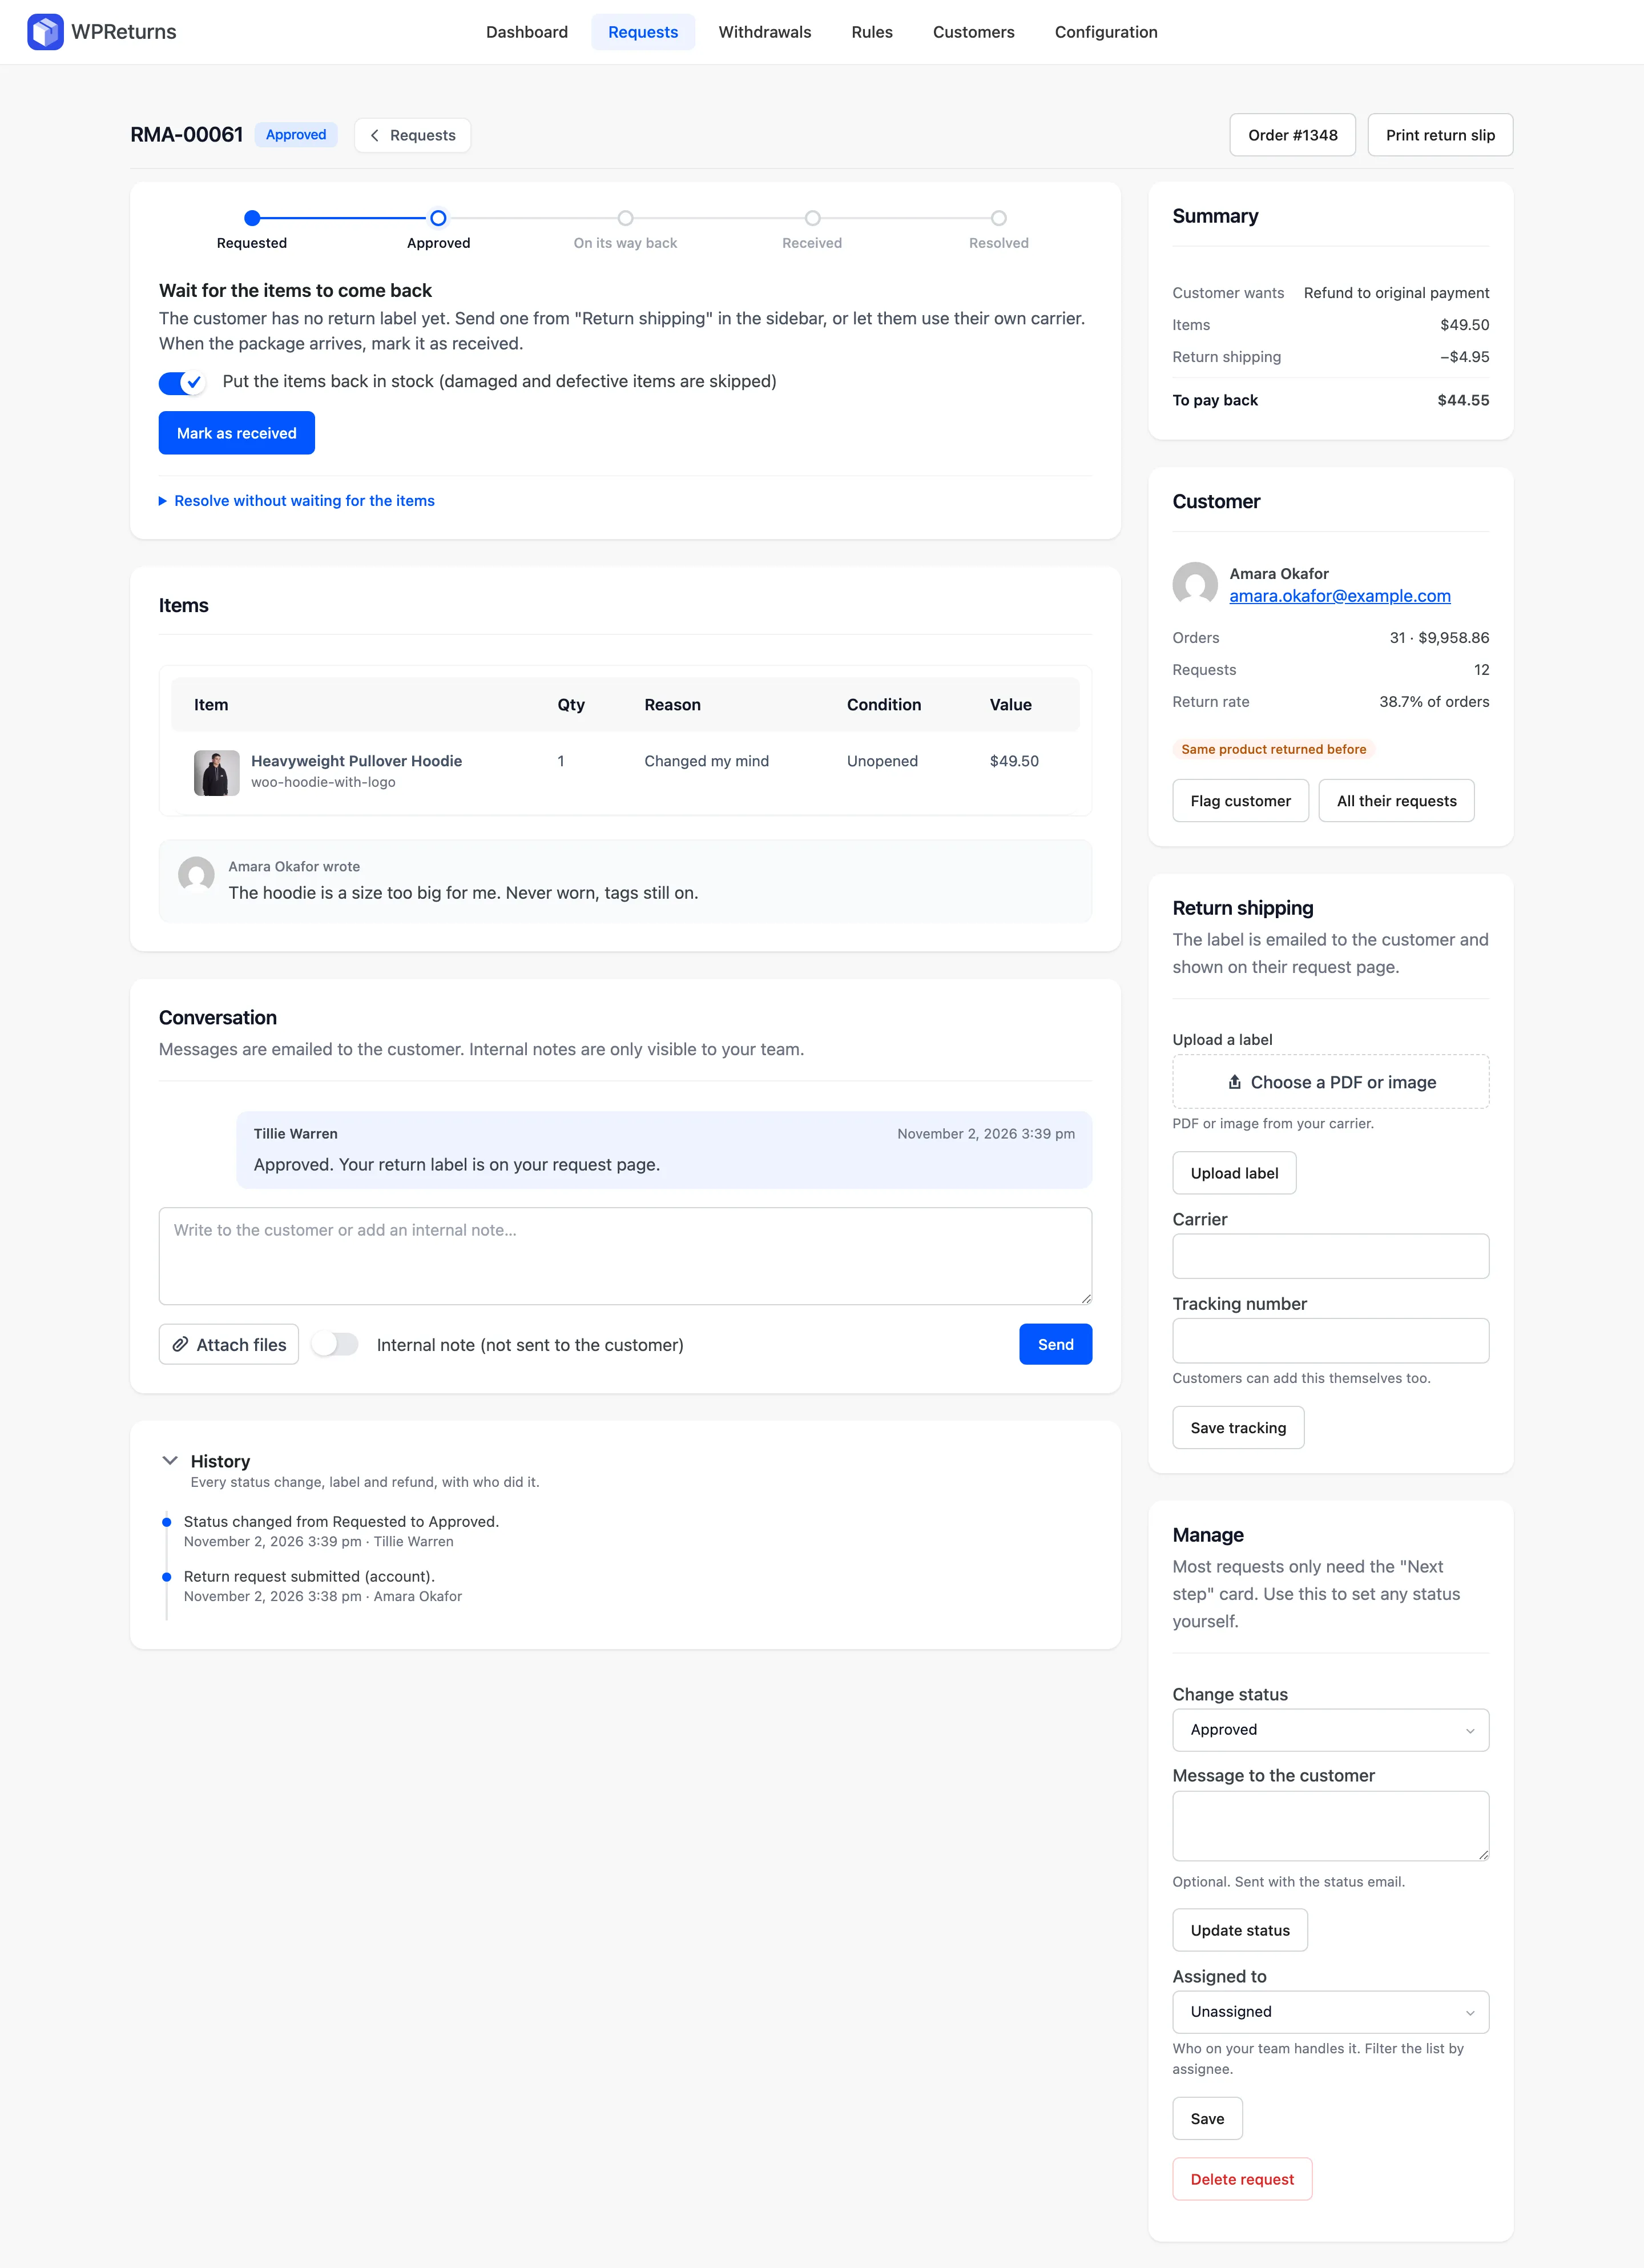
Section titled “6. The request is approved”The status moves to Approved. The card now reads Wait for the items to come back. Your note shows in the Conversation card and the History logs the change.
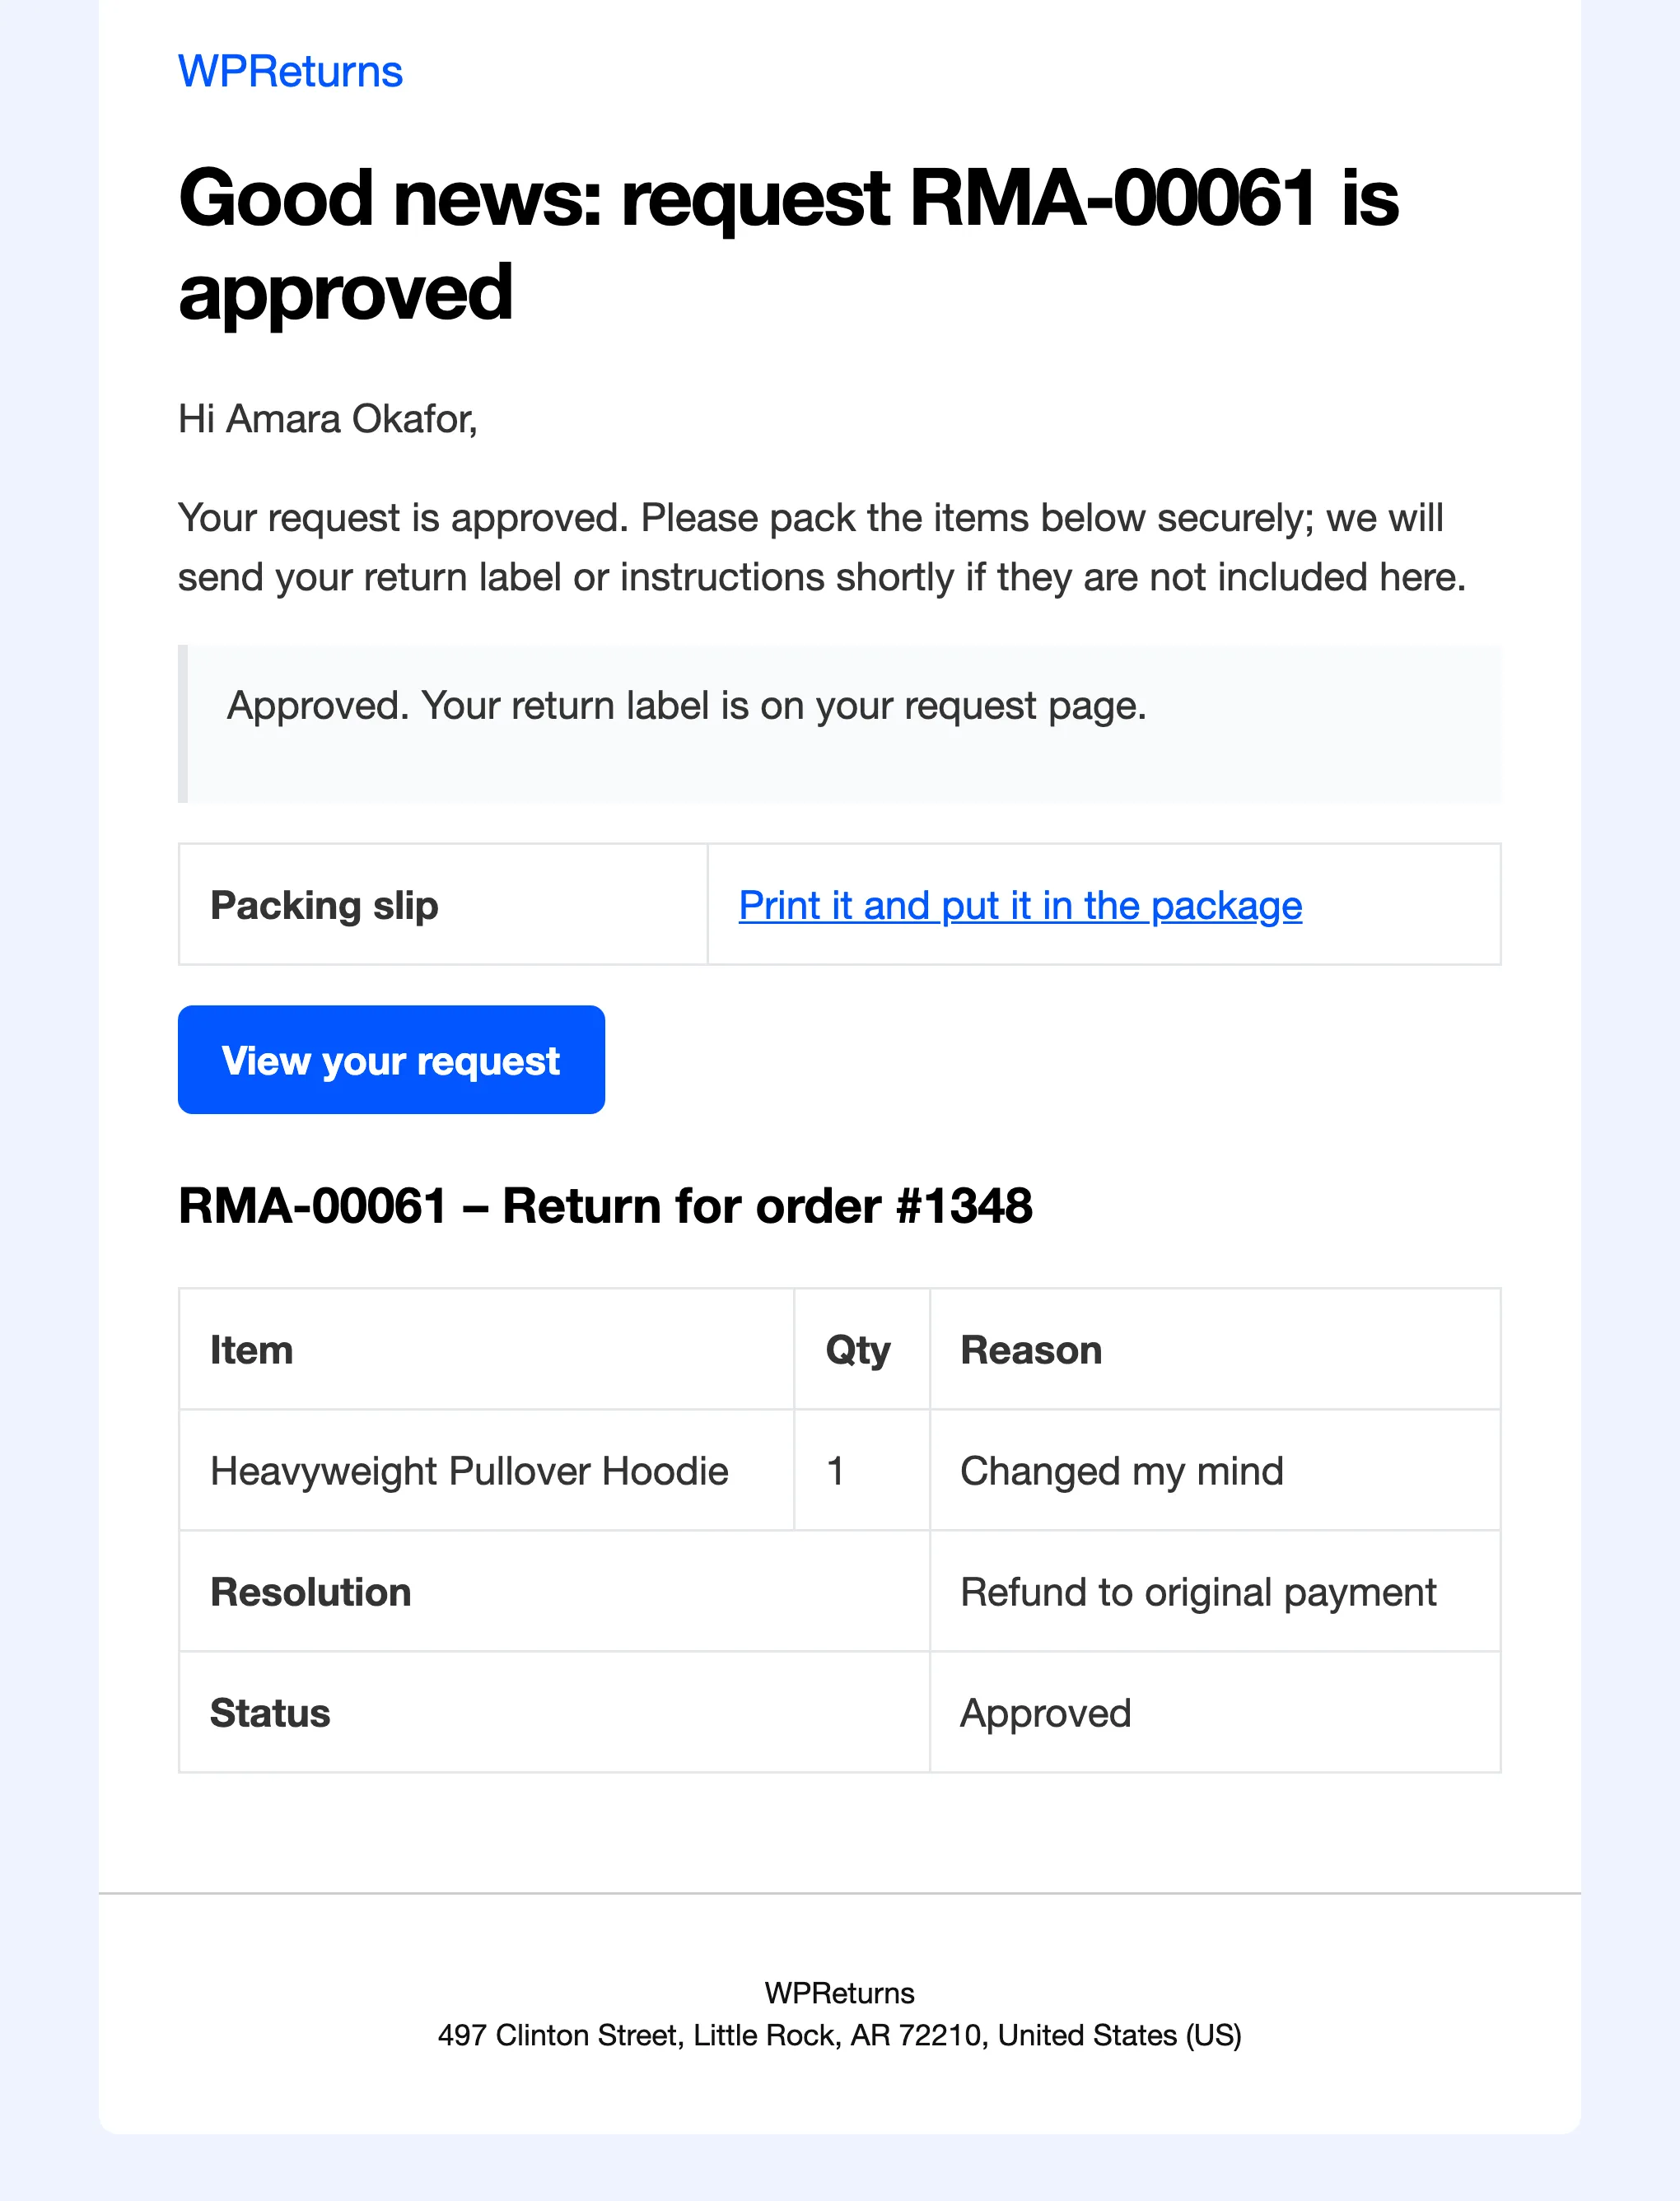
The customer gets the “Good news: request RMA-00061 is approved” email. It holds your note and a link to print the packing slip.
7. You upload the return label
Section titled “7. You upload the return label”In the Return shipping card, select Choose a PDF or image and pick the label from your carrier. Then select Upload label.
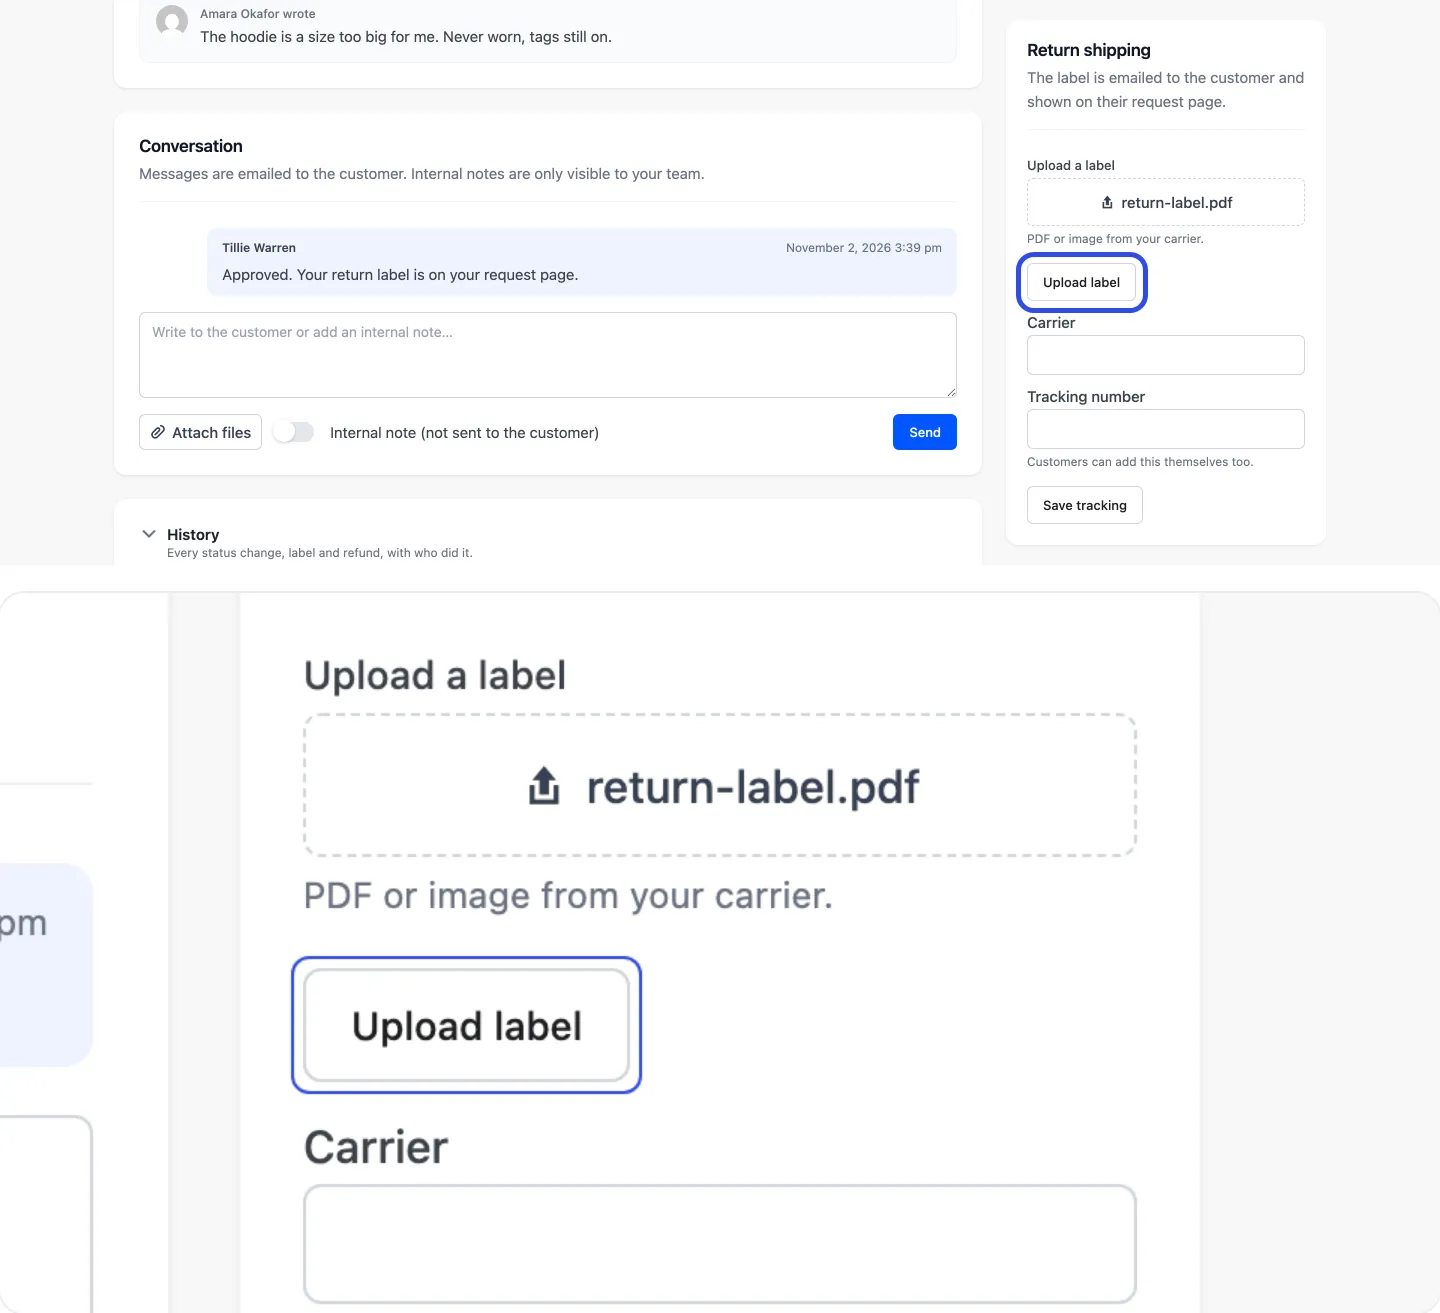
The status moves to Awaiting return. With EasyPost or Shippo set up, you buy the label from the same card instead.
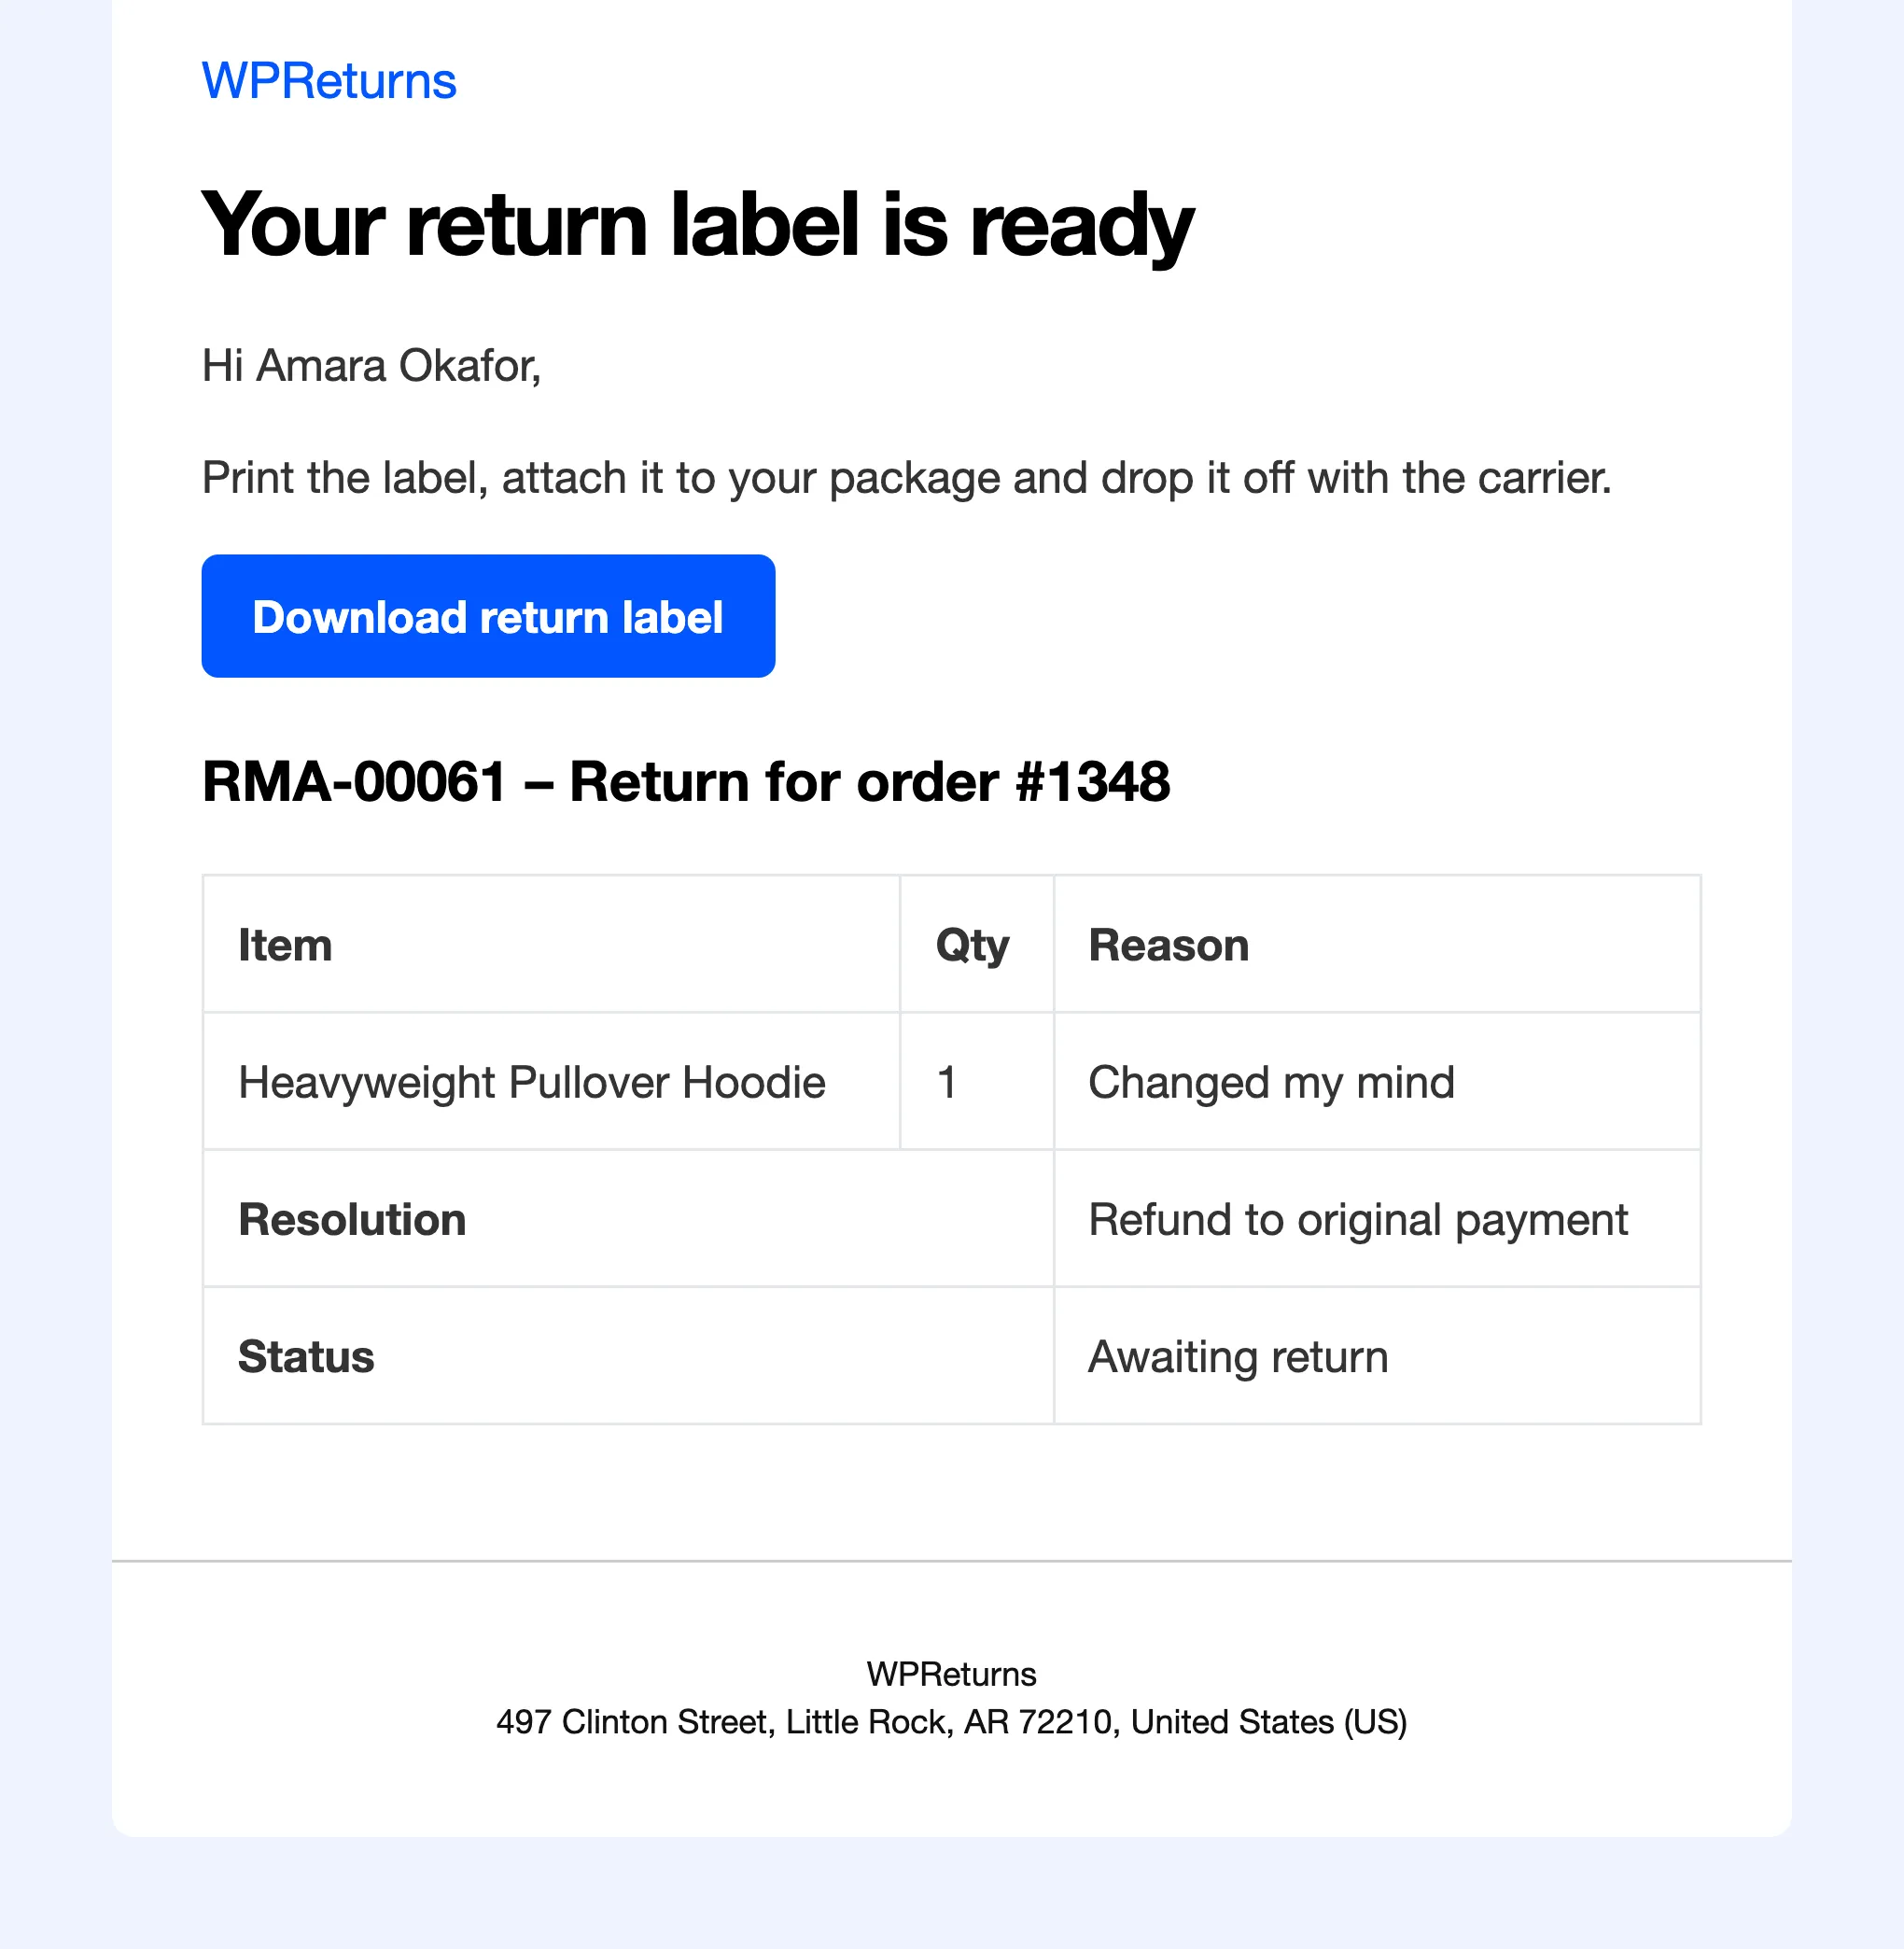
The customer gets the “Your return label is ready” email with a Download return label button.
8. The customer prints the label
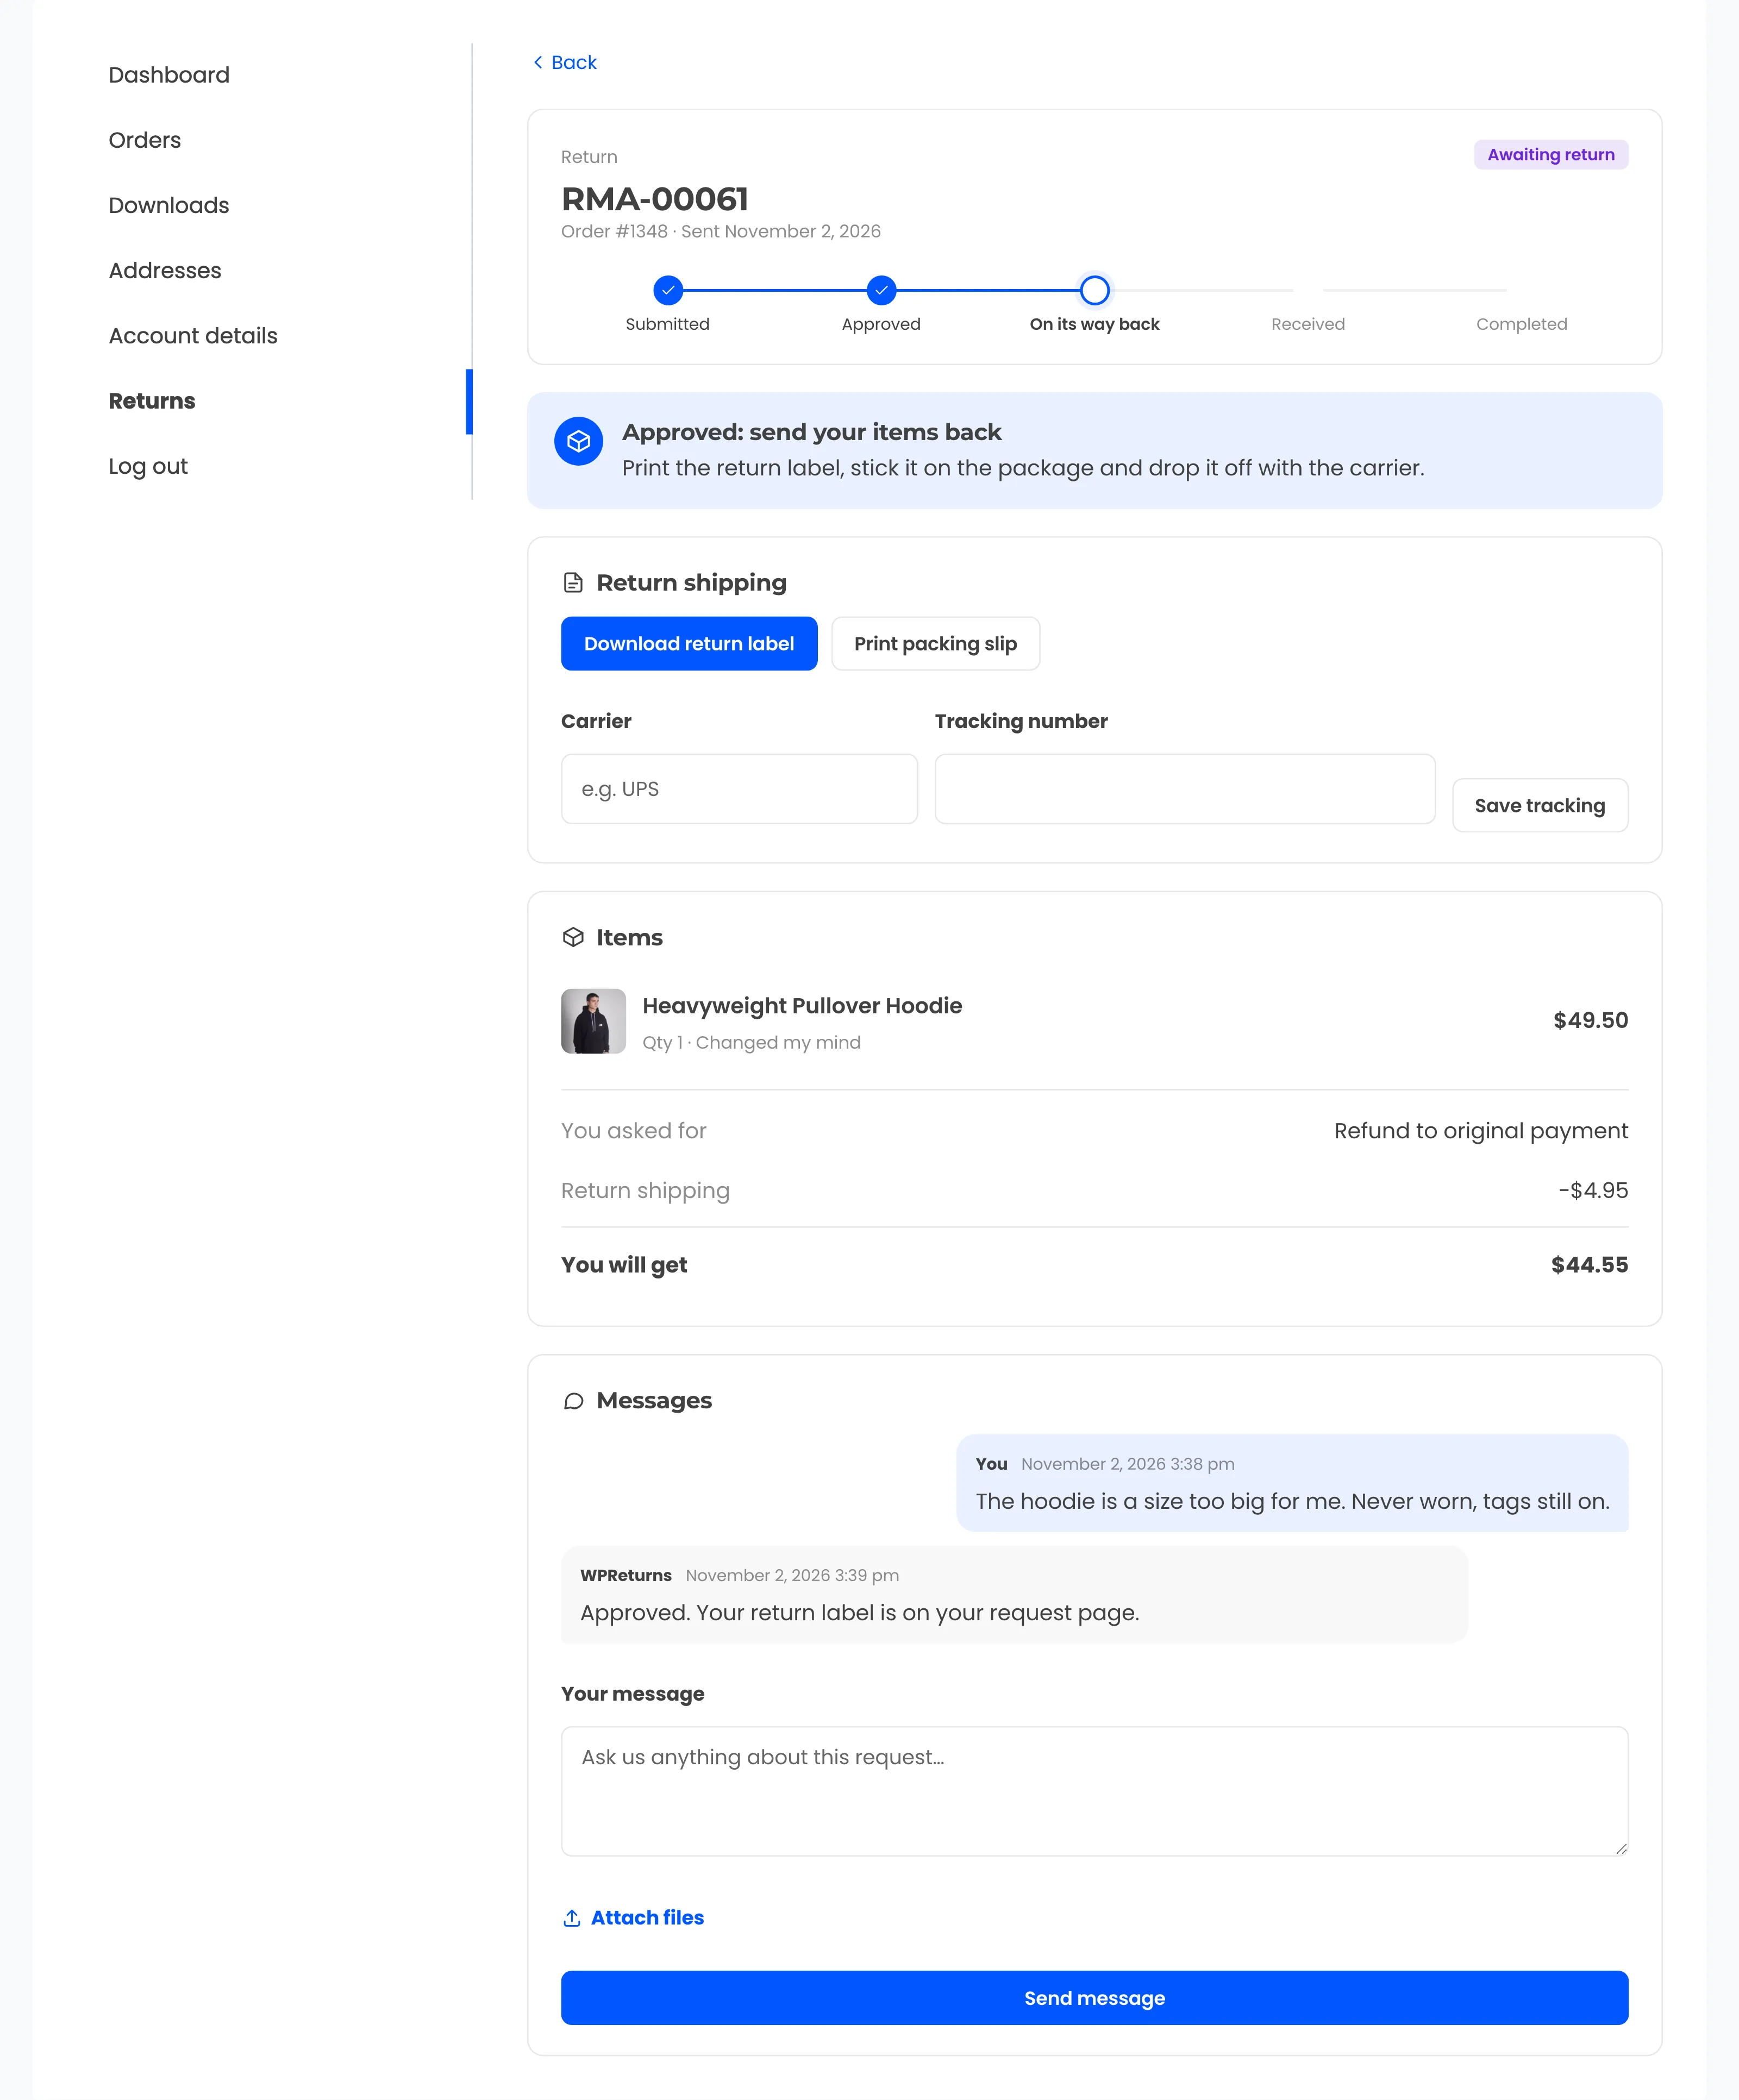
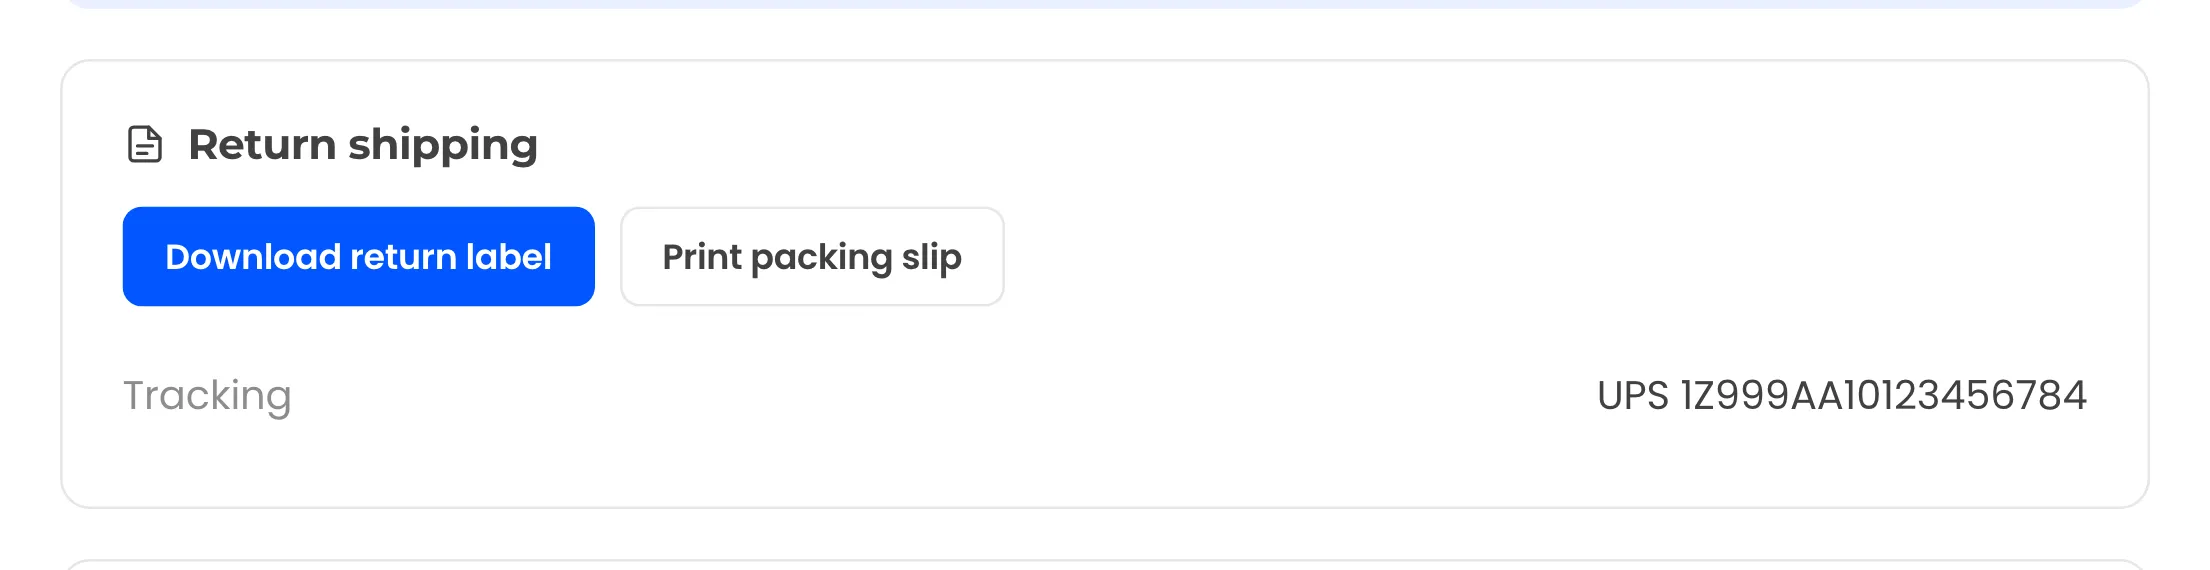
Section titled “8. The customer prints the label”Her request page now says “Approved: send your items back”. The Return shipping card has Download return label and Print packing slip. Under them she can enter a Carrier and a Tracking number.
9. She adds tracking and writes to you
Section titled “9. She adds tracking and writes to you”She enters UPS and the tracking number and selects Save tracking. The card then shows the tracking line.
She writes “Thanks! It is in the post today.” under Your message and selects Send message. Your replies show under the store’s name.
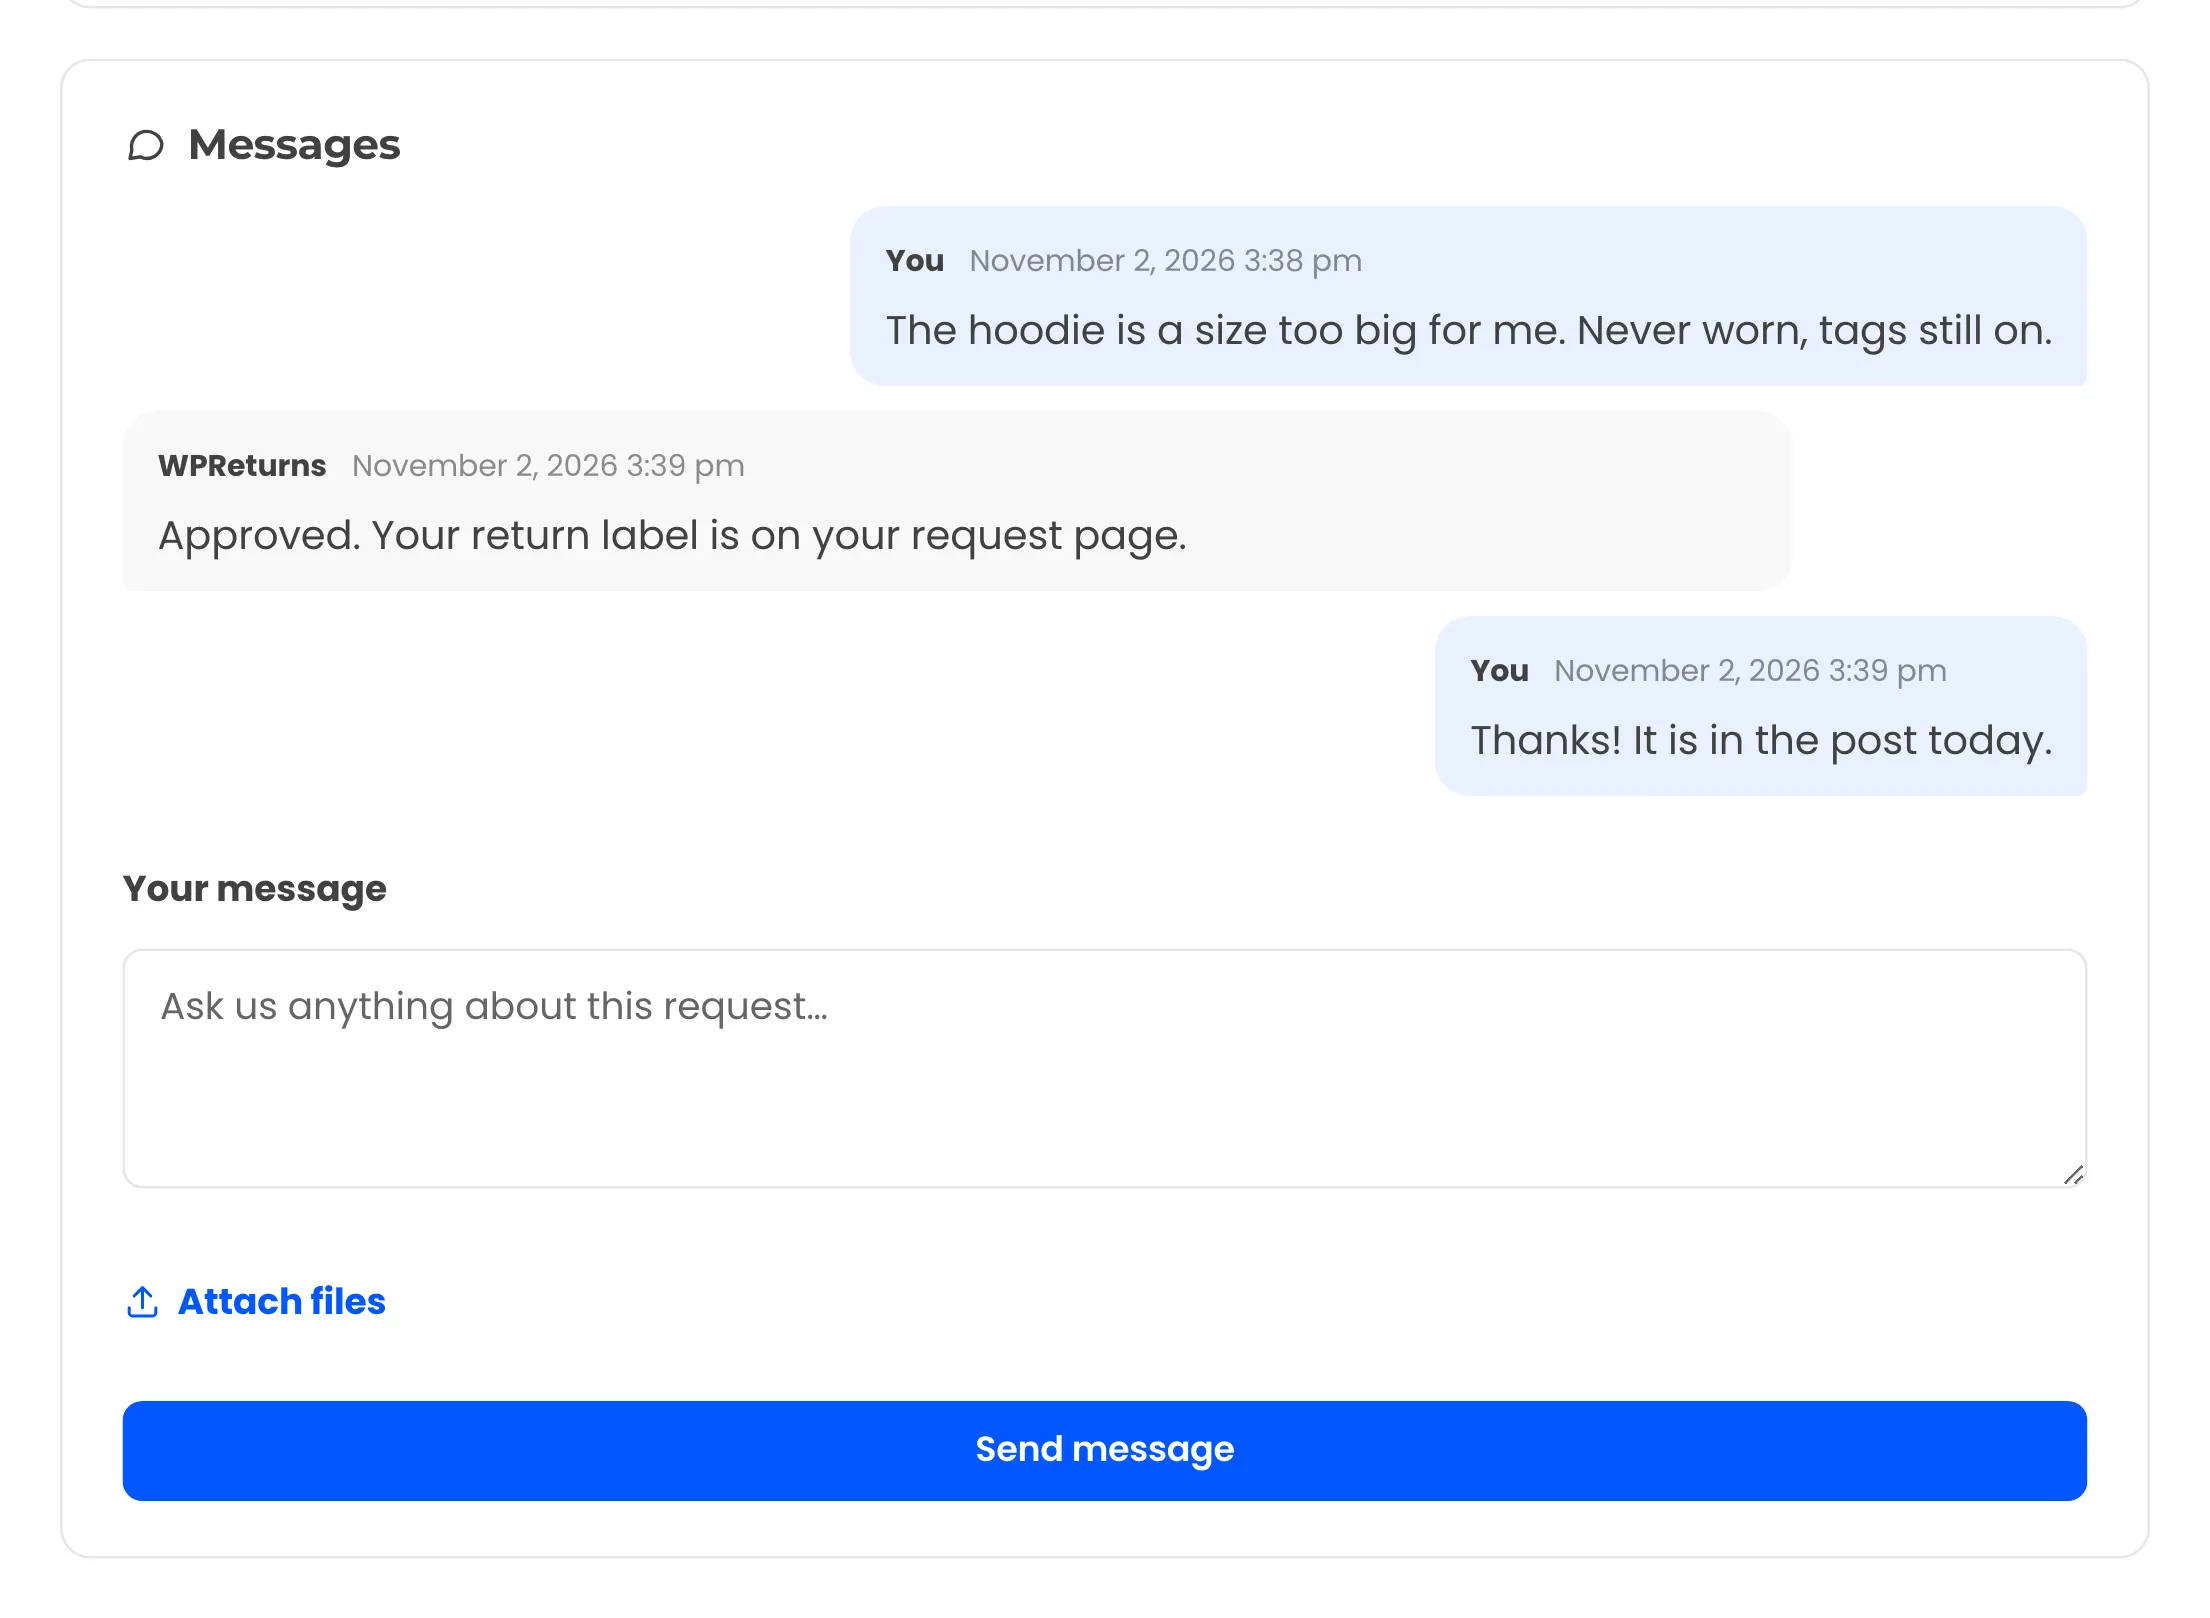
The tracking shows on your request screen and in the History. Her message lands in the Conversation card.
10. You mark the items as received
Section titled “10. You mark the items as received”When the parcel arrives, check the hoodie. Leave Put the items back in stock on and select Mark as received.
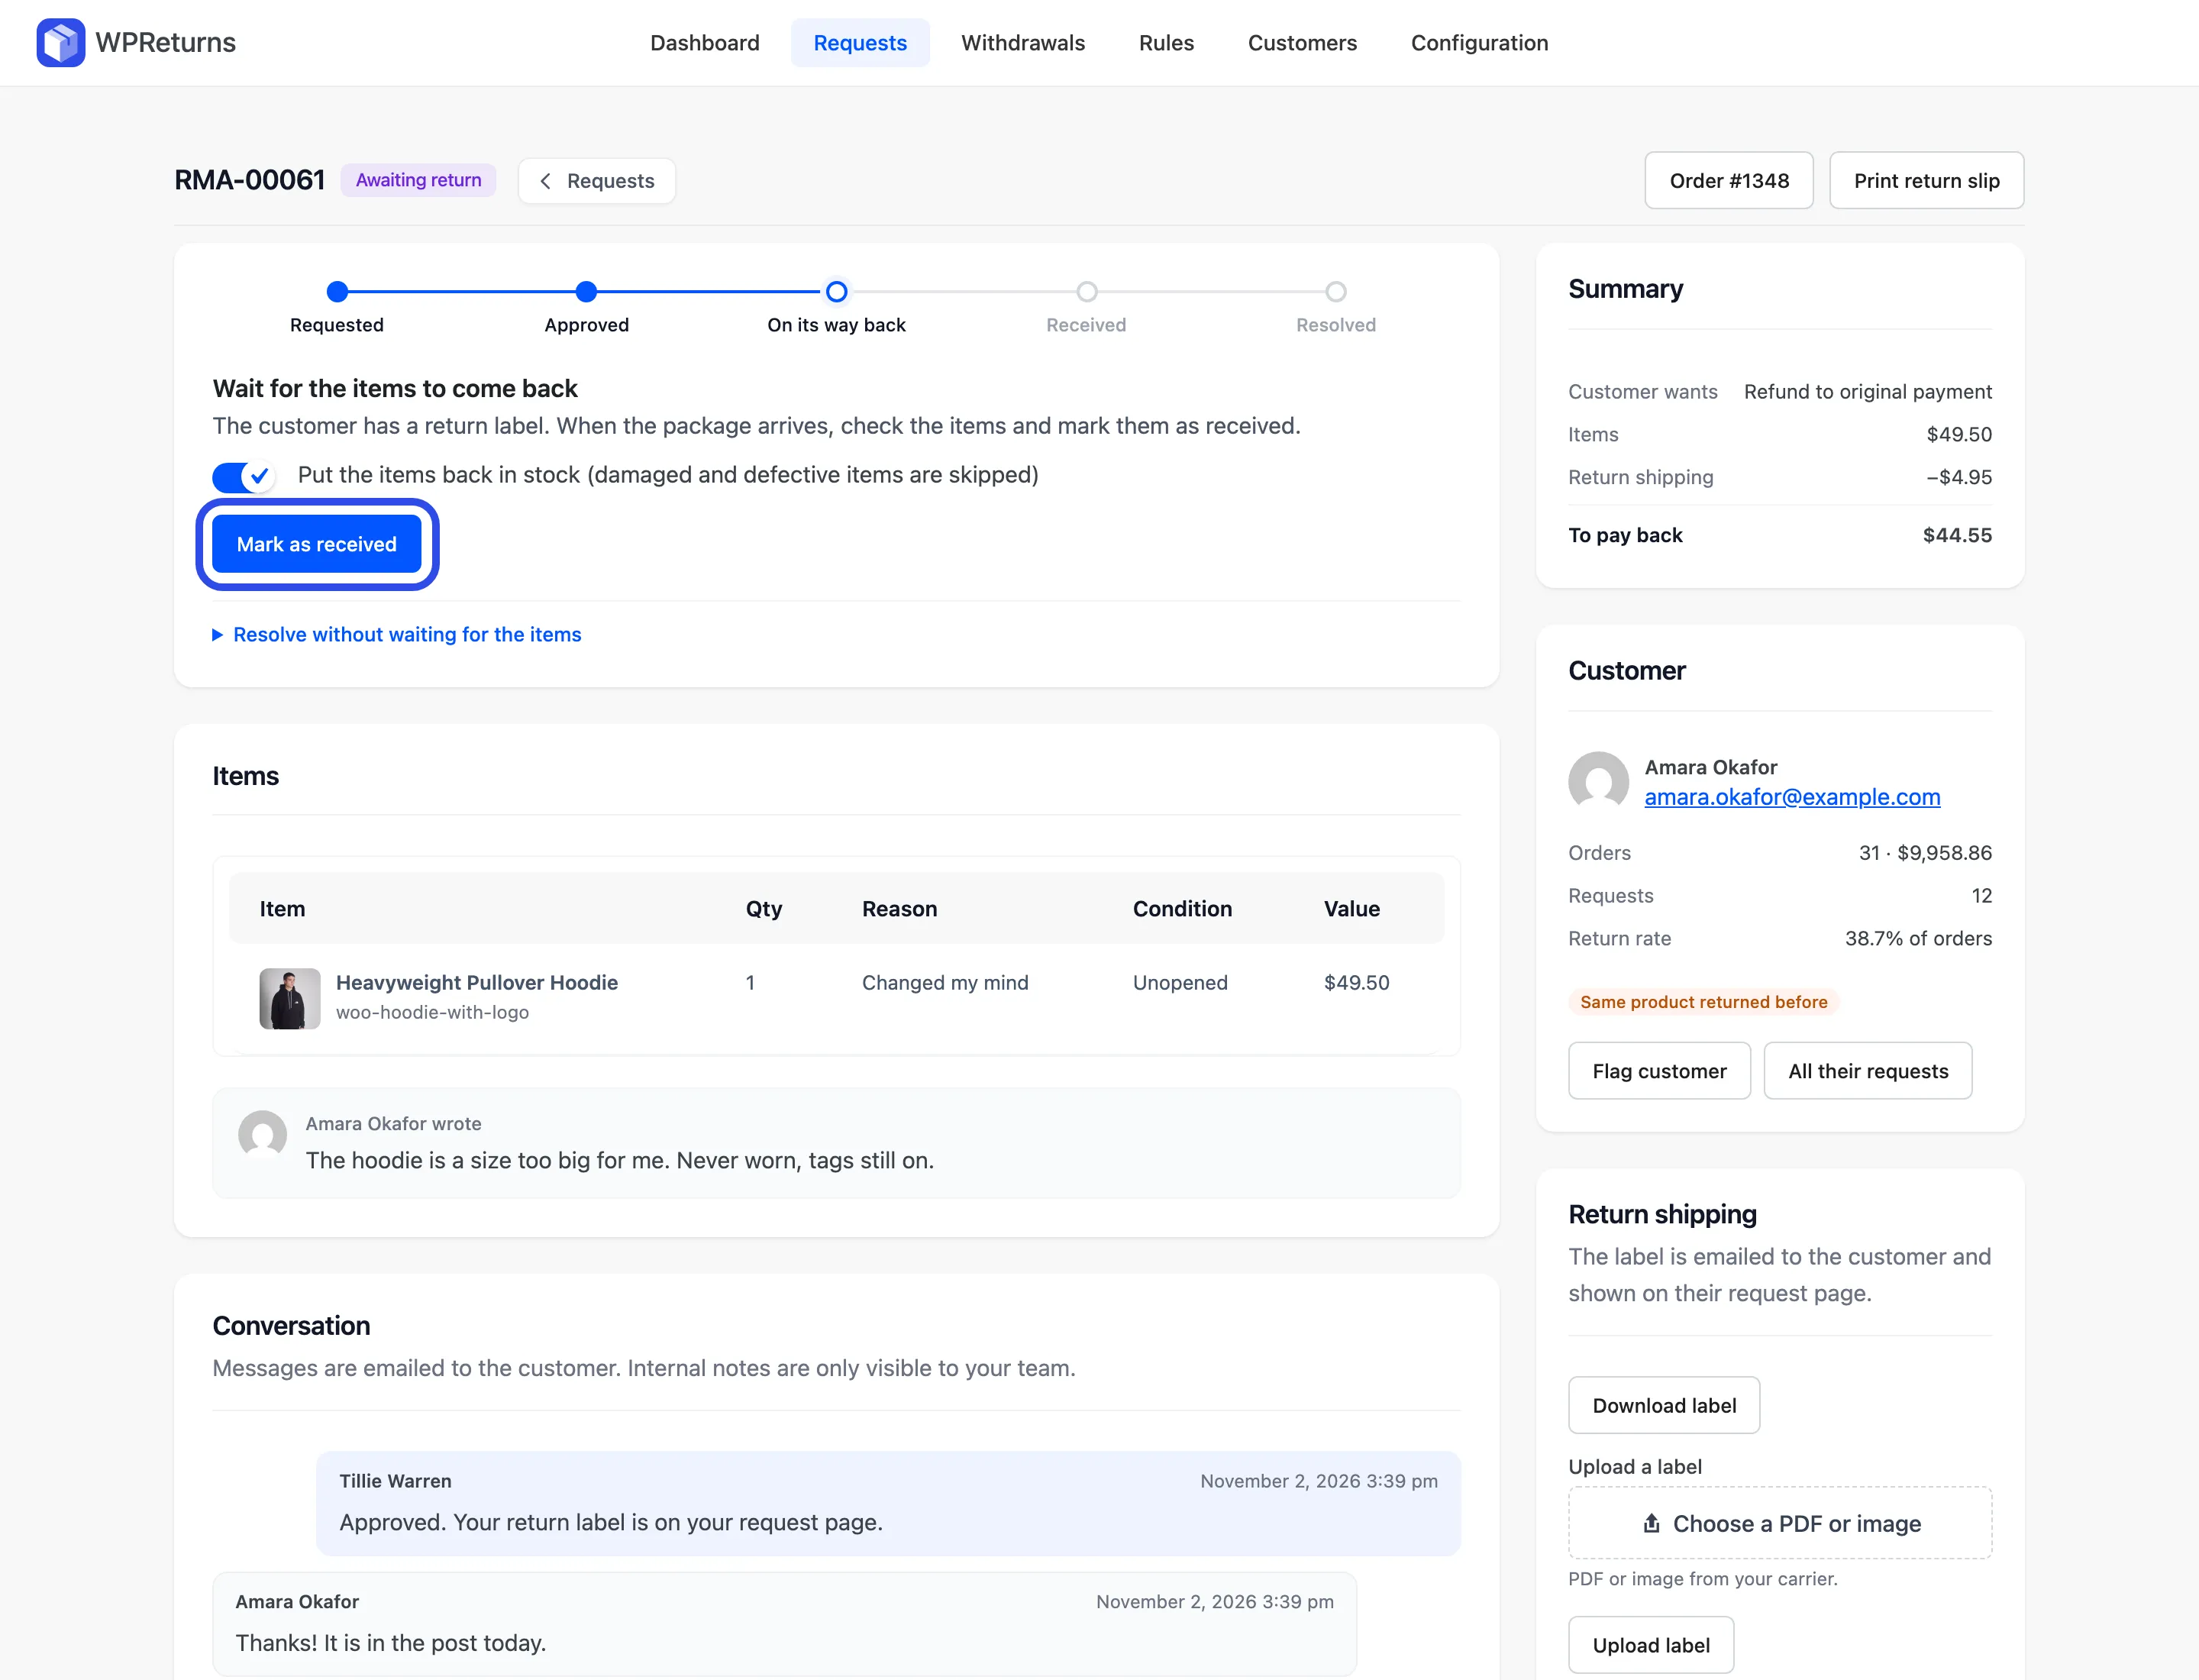
Damaged and defective items are never restocked. Resolve without waiting for the items lets you skip this step.
11. You resolve the request
Section titled “11. You resolve the request”The card now reads Items received: resolve the request. Resolution holds the customer’s choice and Amount holds 44.55.
This order was paid cash on delivery. Set Refund goes to to Record only (I pay it back myself) and select Resolve request.
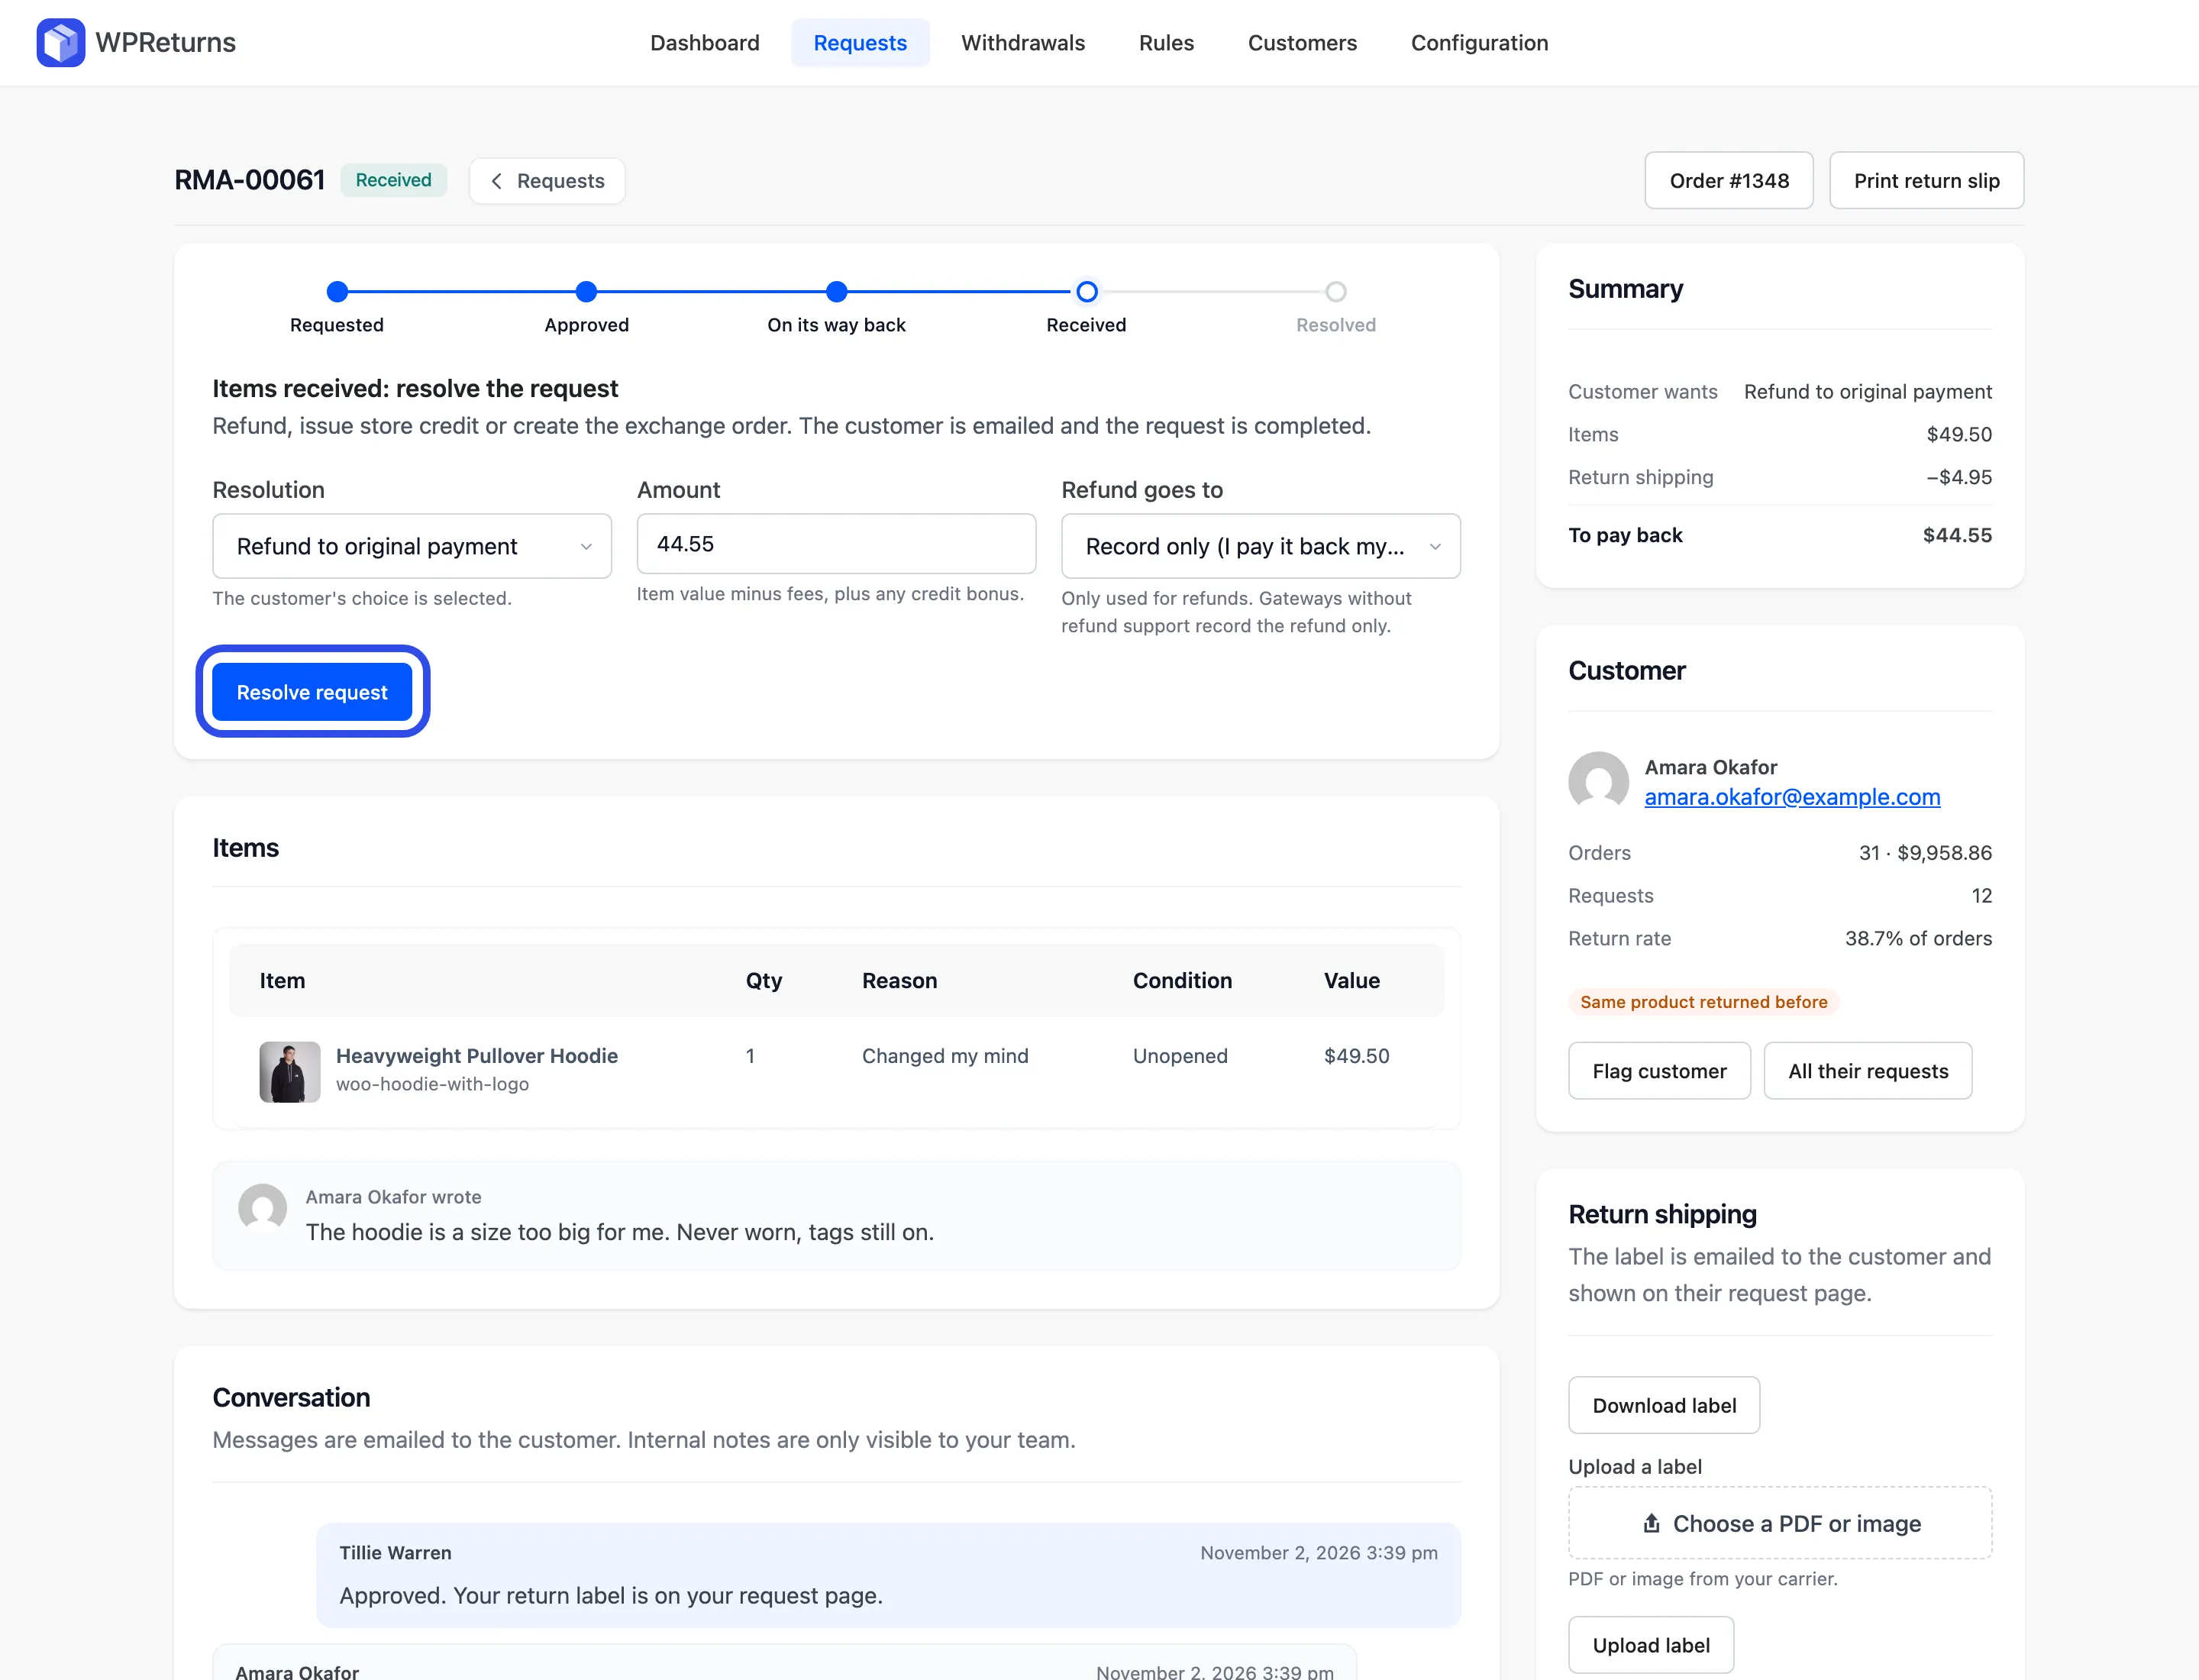
For a card payment, keep The original payment method and the payment gateway sends the money back.
12. The request is completed
Section titled “12. The request is completed”The status moves to Completed. The card reads “Refunded $44.55 (recorded in WooCommerce; pay it back manually).” The Summary shows Paid back $44.55 and the History lists every step.
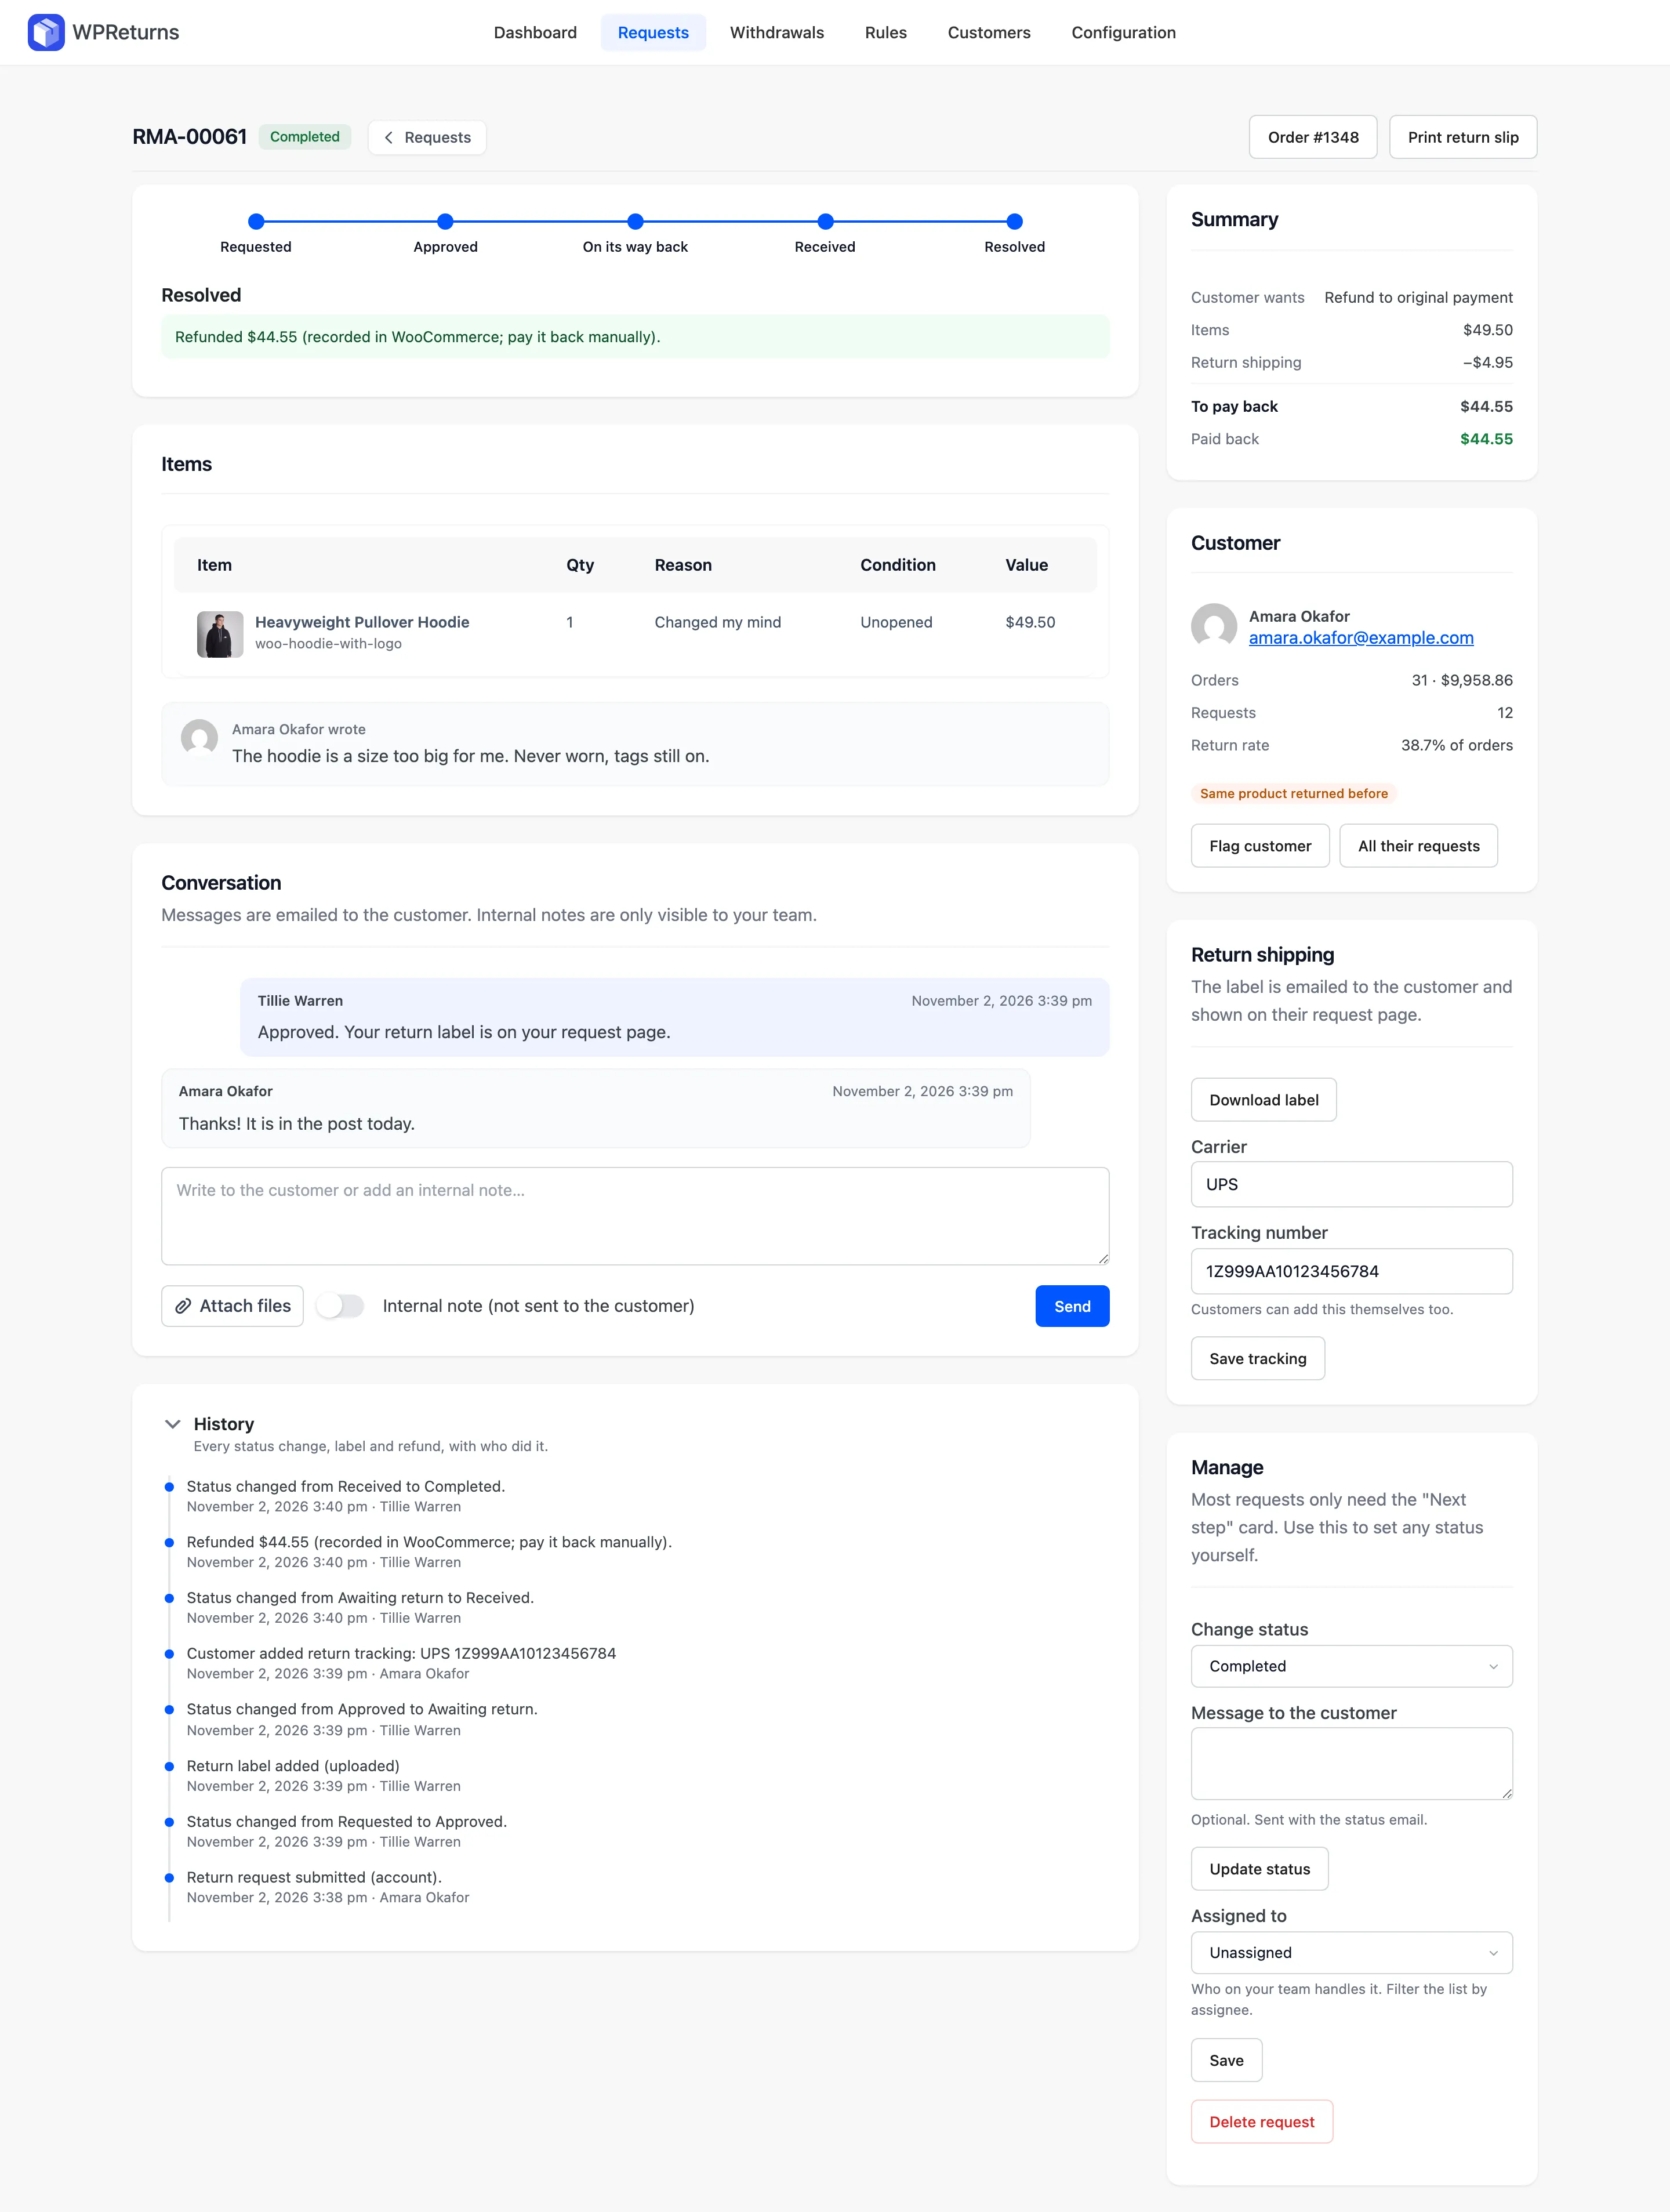
Pay the $44.55 back to the customer yourself. WPReturns does not move money for a recorded refund.
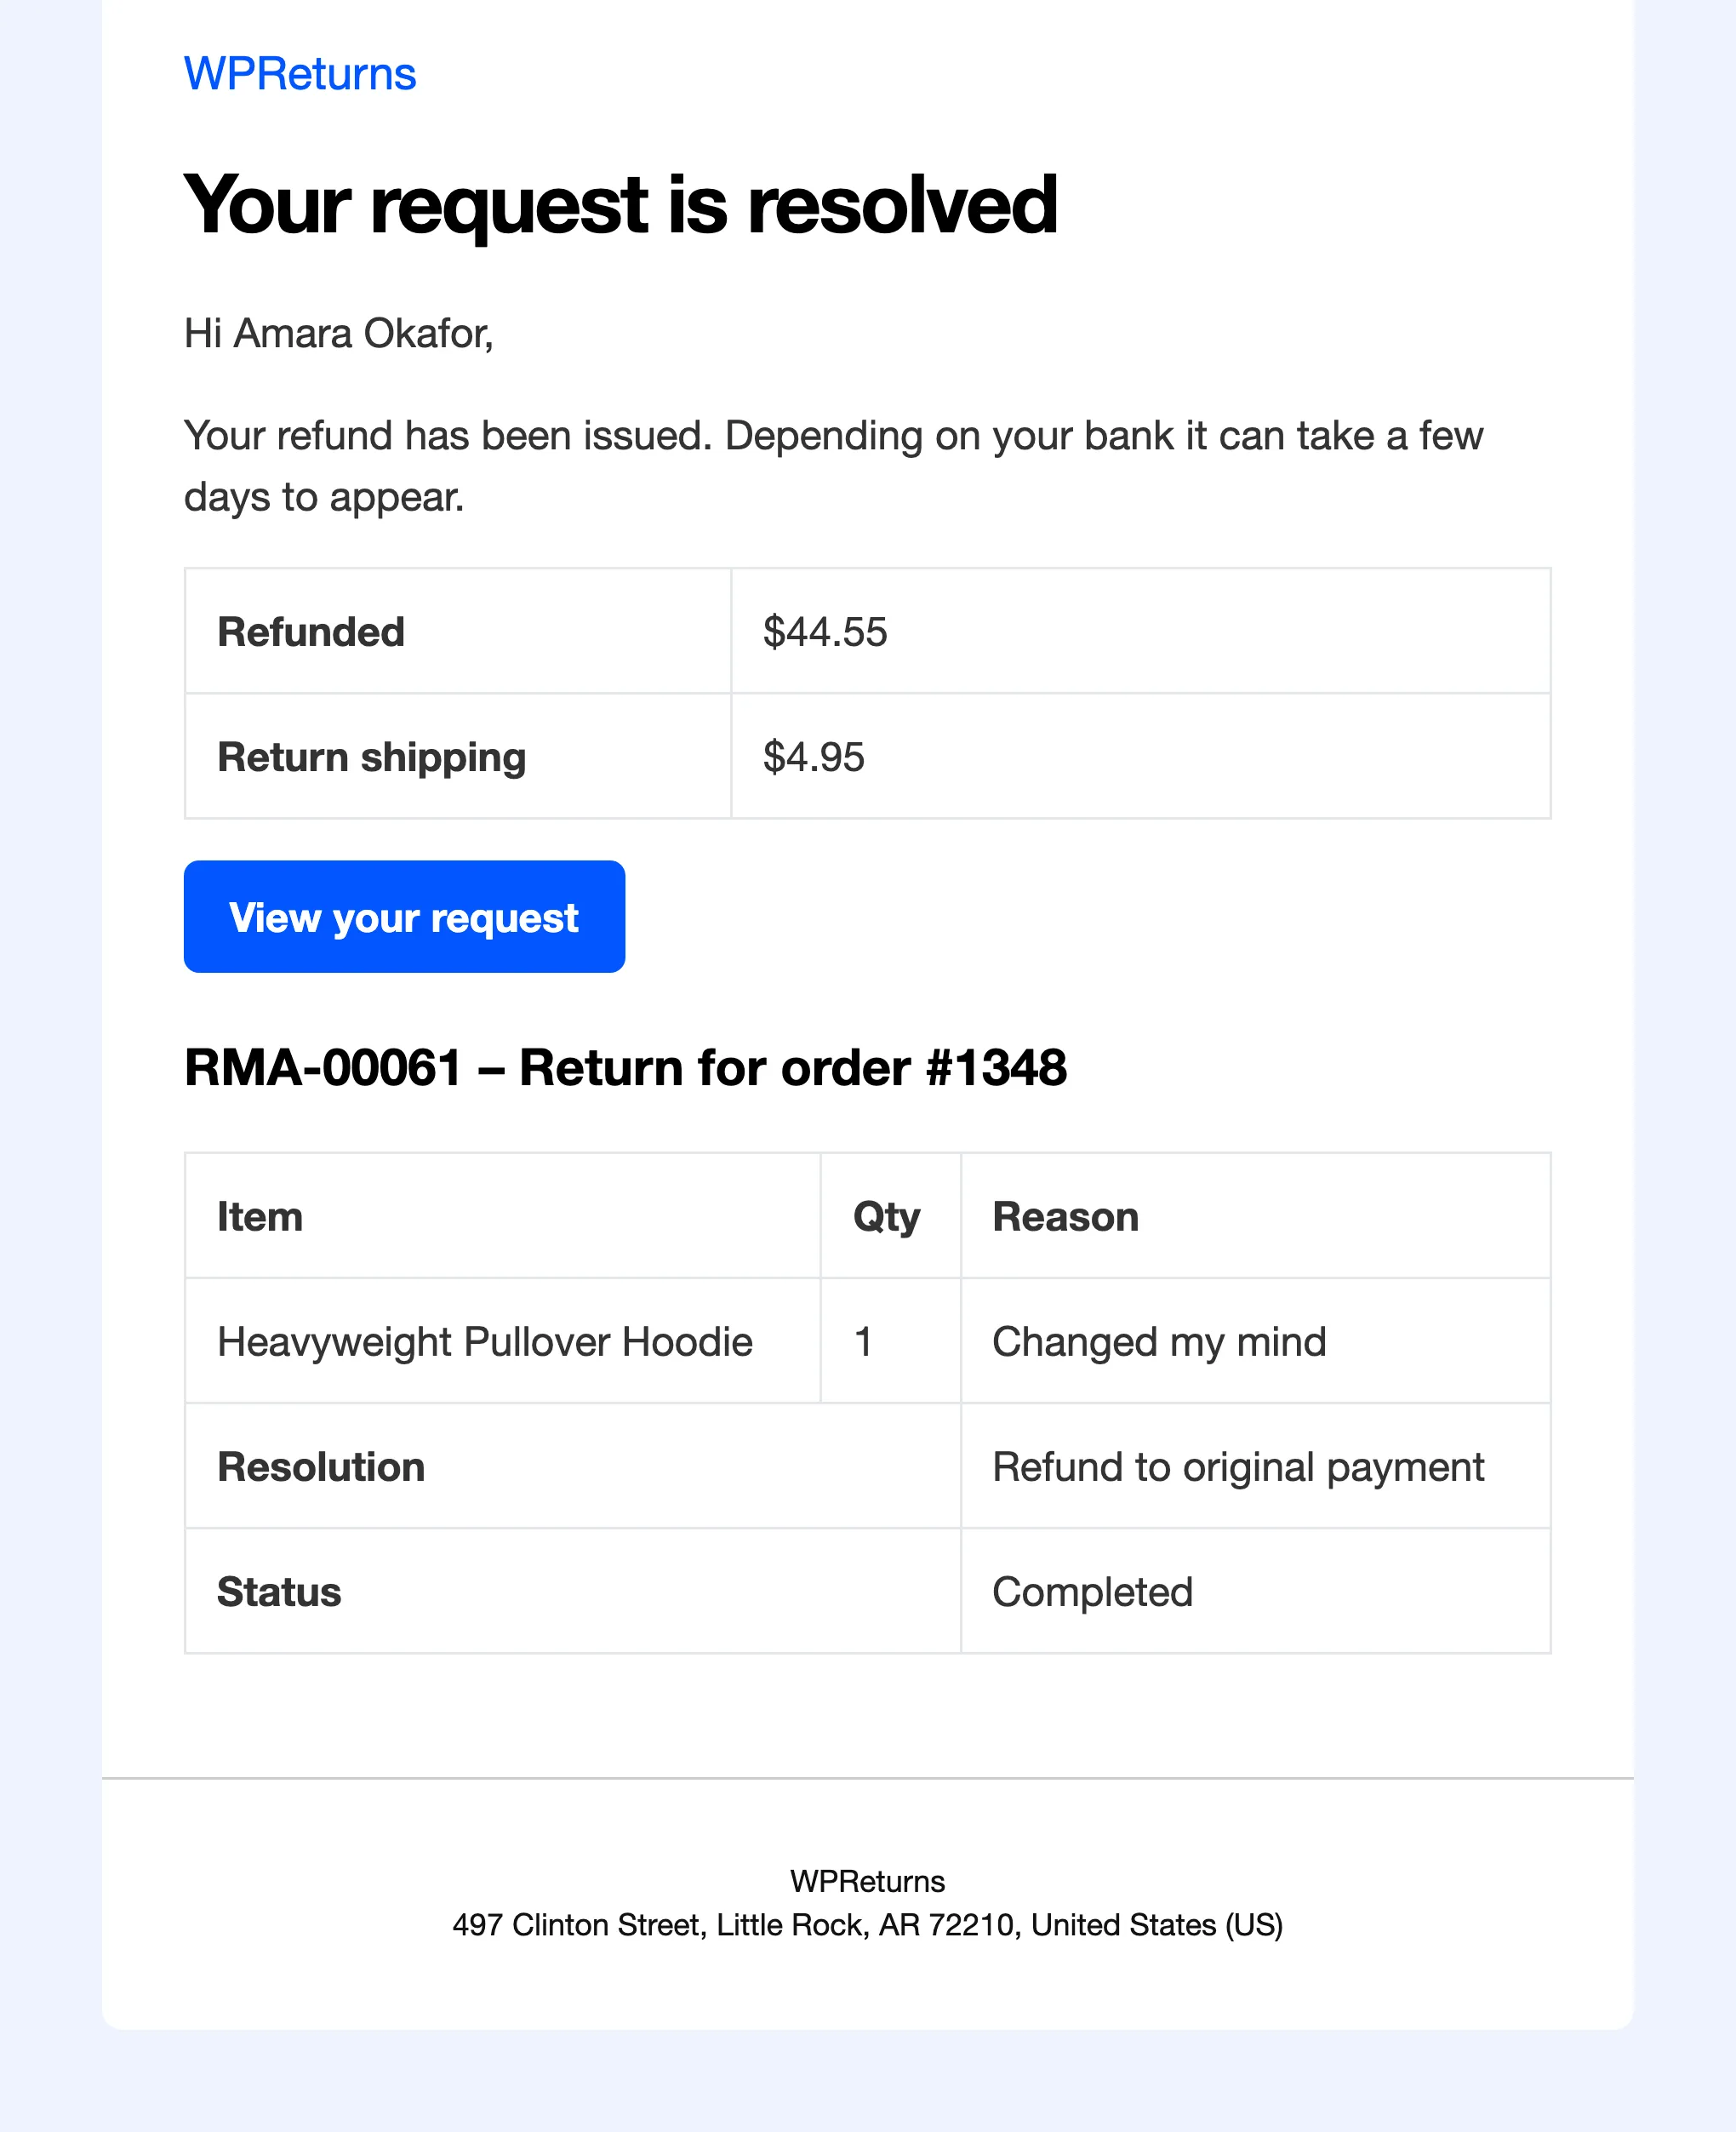
The customer gets the “Your request is resolved” email. It shows Refunded $44.55, the return shipping fee and the status Completed.
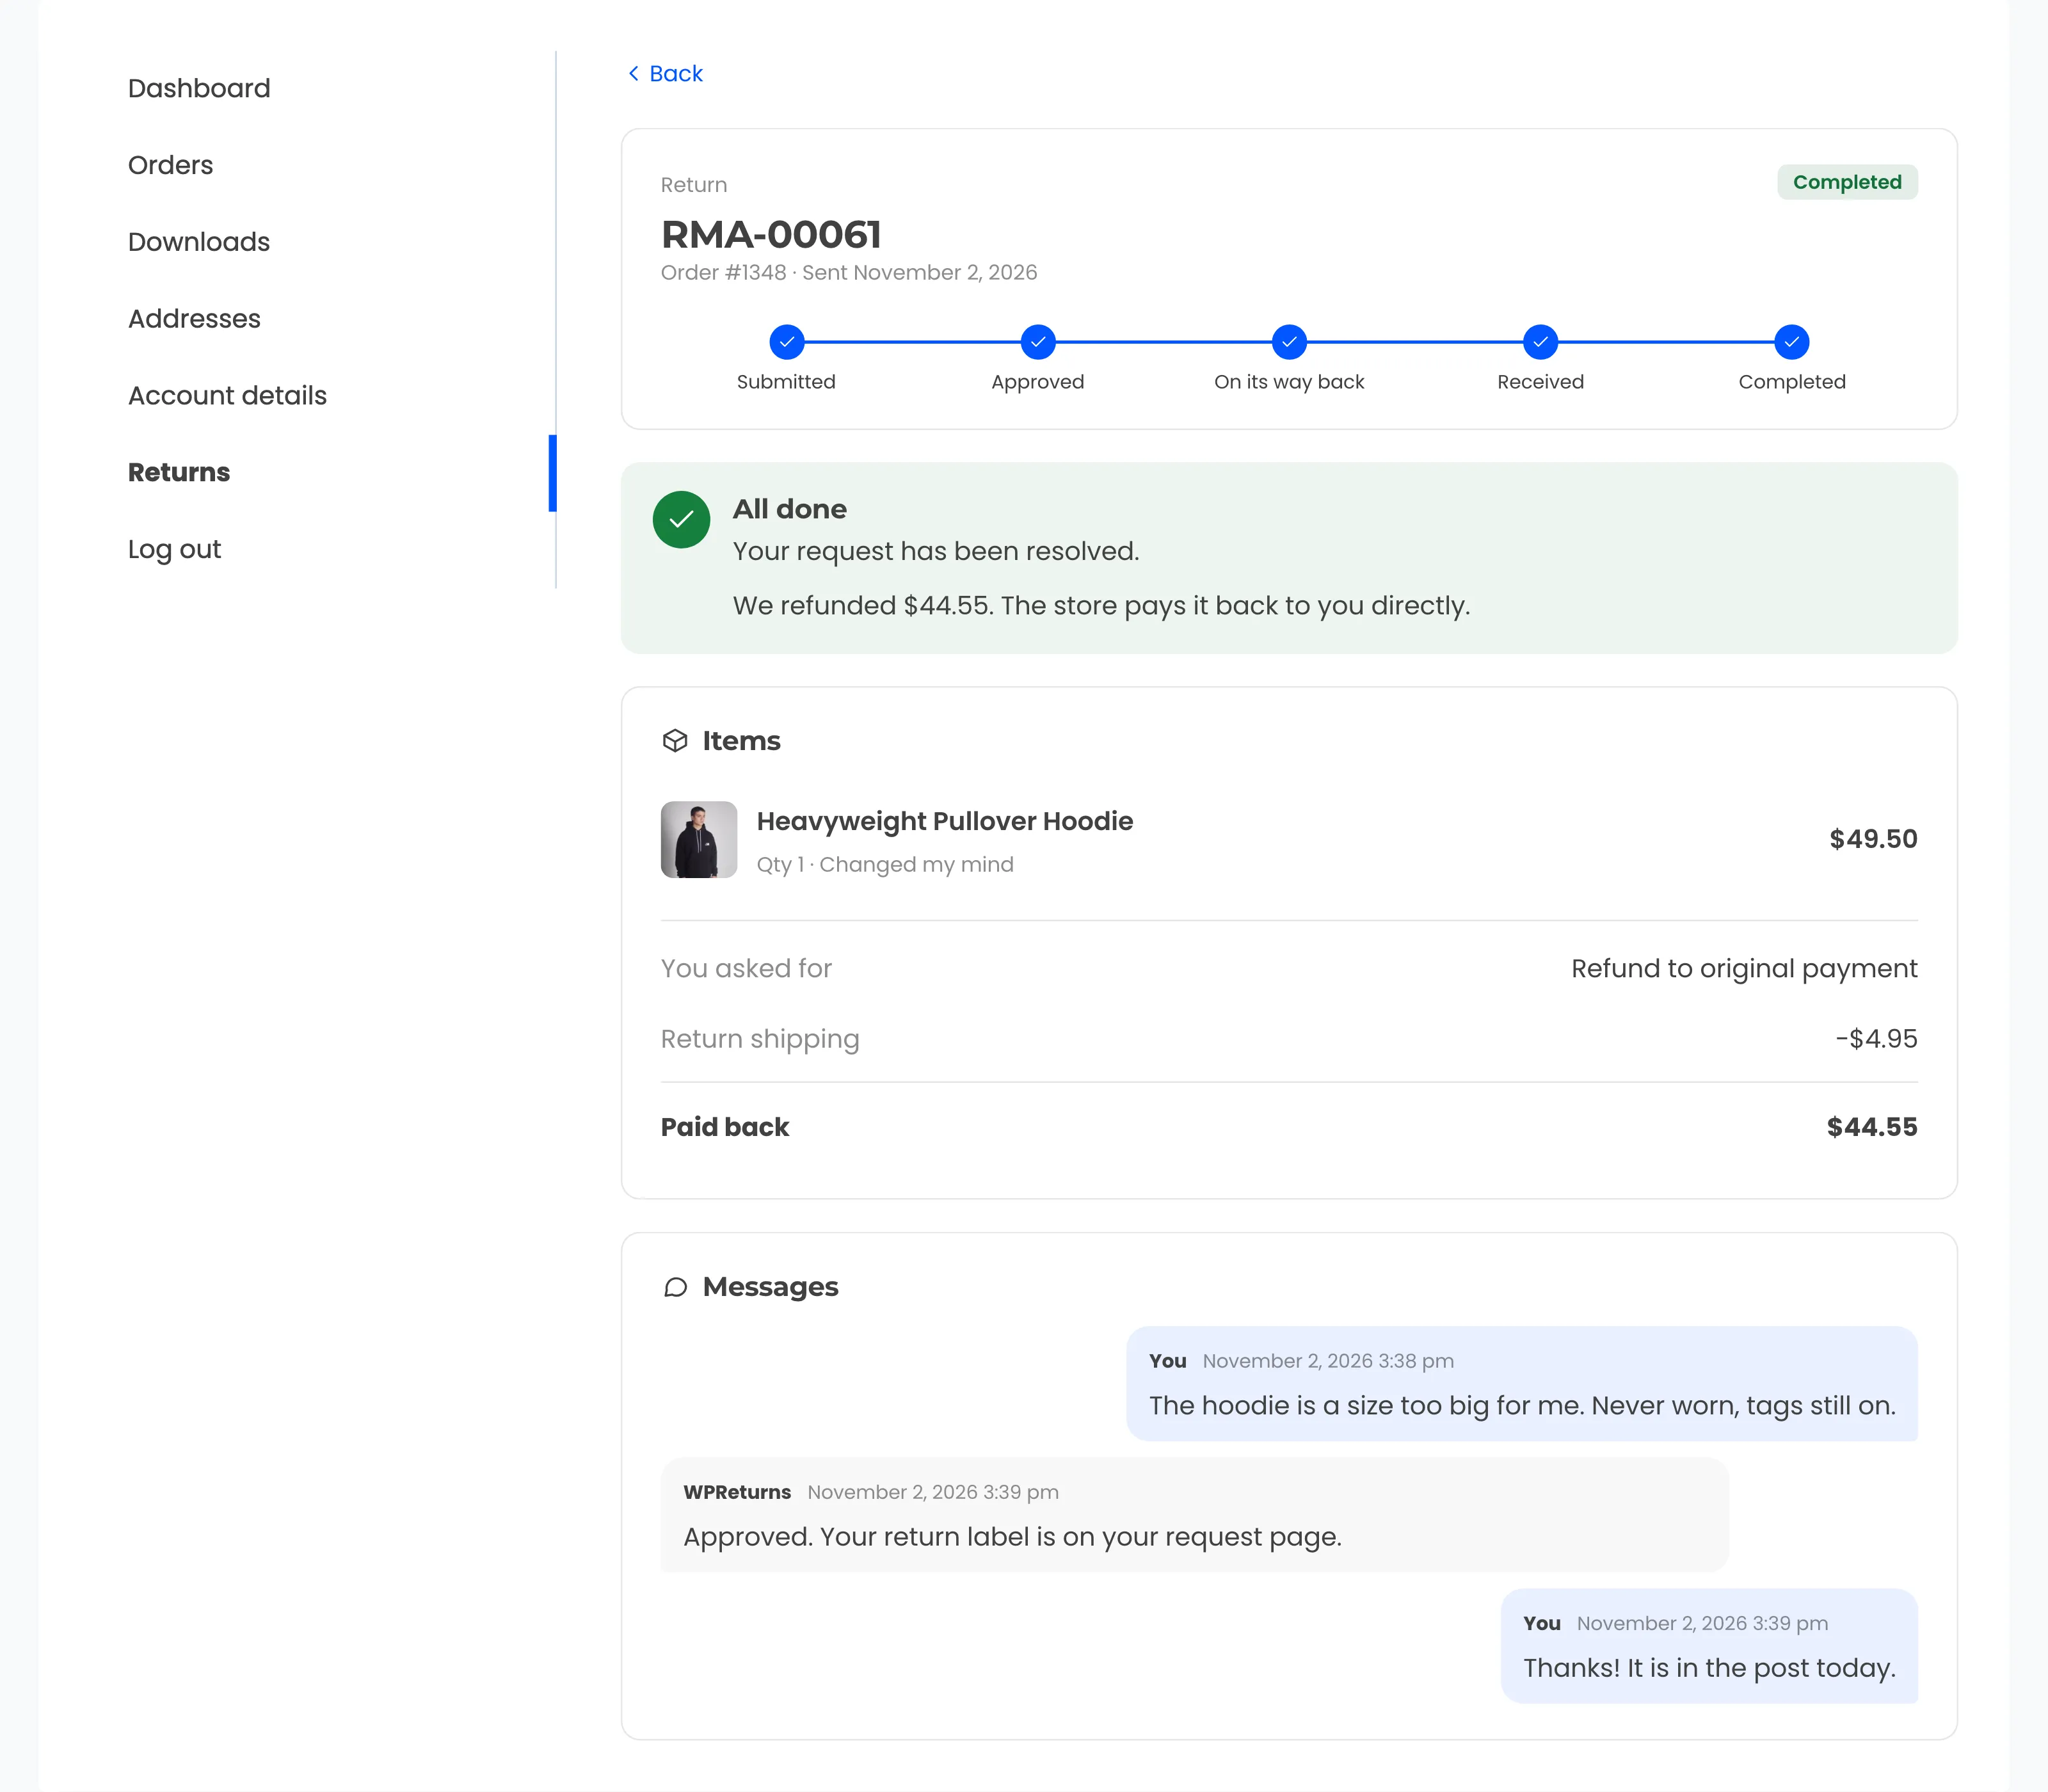
13. The customer sees it is done
Section titled “13. The customer sees it is done”Her request page shows every step checked and the box “All done” with “We refunded $44.55. The store pays it back to you directly.” The Items card now reads Paid back $44.55.