Shipping Labels
The Shipping Labels tab sets how customers get a return label: you upload it yourself, or WPReturns buys it from your EasyPost or Shippo account. With a provider connected, labels can be bought on approval and emailed to the customer at once. The tab also sets the return address name and the default parcel size.
Available in: Pro (uploading a label on a request is also in the free plugin)
Where to find it
Section titled “Where to find it”DevDiggers Plugins > WPReturns > Configuration > Shipping Labels
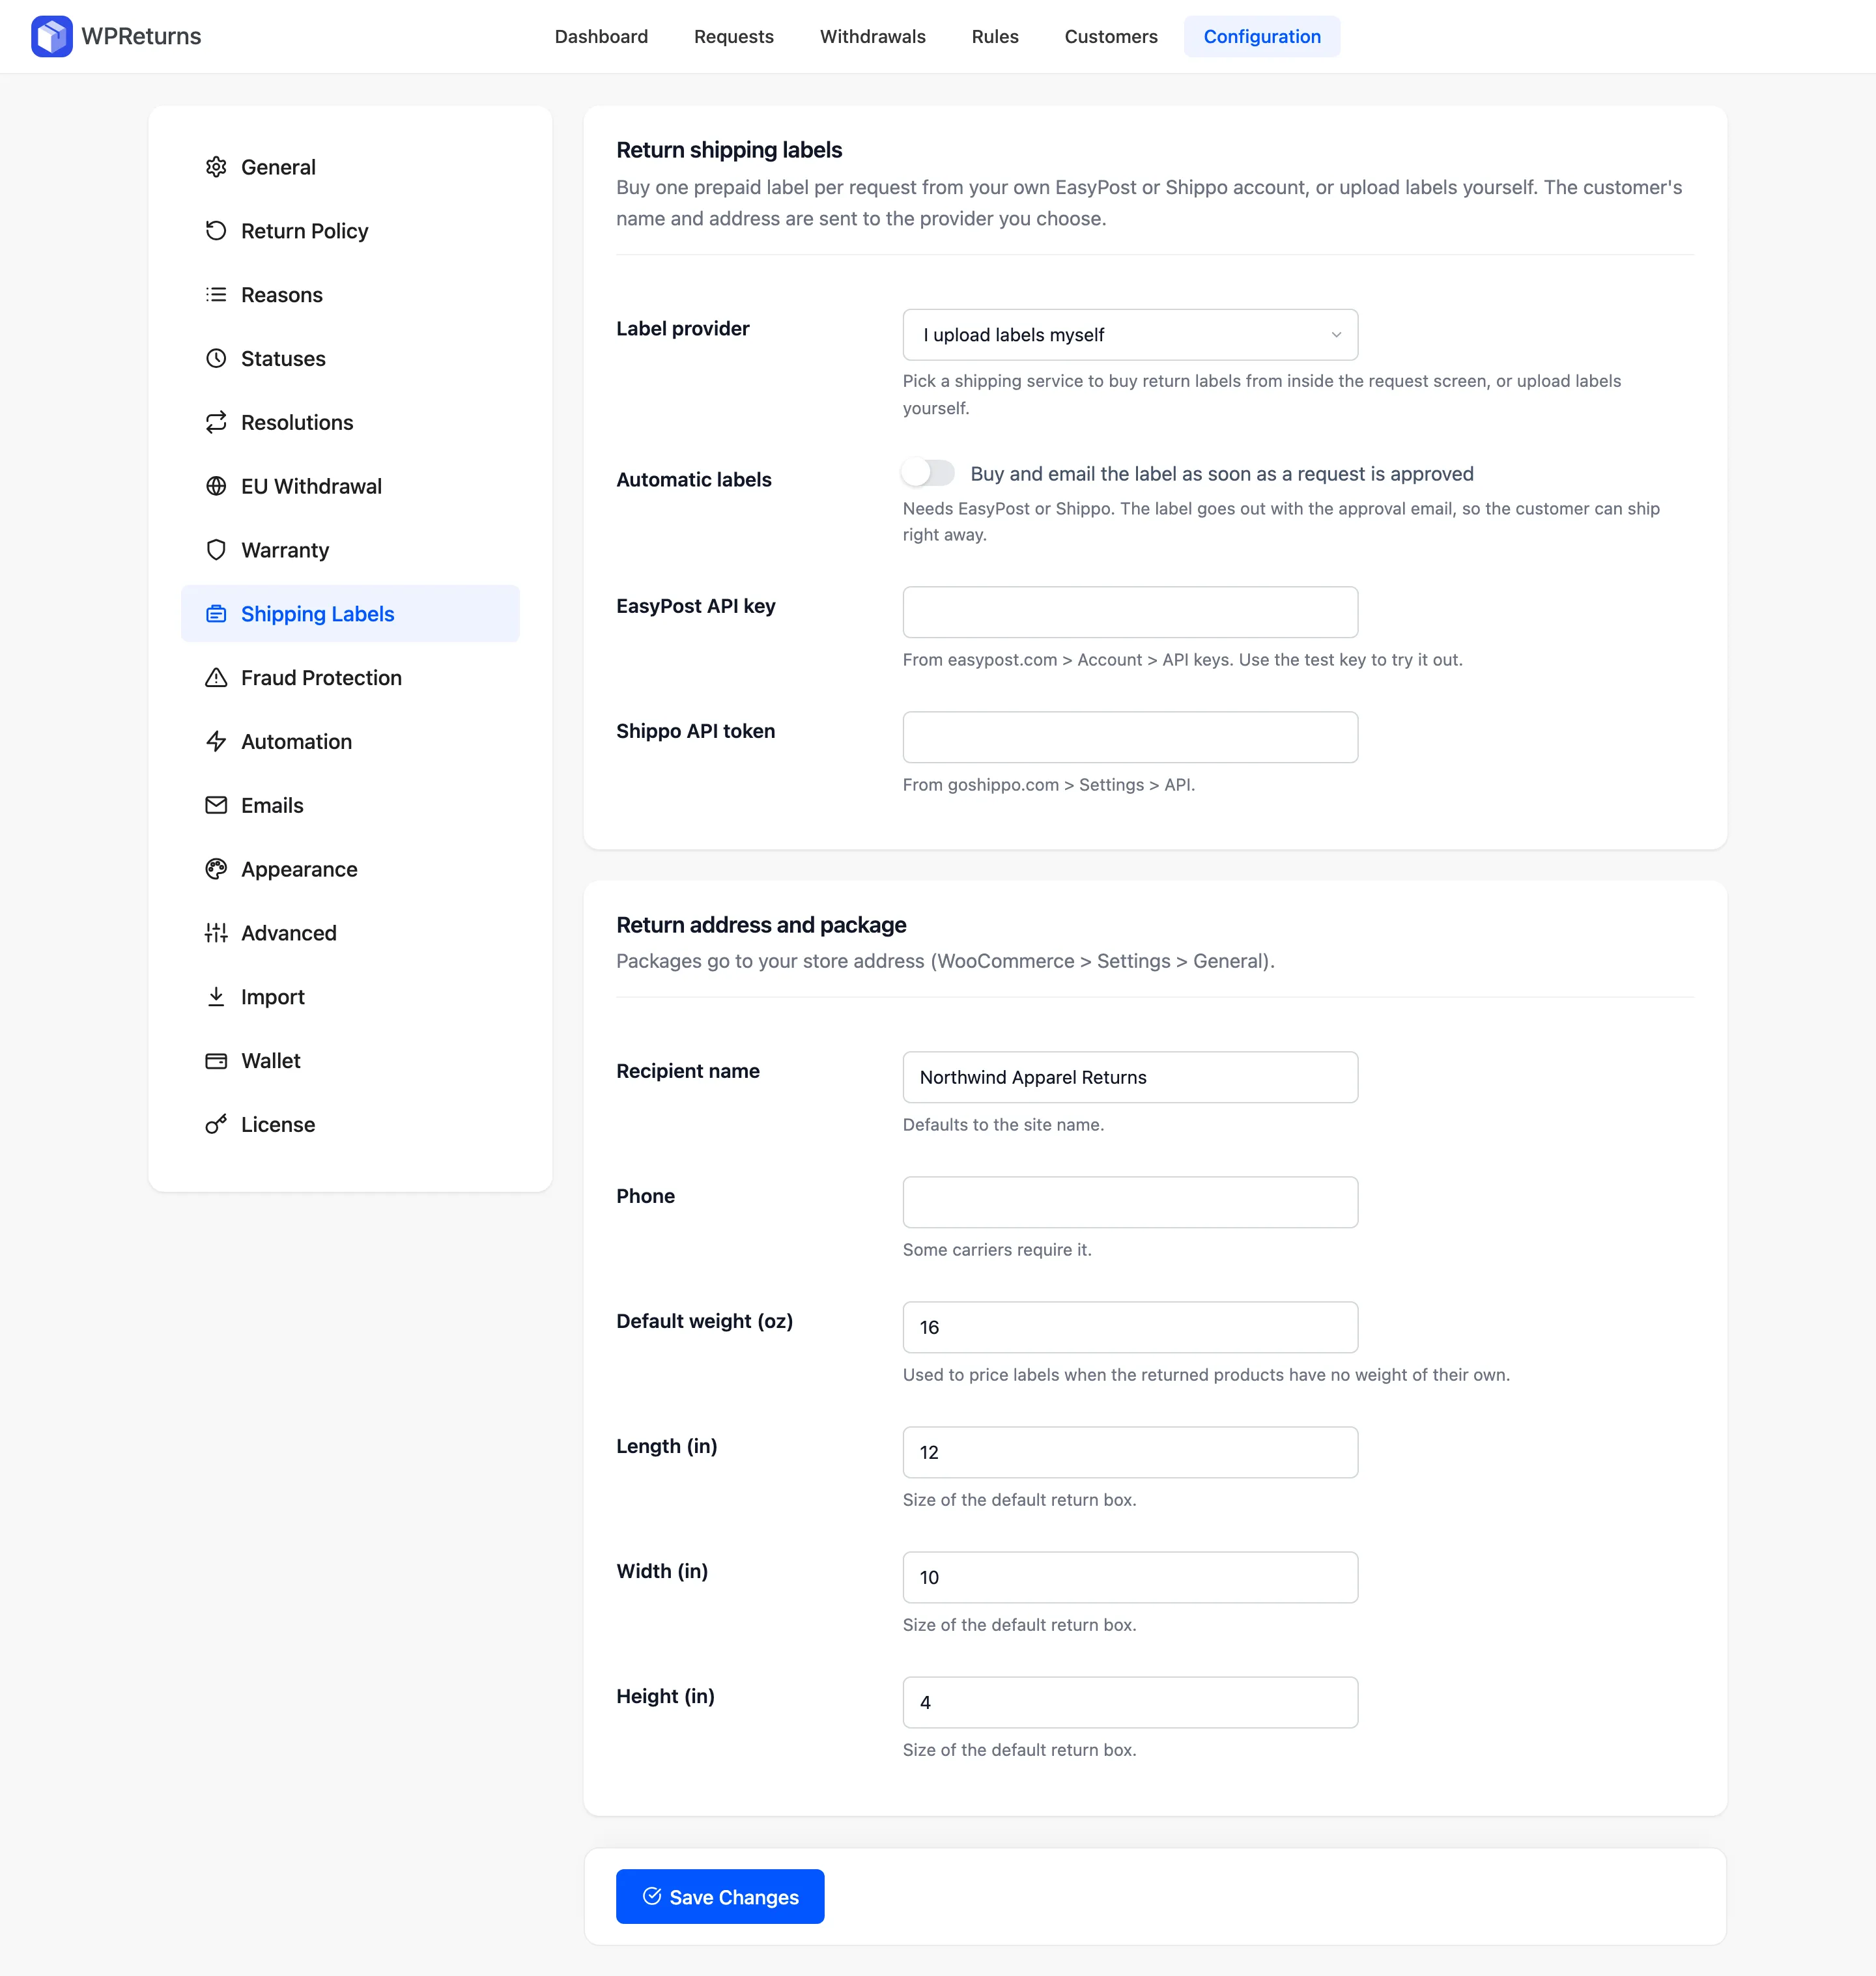
Return shipping labels
Section titled “Return shipping labels”| Field | What it does | Default |
|---|---|---|
| Label provider | “I upload labels myself”, EasyPost or Shippo. Pick a provider to buy labels from the request screen. | I upload labels myself |
| Automatic labels | “Buy and email the label as soon as a request is approved”. Needs EasyPost or Shippo. The label goes out with the approval email. | Off |
| EasyPost API key | From easypost.com > Account > API keys. Use the test key to try it out. | Empty |
| Shippo API token | From goshippo.com > Settings > API. | Empty |
The customer’s name and address are sent to the provider you choose. Labels are paid from your own EasyPost or Shippo account at your rates.
Return address and package
Section titled “Return address and package”Packages go to your store address from WooCommerce > Settings > General.
| Field | What it does | Default |
|---|---|---|
| Recipient name | The name on the label. | Your site name |
| Phone | Some carriers require it. | Empty |
| Default weight (oz) | Used to price labels when the returned products have no weight. | 16 |
| Length (in) | Size of the default return box. | 12 |
| Width (in) | Size of the default return box. | 10 |
| Height (in) | Size of the default return box. | 4 |
Uploading labels yourself
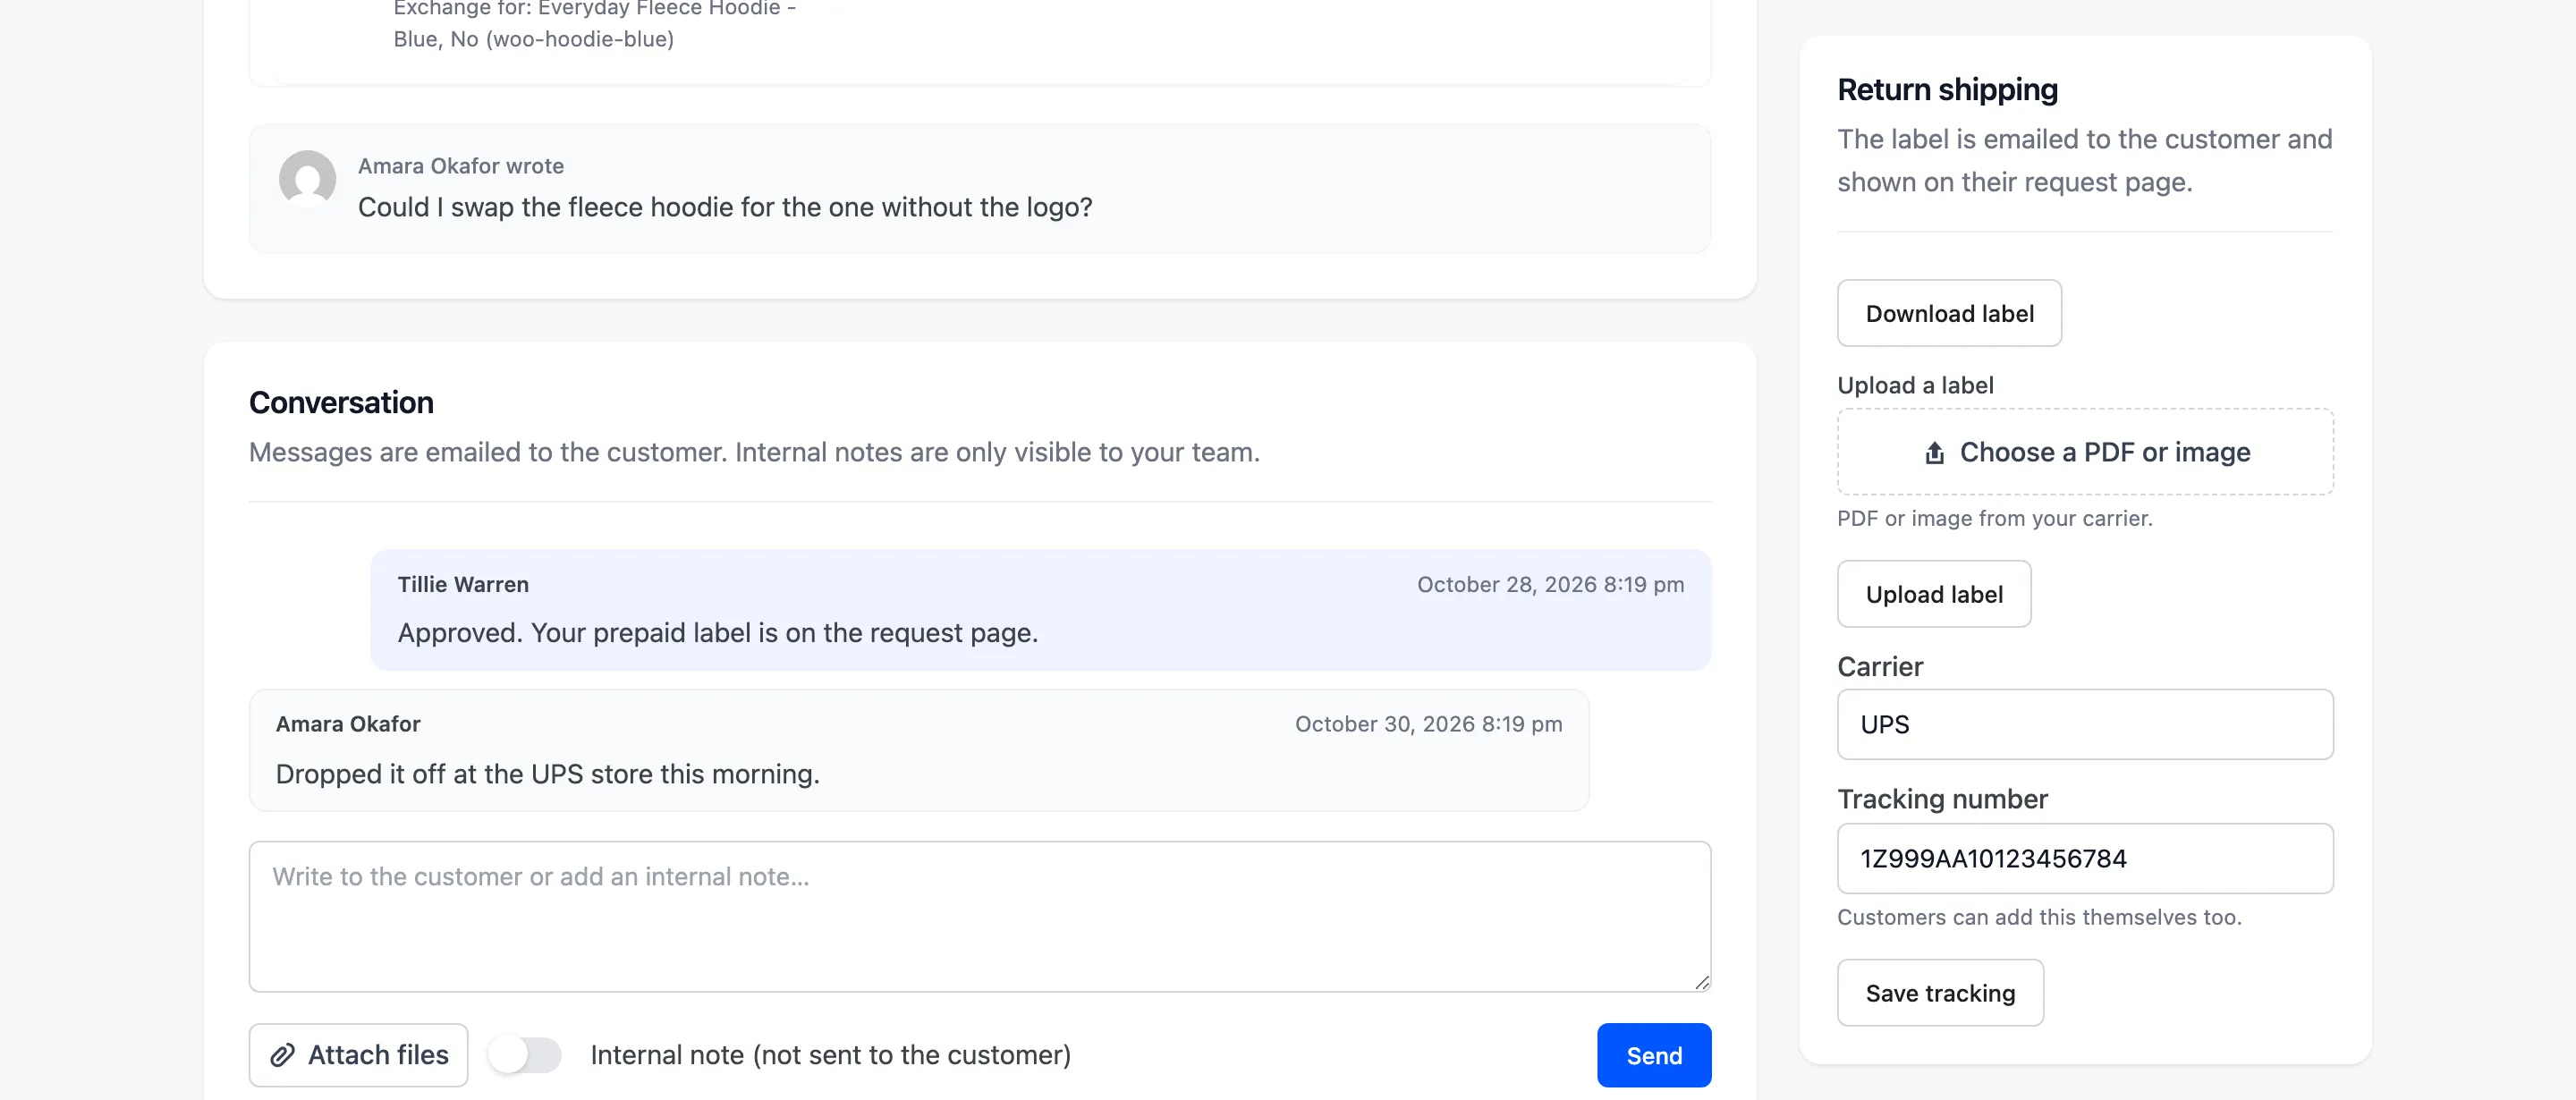
Section titled “Uploading labels yourself”With “I upload labels myself”, open a request and choose a PDF or image in the Return shipping panel. Then click Upload label.
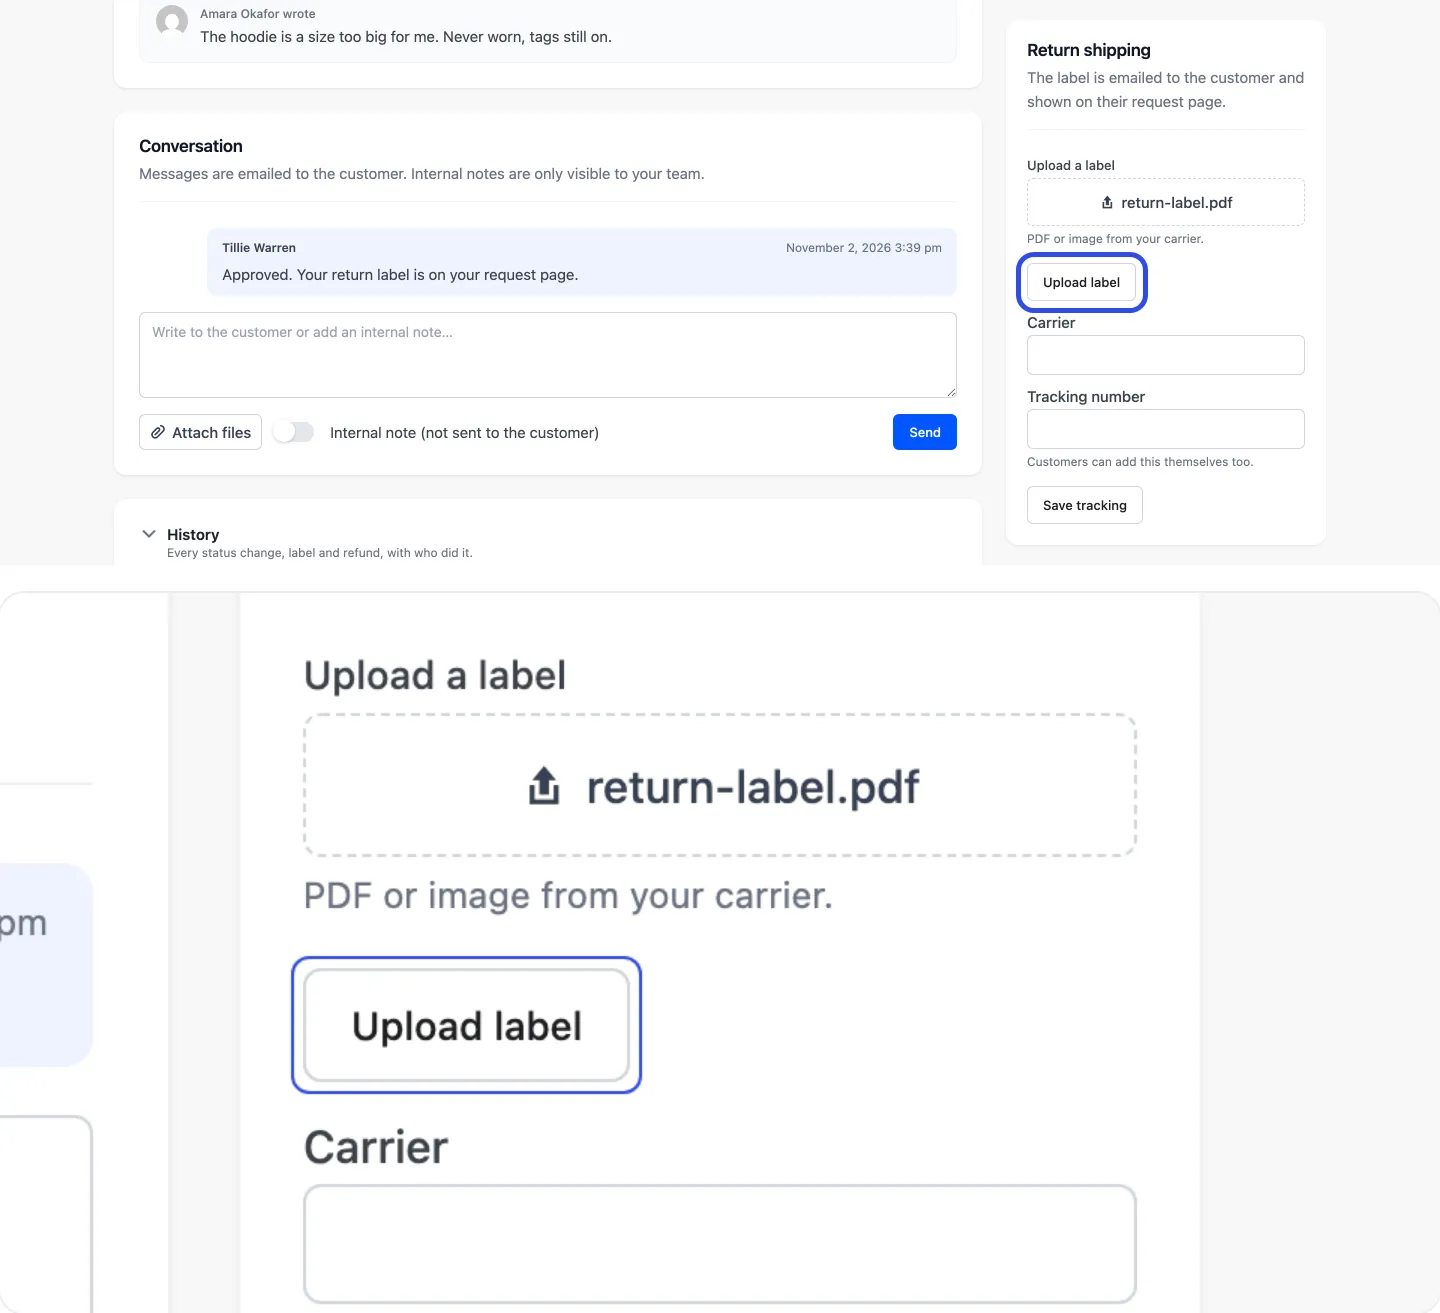
The request moves to Awaiting return and the history logs the label.
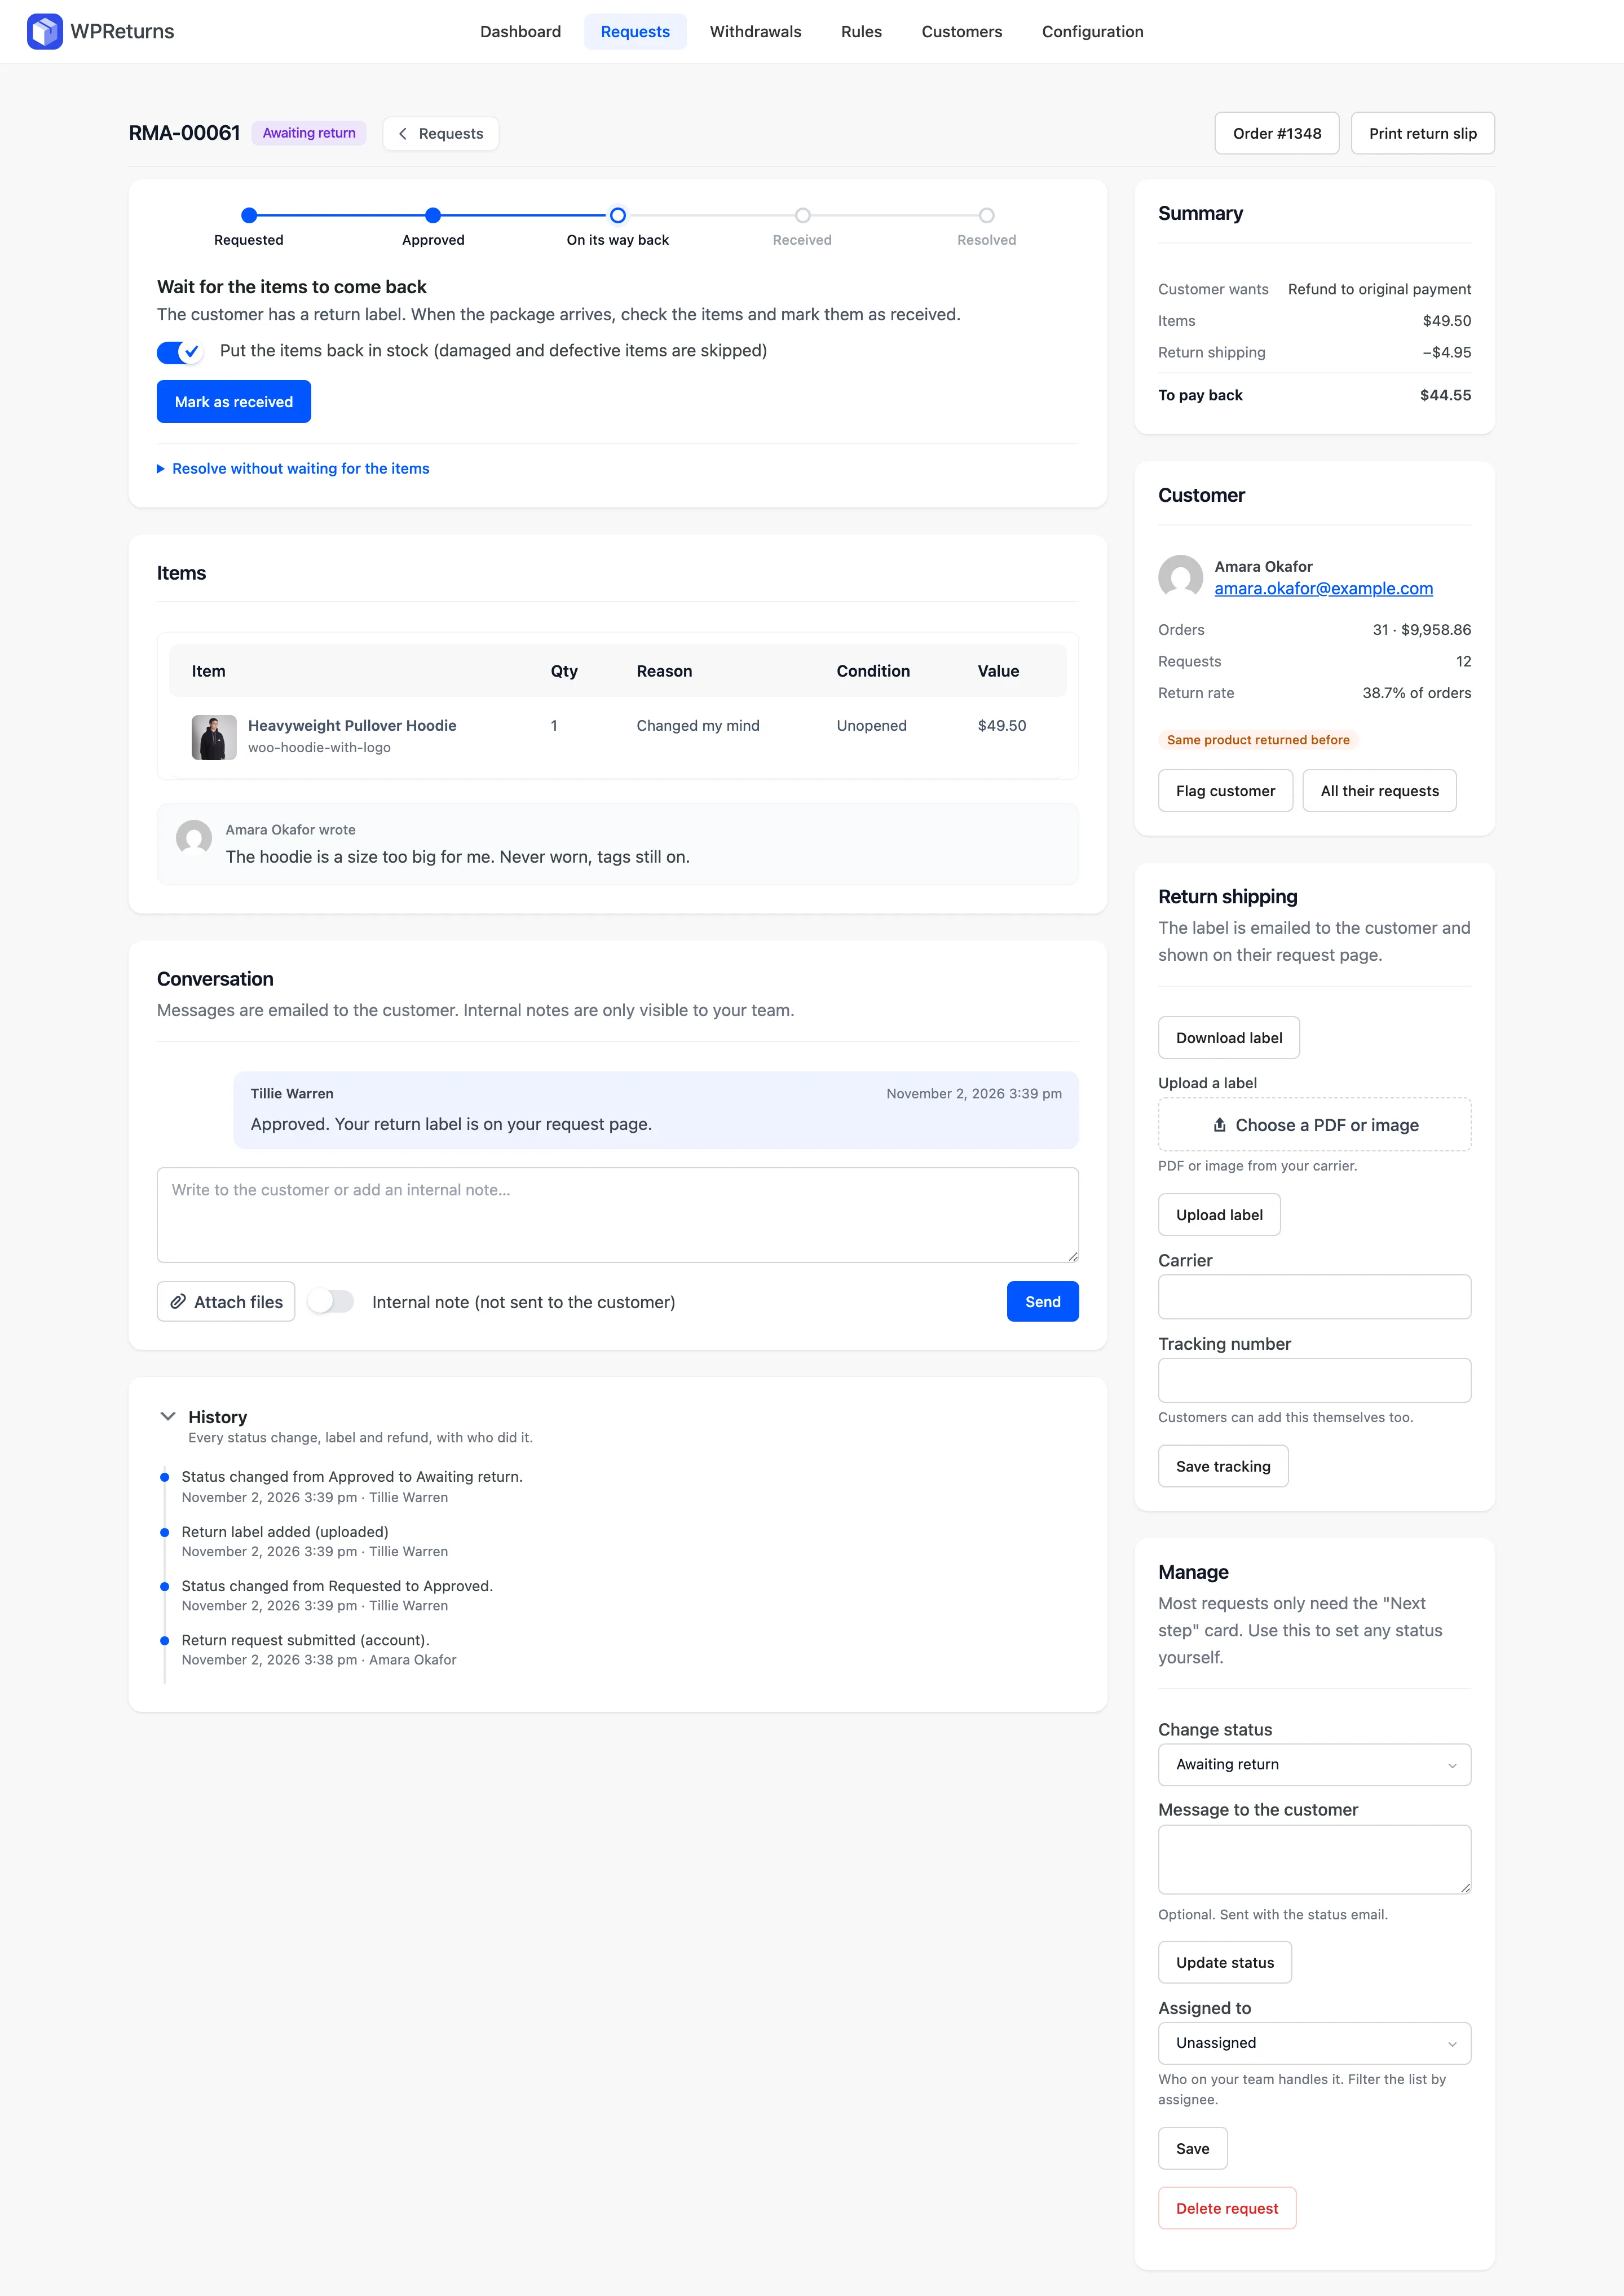
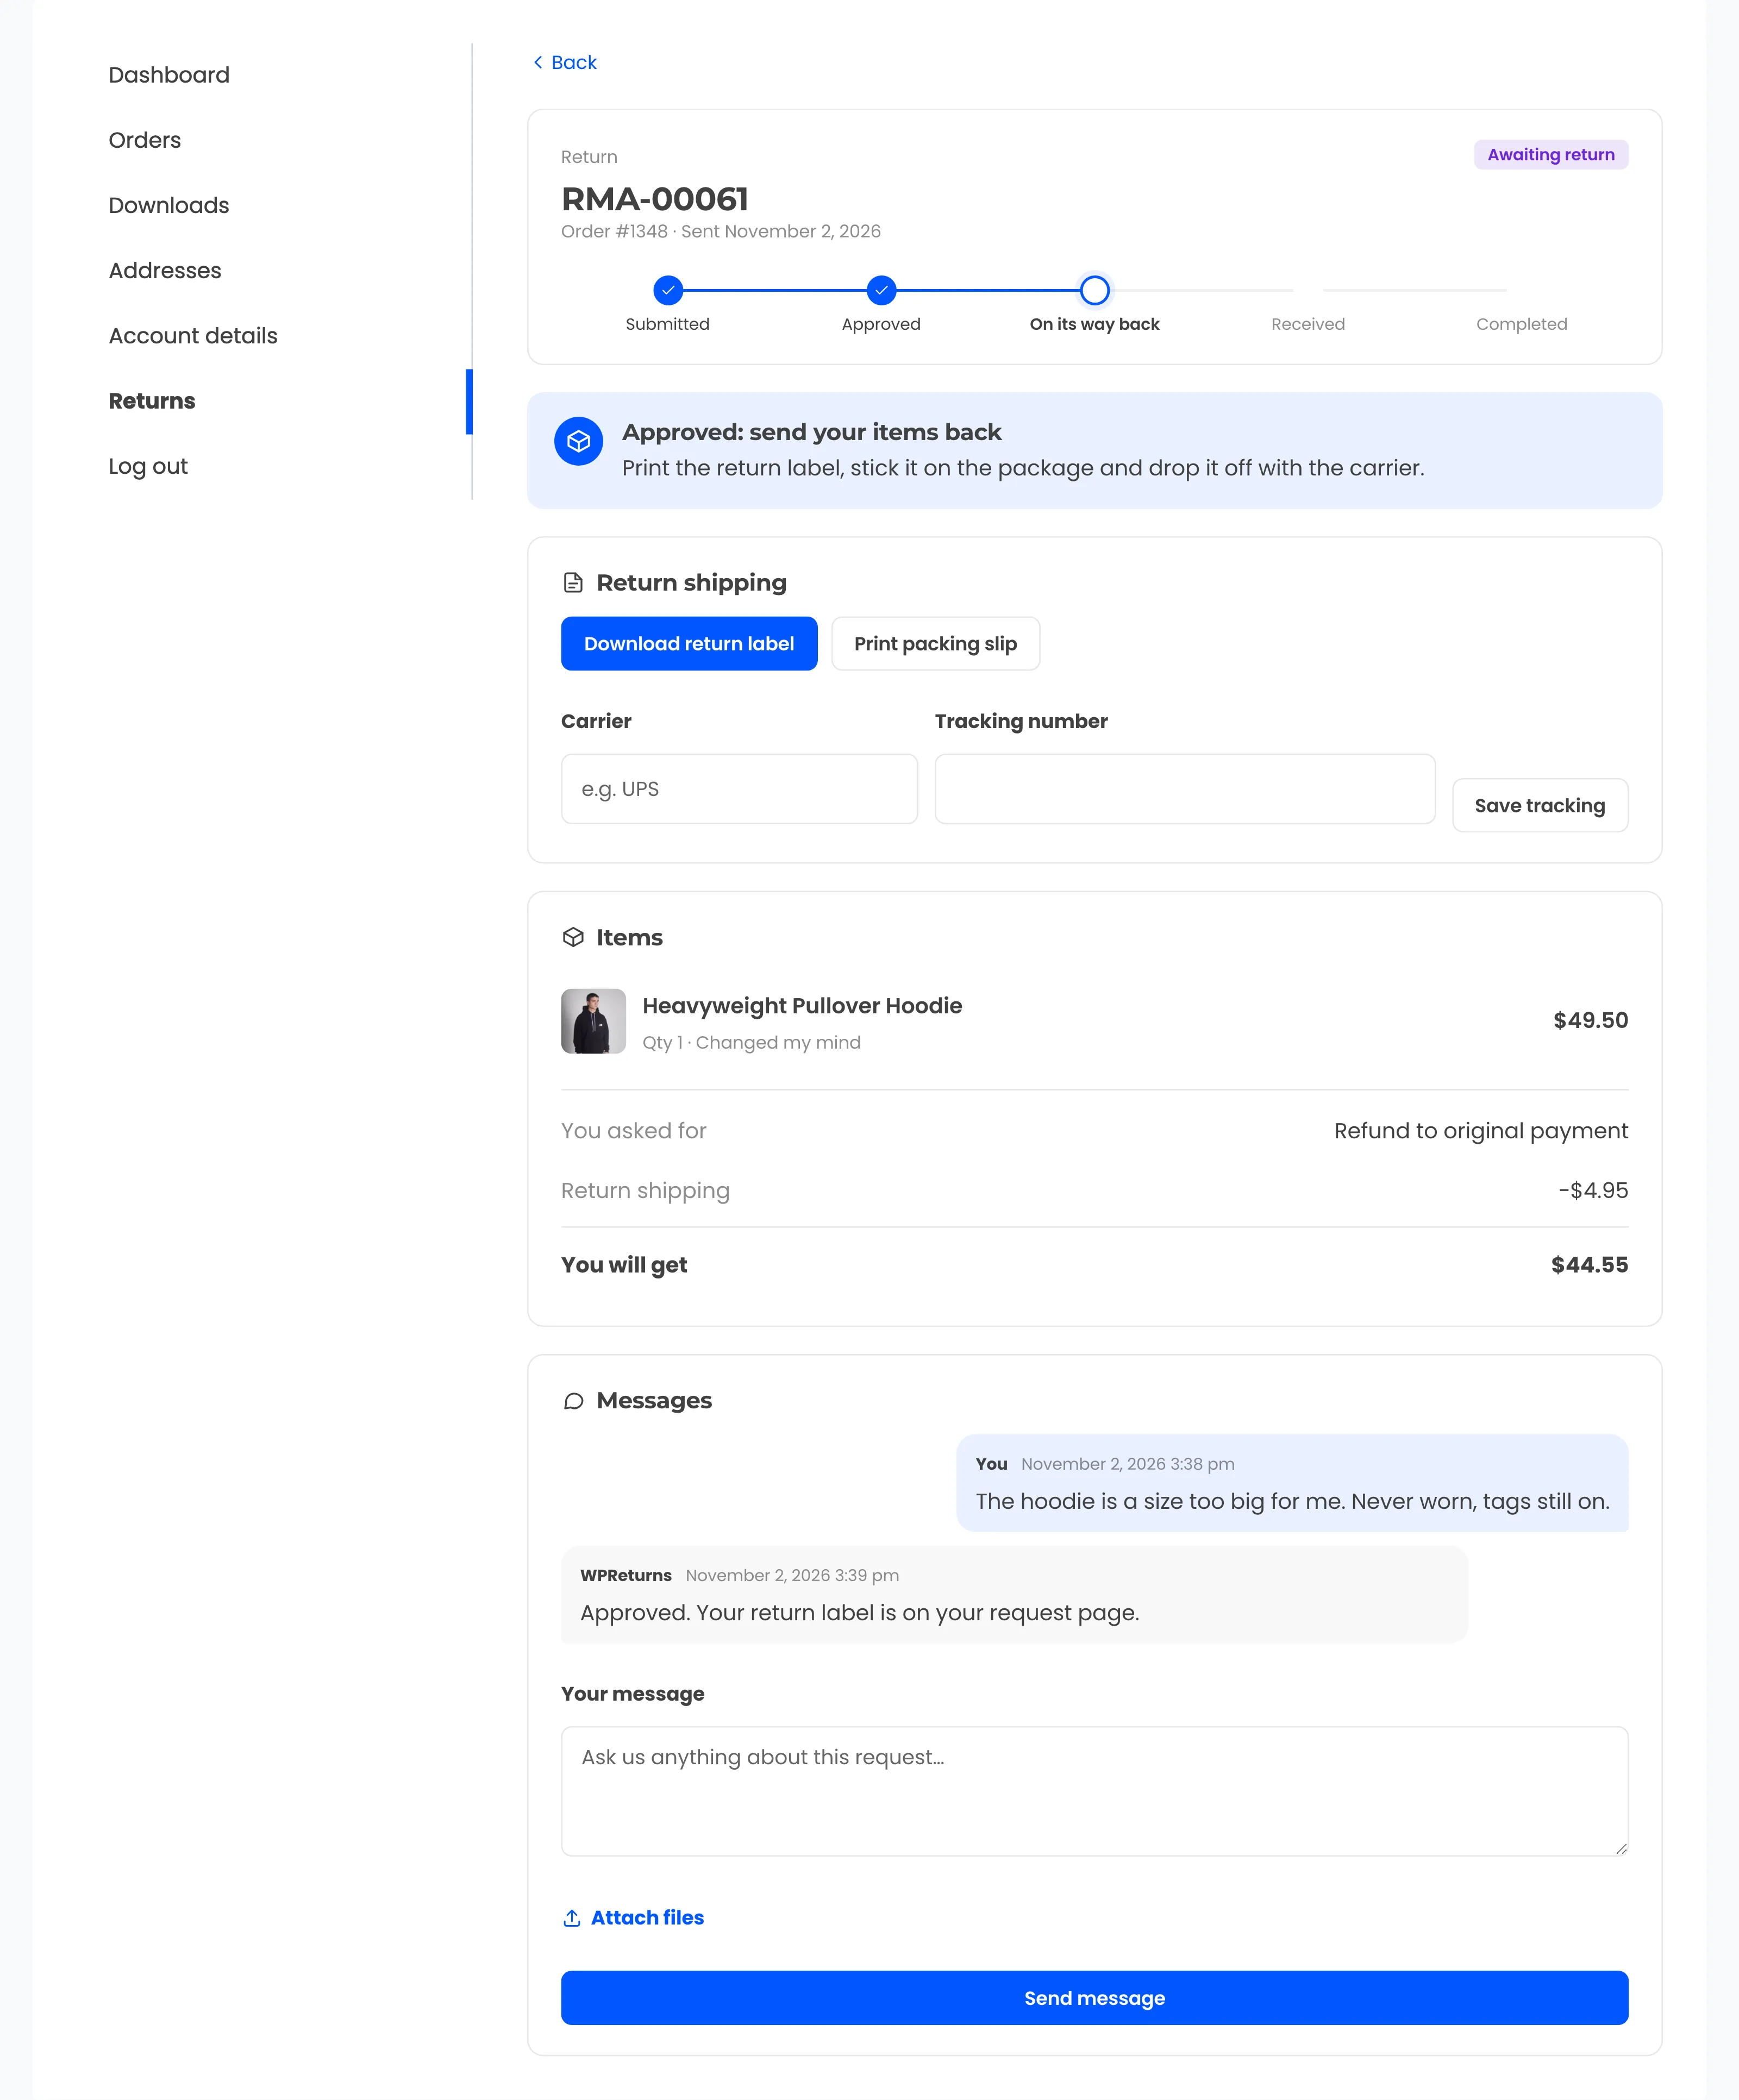
The customer gets the label by email and can download it from their request page. They then enter the carrier and tracking number.
The panel then shows Download label and the tracking the customer saved. You can also enter tracking yourself and click Save tracking.
Practical notes
Section titled “Practical notes”- Connect a provider with its test key first and run one request through the whole flow.
- Set real product weights in WooCommerce for accurate label prices. The default weight only fills the gap.
- Under Automation you can remind customers who received a label but never shipped. See Automation.