The request screen
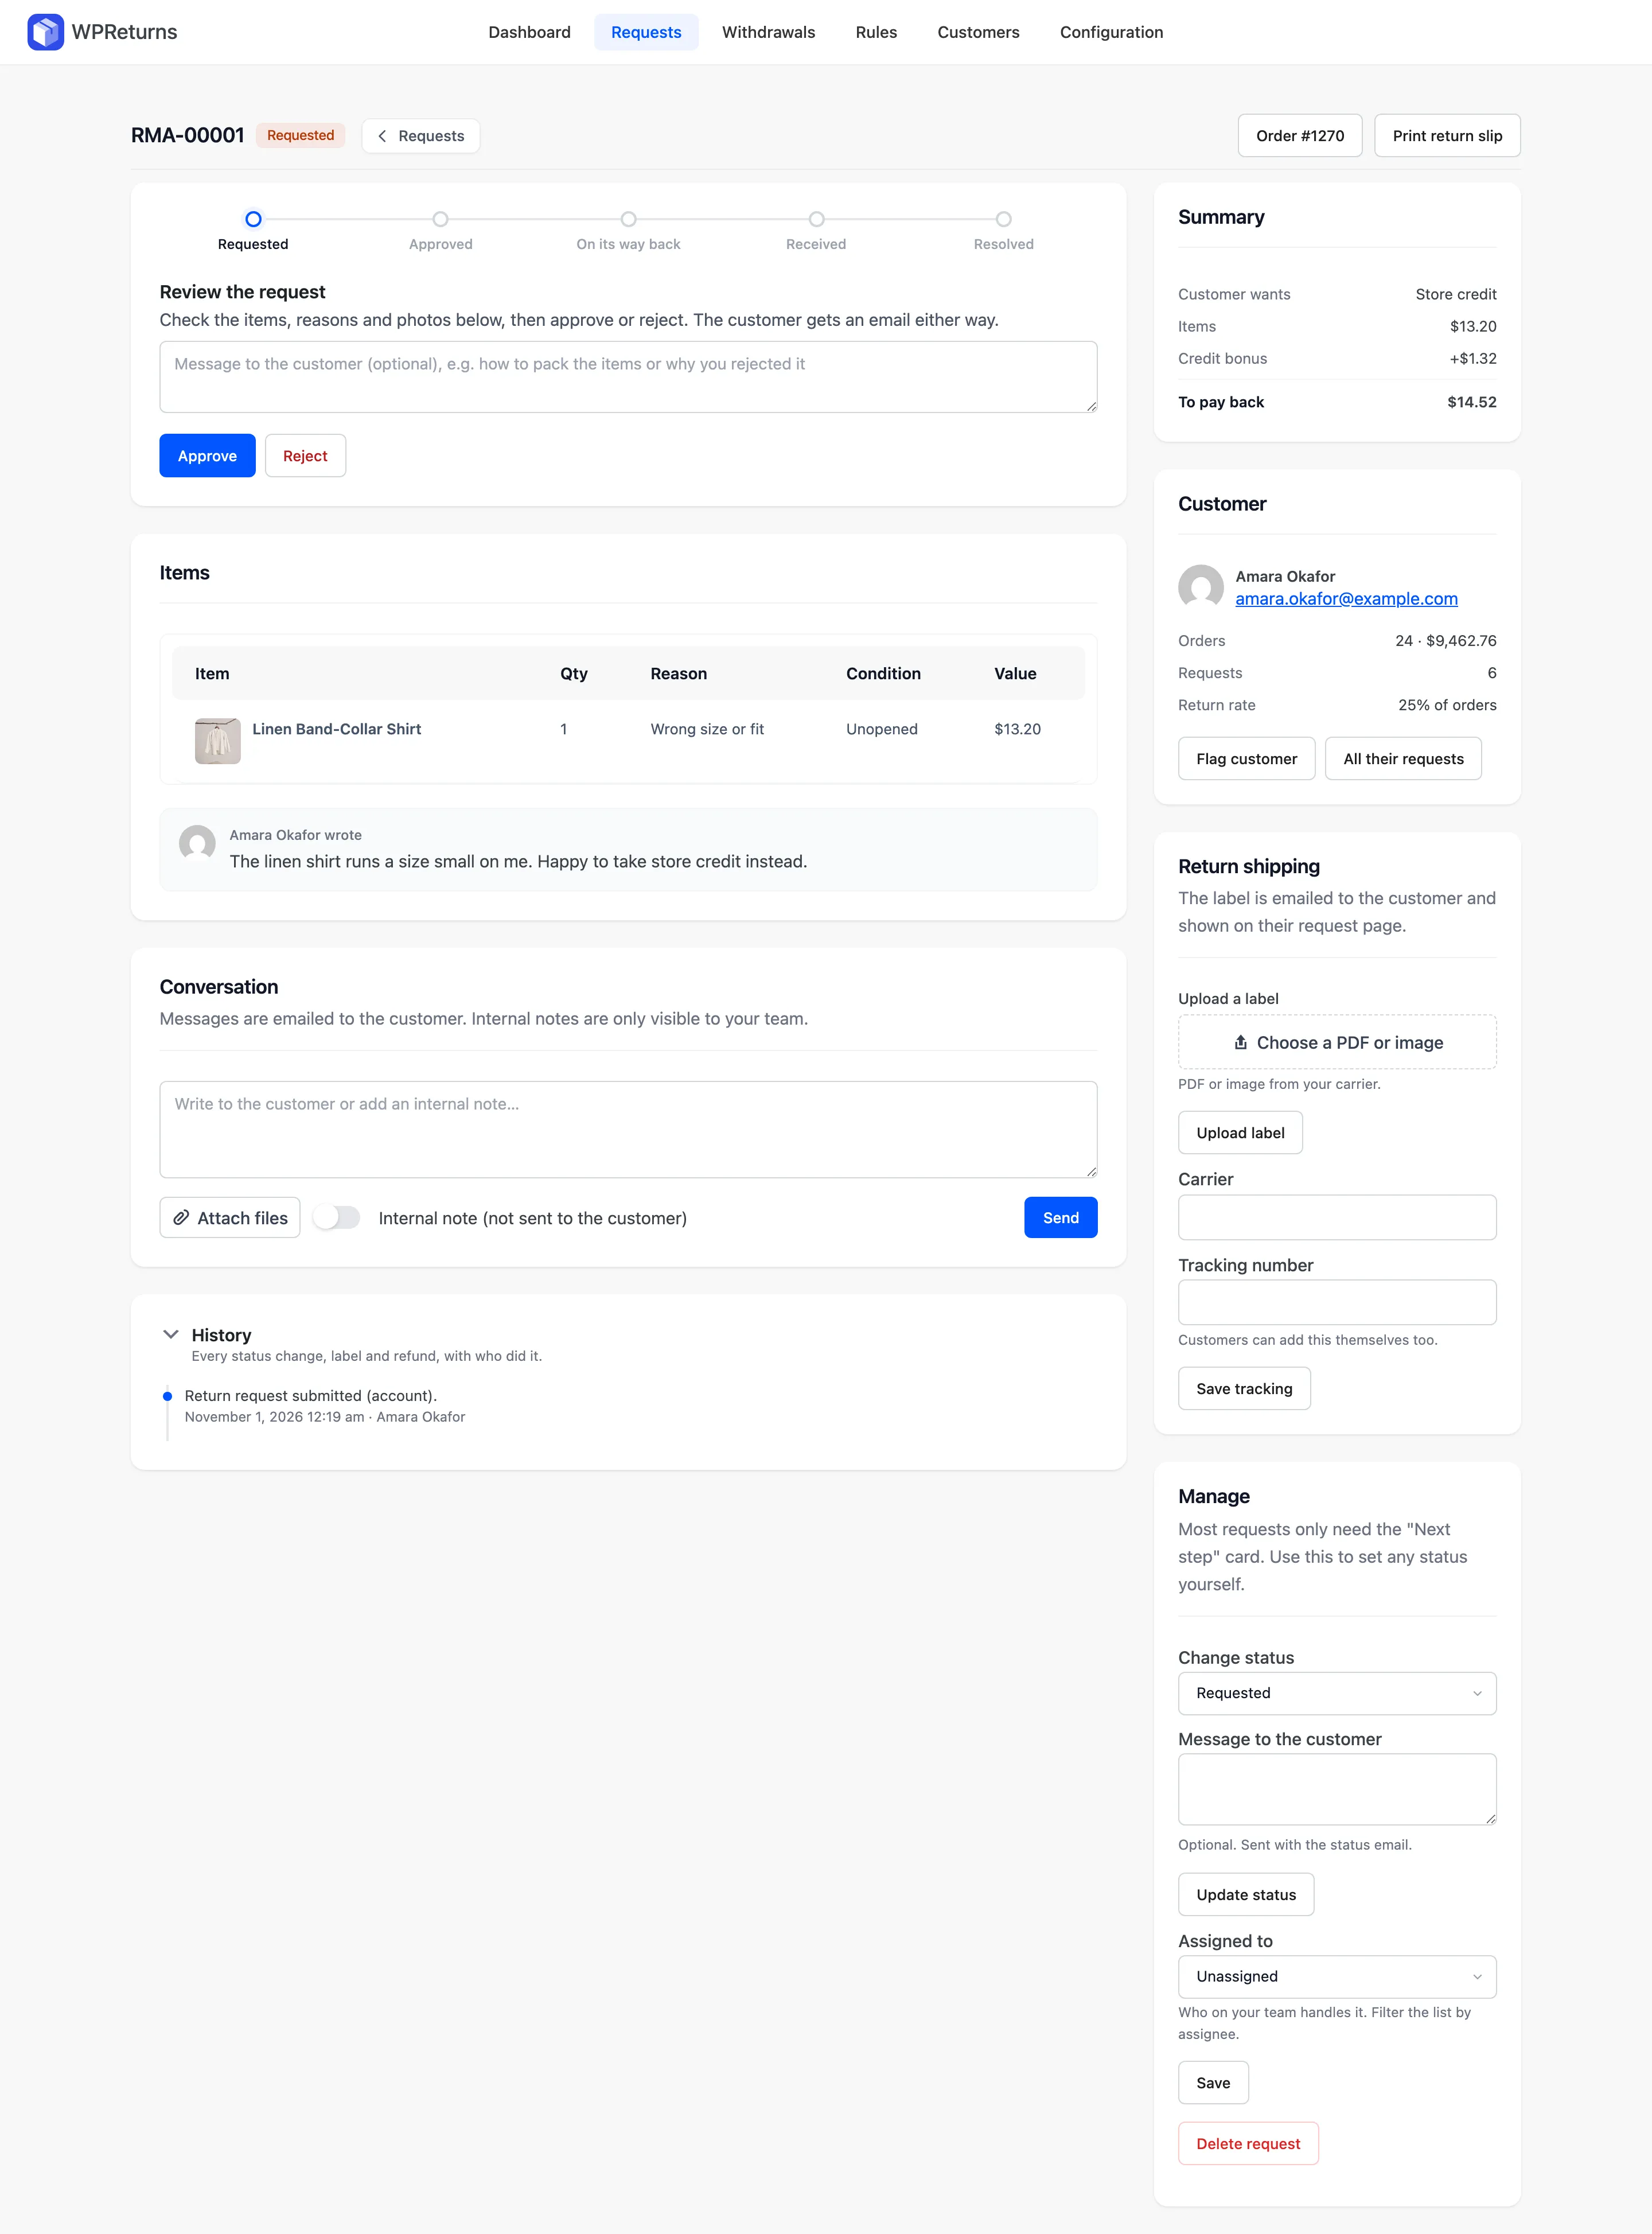
The request screen holds everything about one return request. A Next step card at the top shows where the request stands and offers the one action that moves it forward. Below it sit the items, photos, conversation and history, and a sidebar holds the summary, customer, return shipping and manual controls.
Available in: Free and Pro. Print return slip, Buy return label, assignment, the customer risk panel and resolutions other than refund need Pro.
Open it by selecting a request on the Requests list. The title bar shows the RMA number, such as RMA-01042, with its status badge. Buttons there go back to Requests, open the WooCommerce order (Order #1270) and print the return slip.
The Next step card
Section titled “The Next step card”A step bar runs across the top of the card: Requested, Approved, On its way back, Received, Resolved. Cancellations and keep-it refunds skip the two shipping steps.
| Where the request is | Card heading | Action |
|---|---|---|
| Requested | Review the request | Approve or Reject with an optional message |
| Approved or Awaiting return | Wait for the items to come back | Mark as received and the restock switch |
| Received | Items received: resolve the request | The resolution form and Resolve request |
| Approved cancellation or keep-it refund | Resolve the request | The resolution form and Resolve request |
| Resolved but not closed | Resolved, ready to close | Mark as completed |
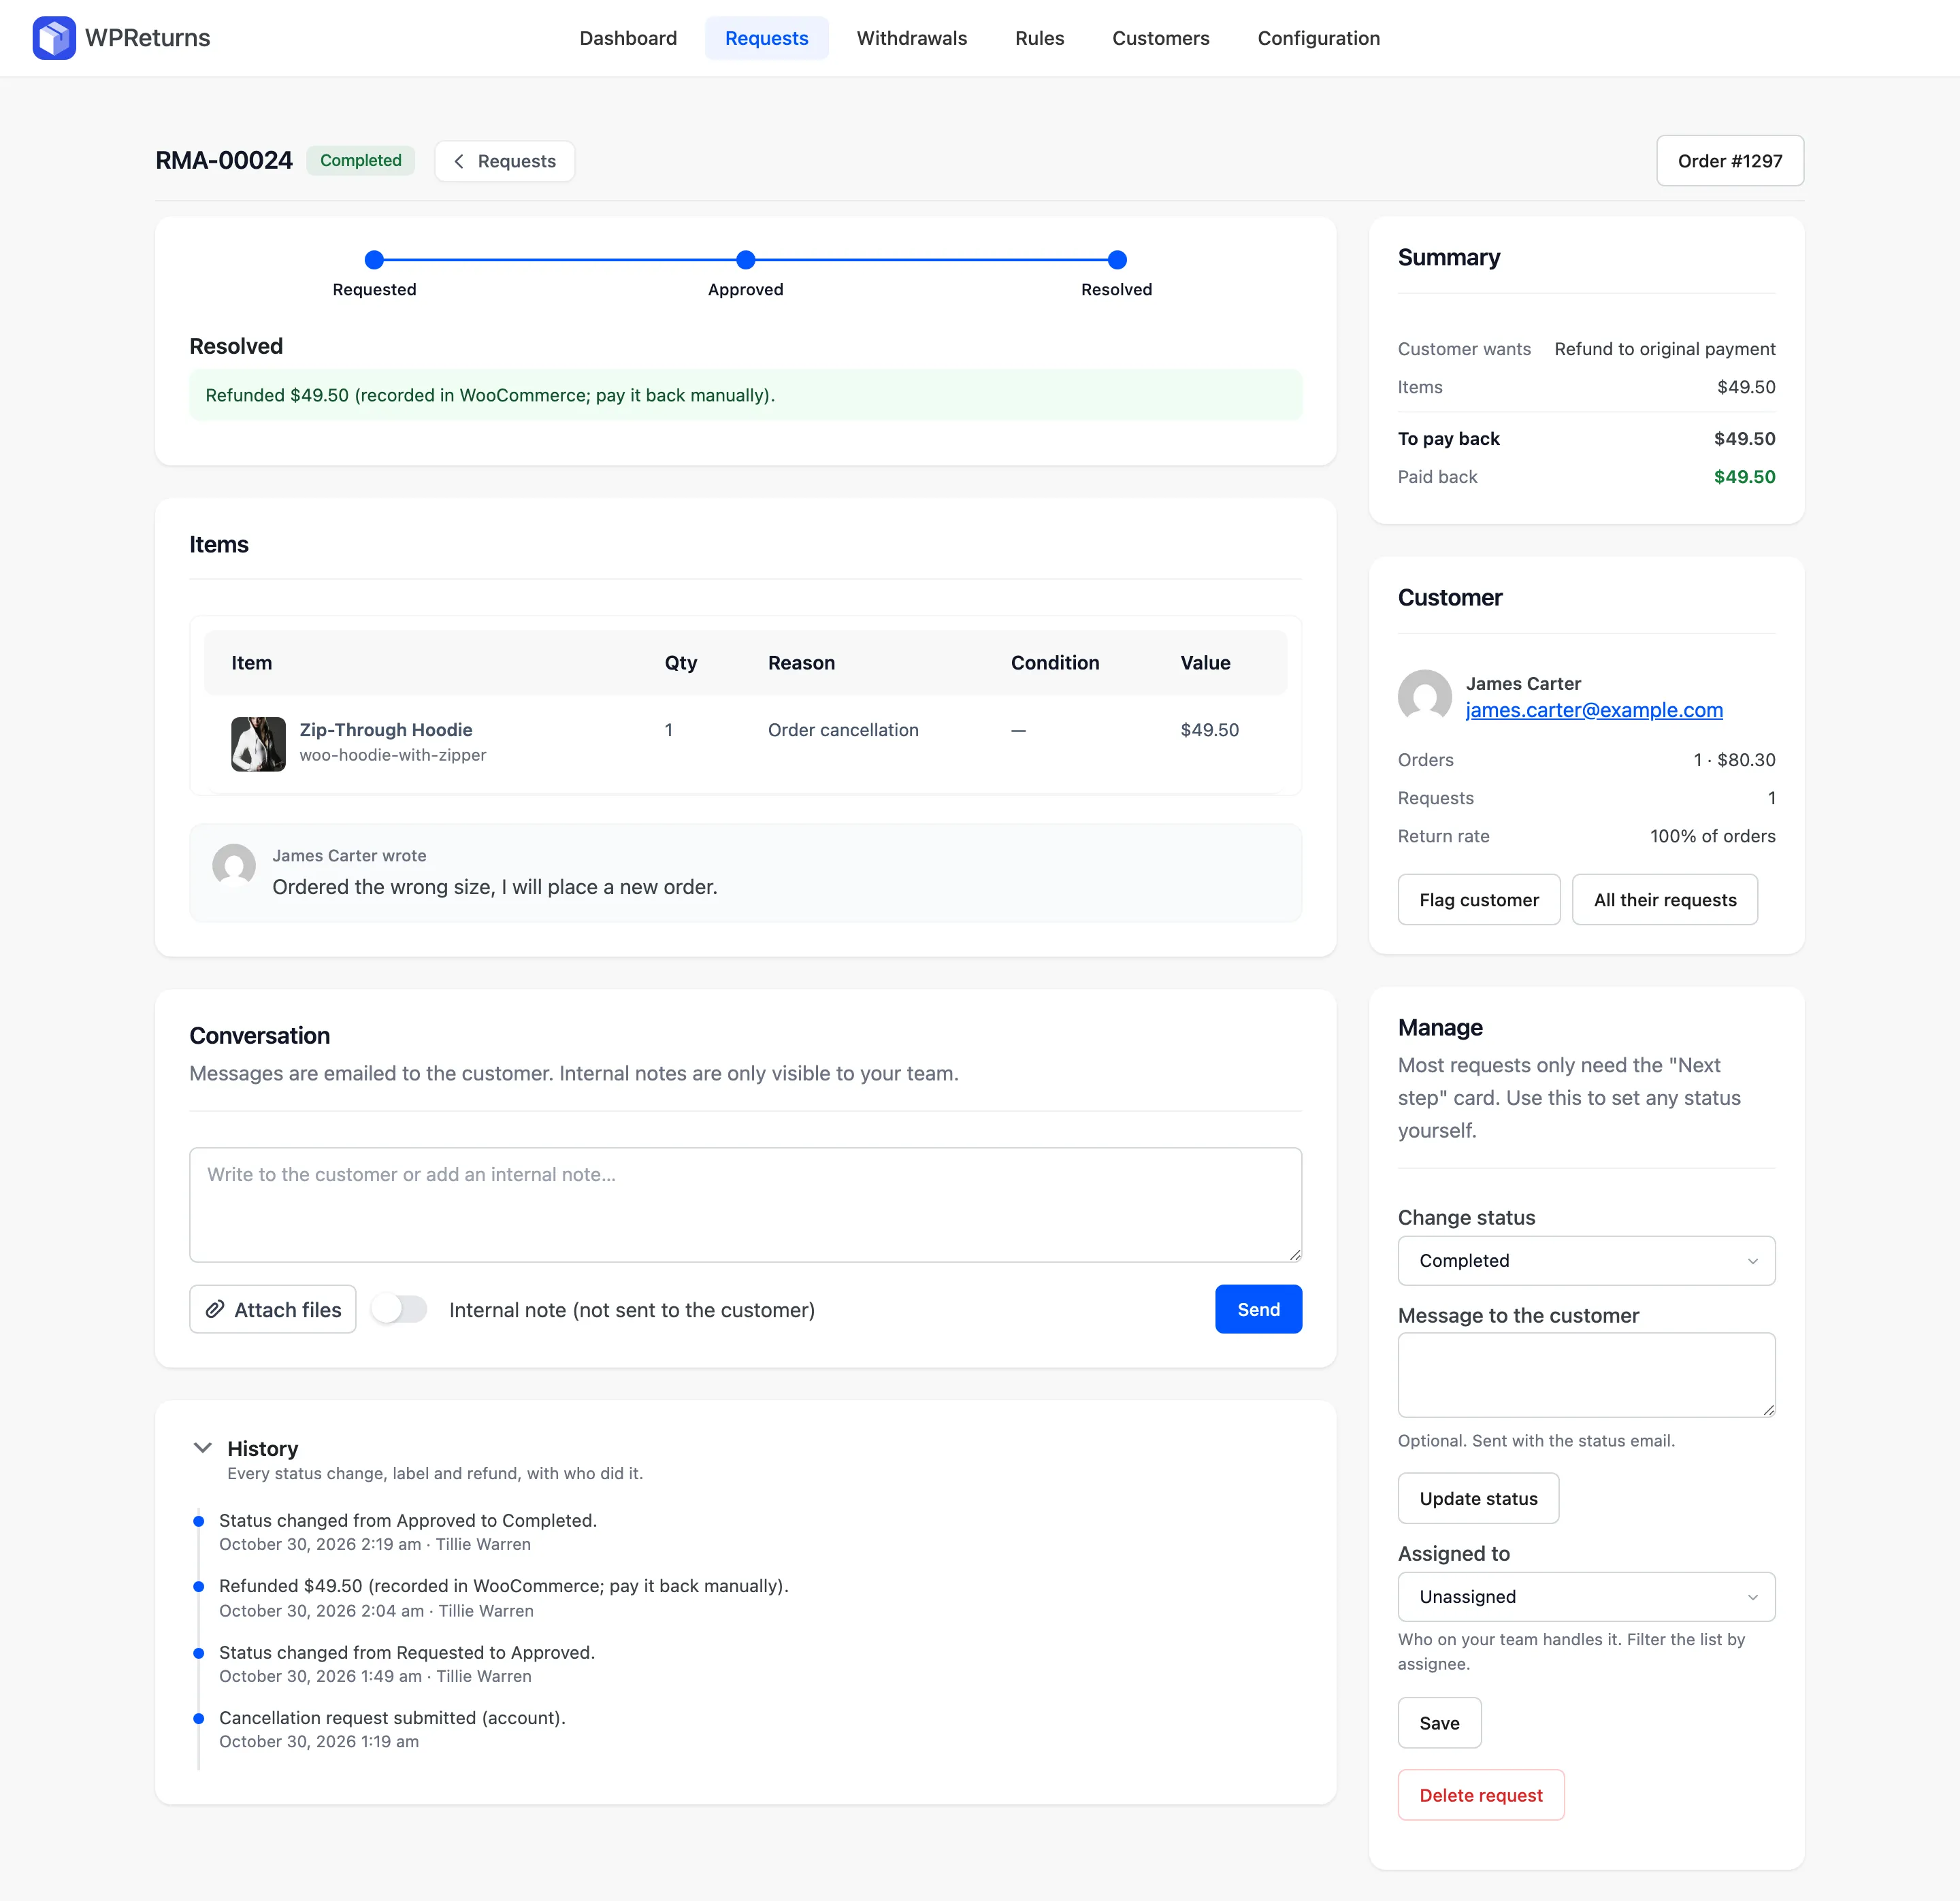
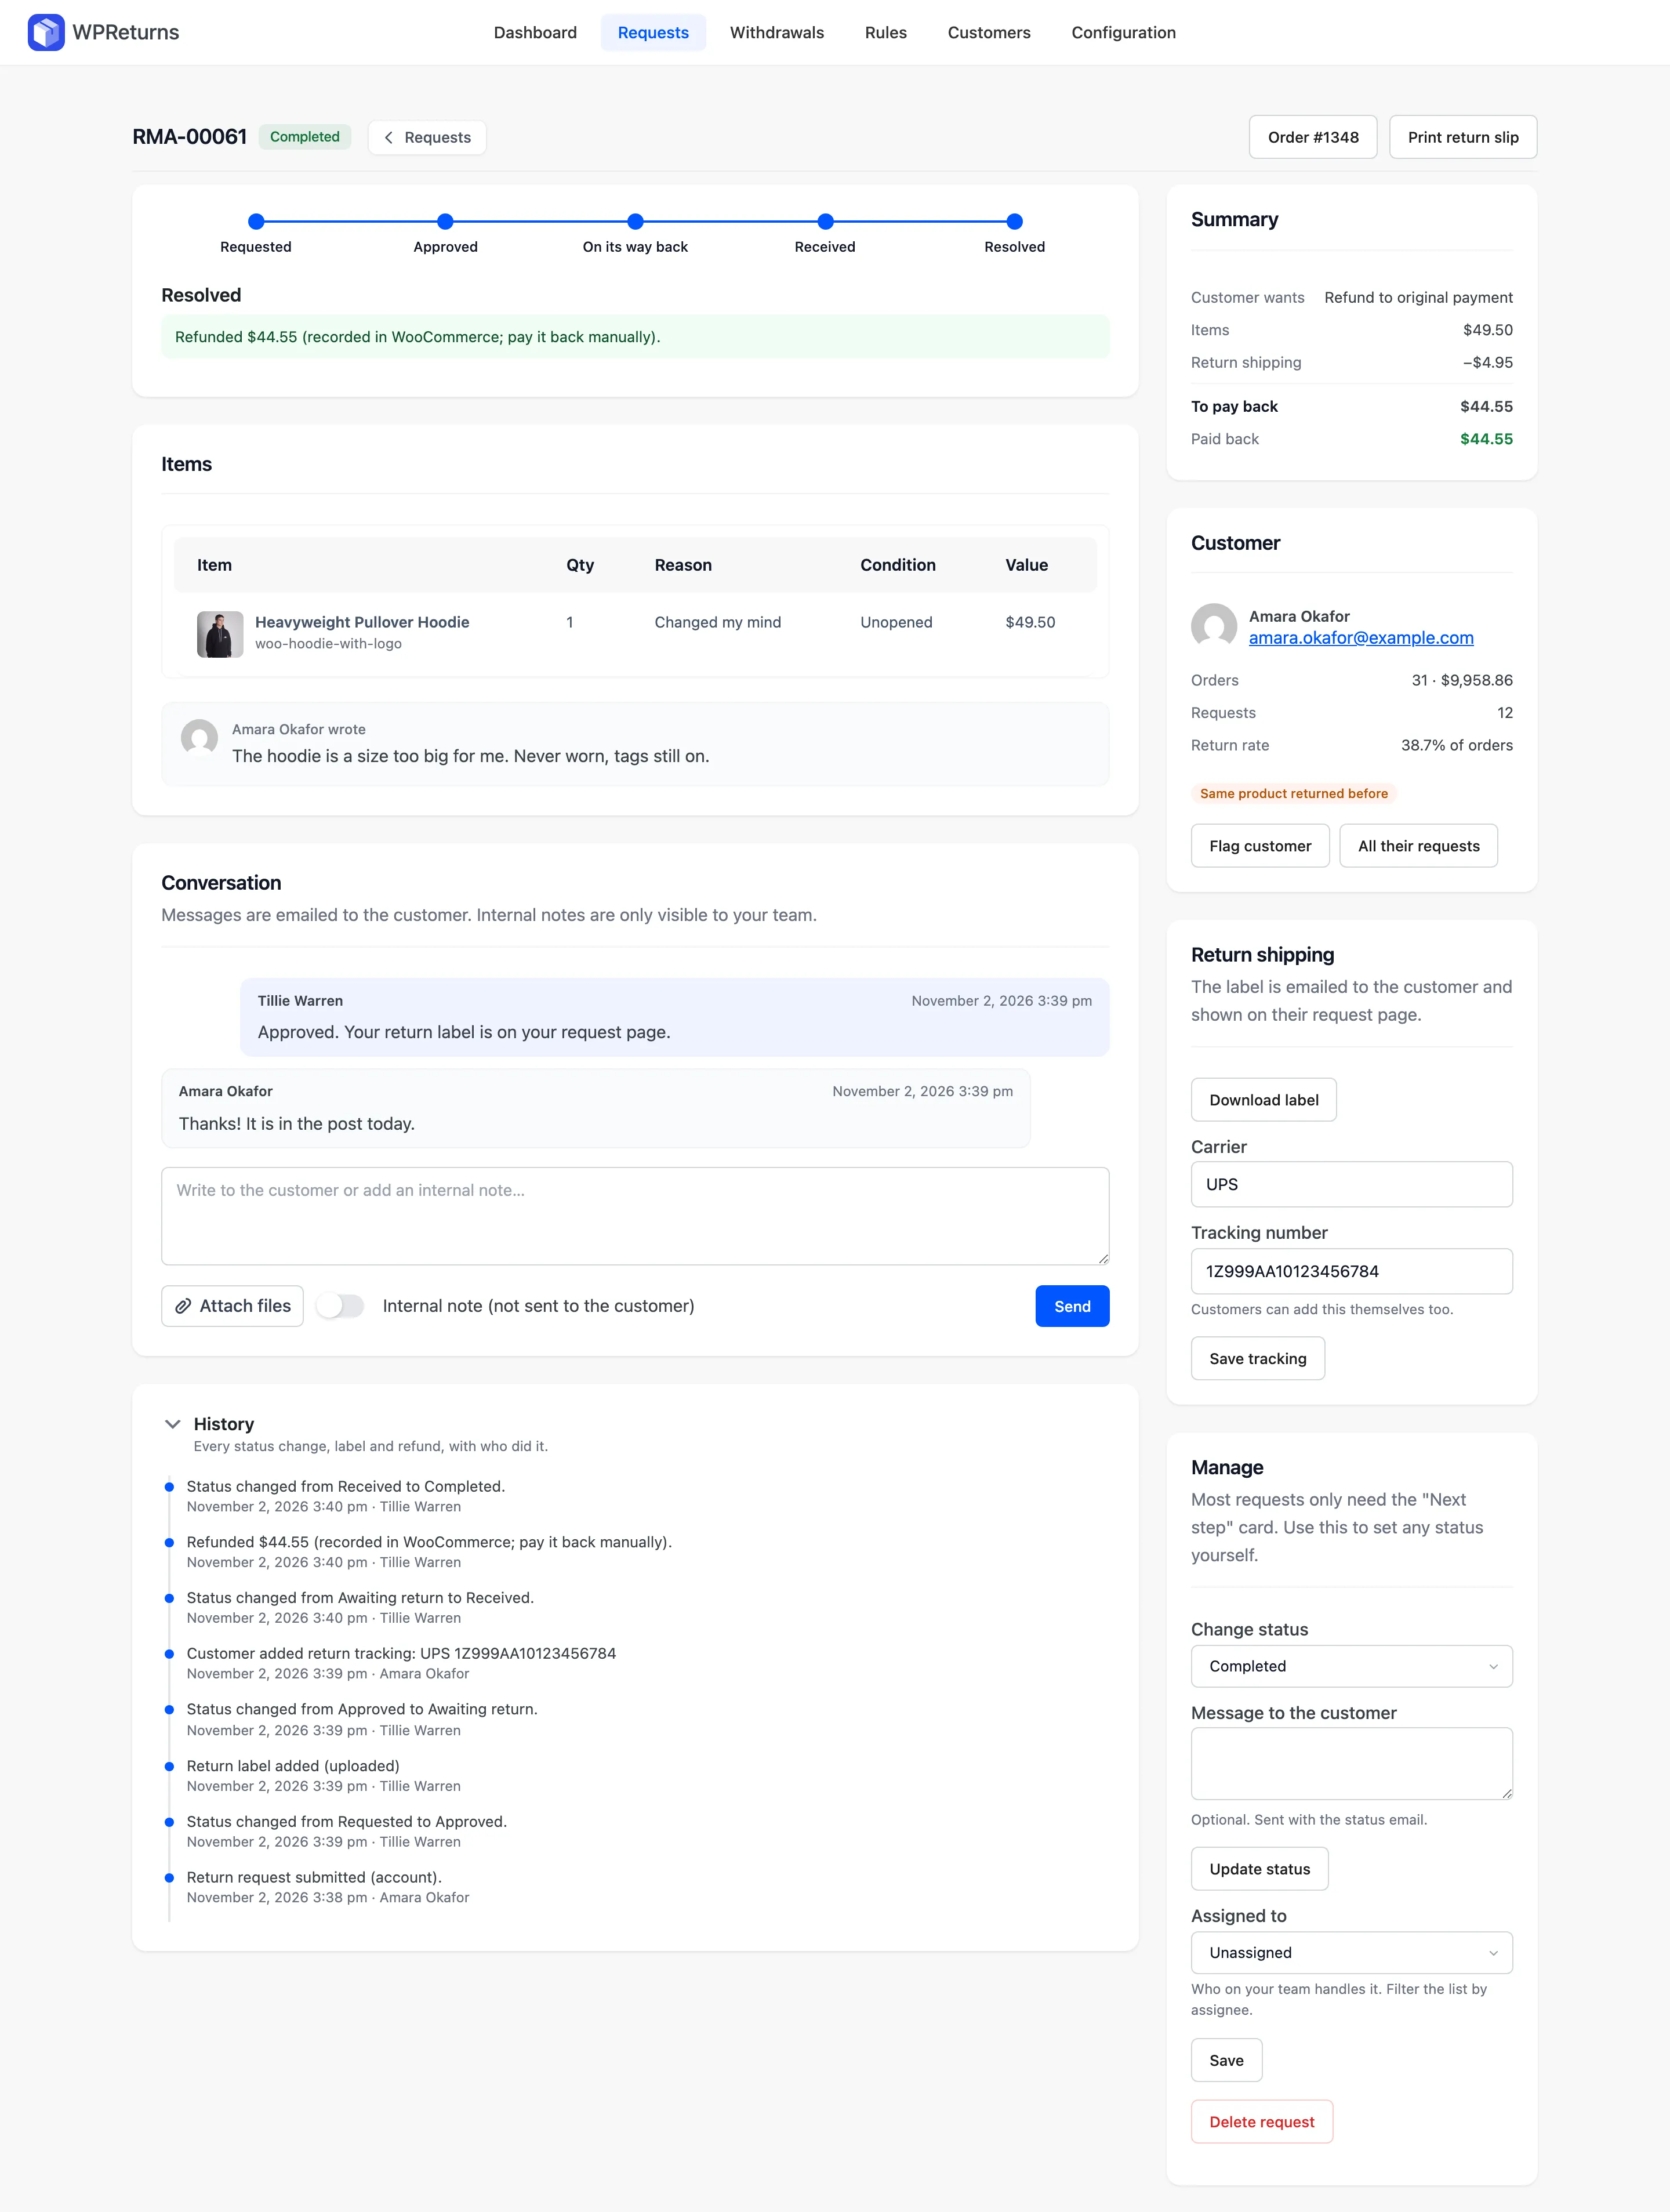
| Completed | Resolved | None. The card shows the result, such as “Refunded $44.55 (recorded in WooCommerce; pay it back manually).” |
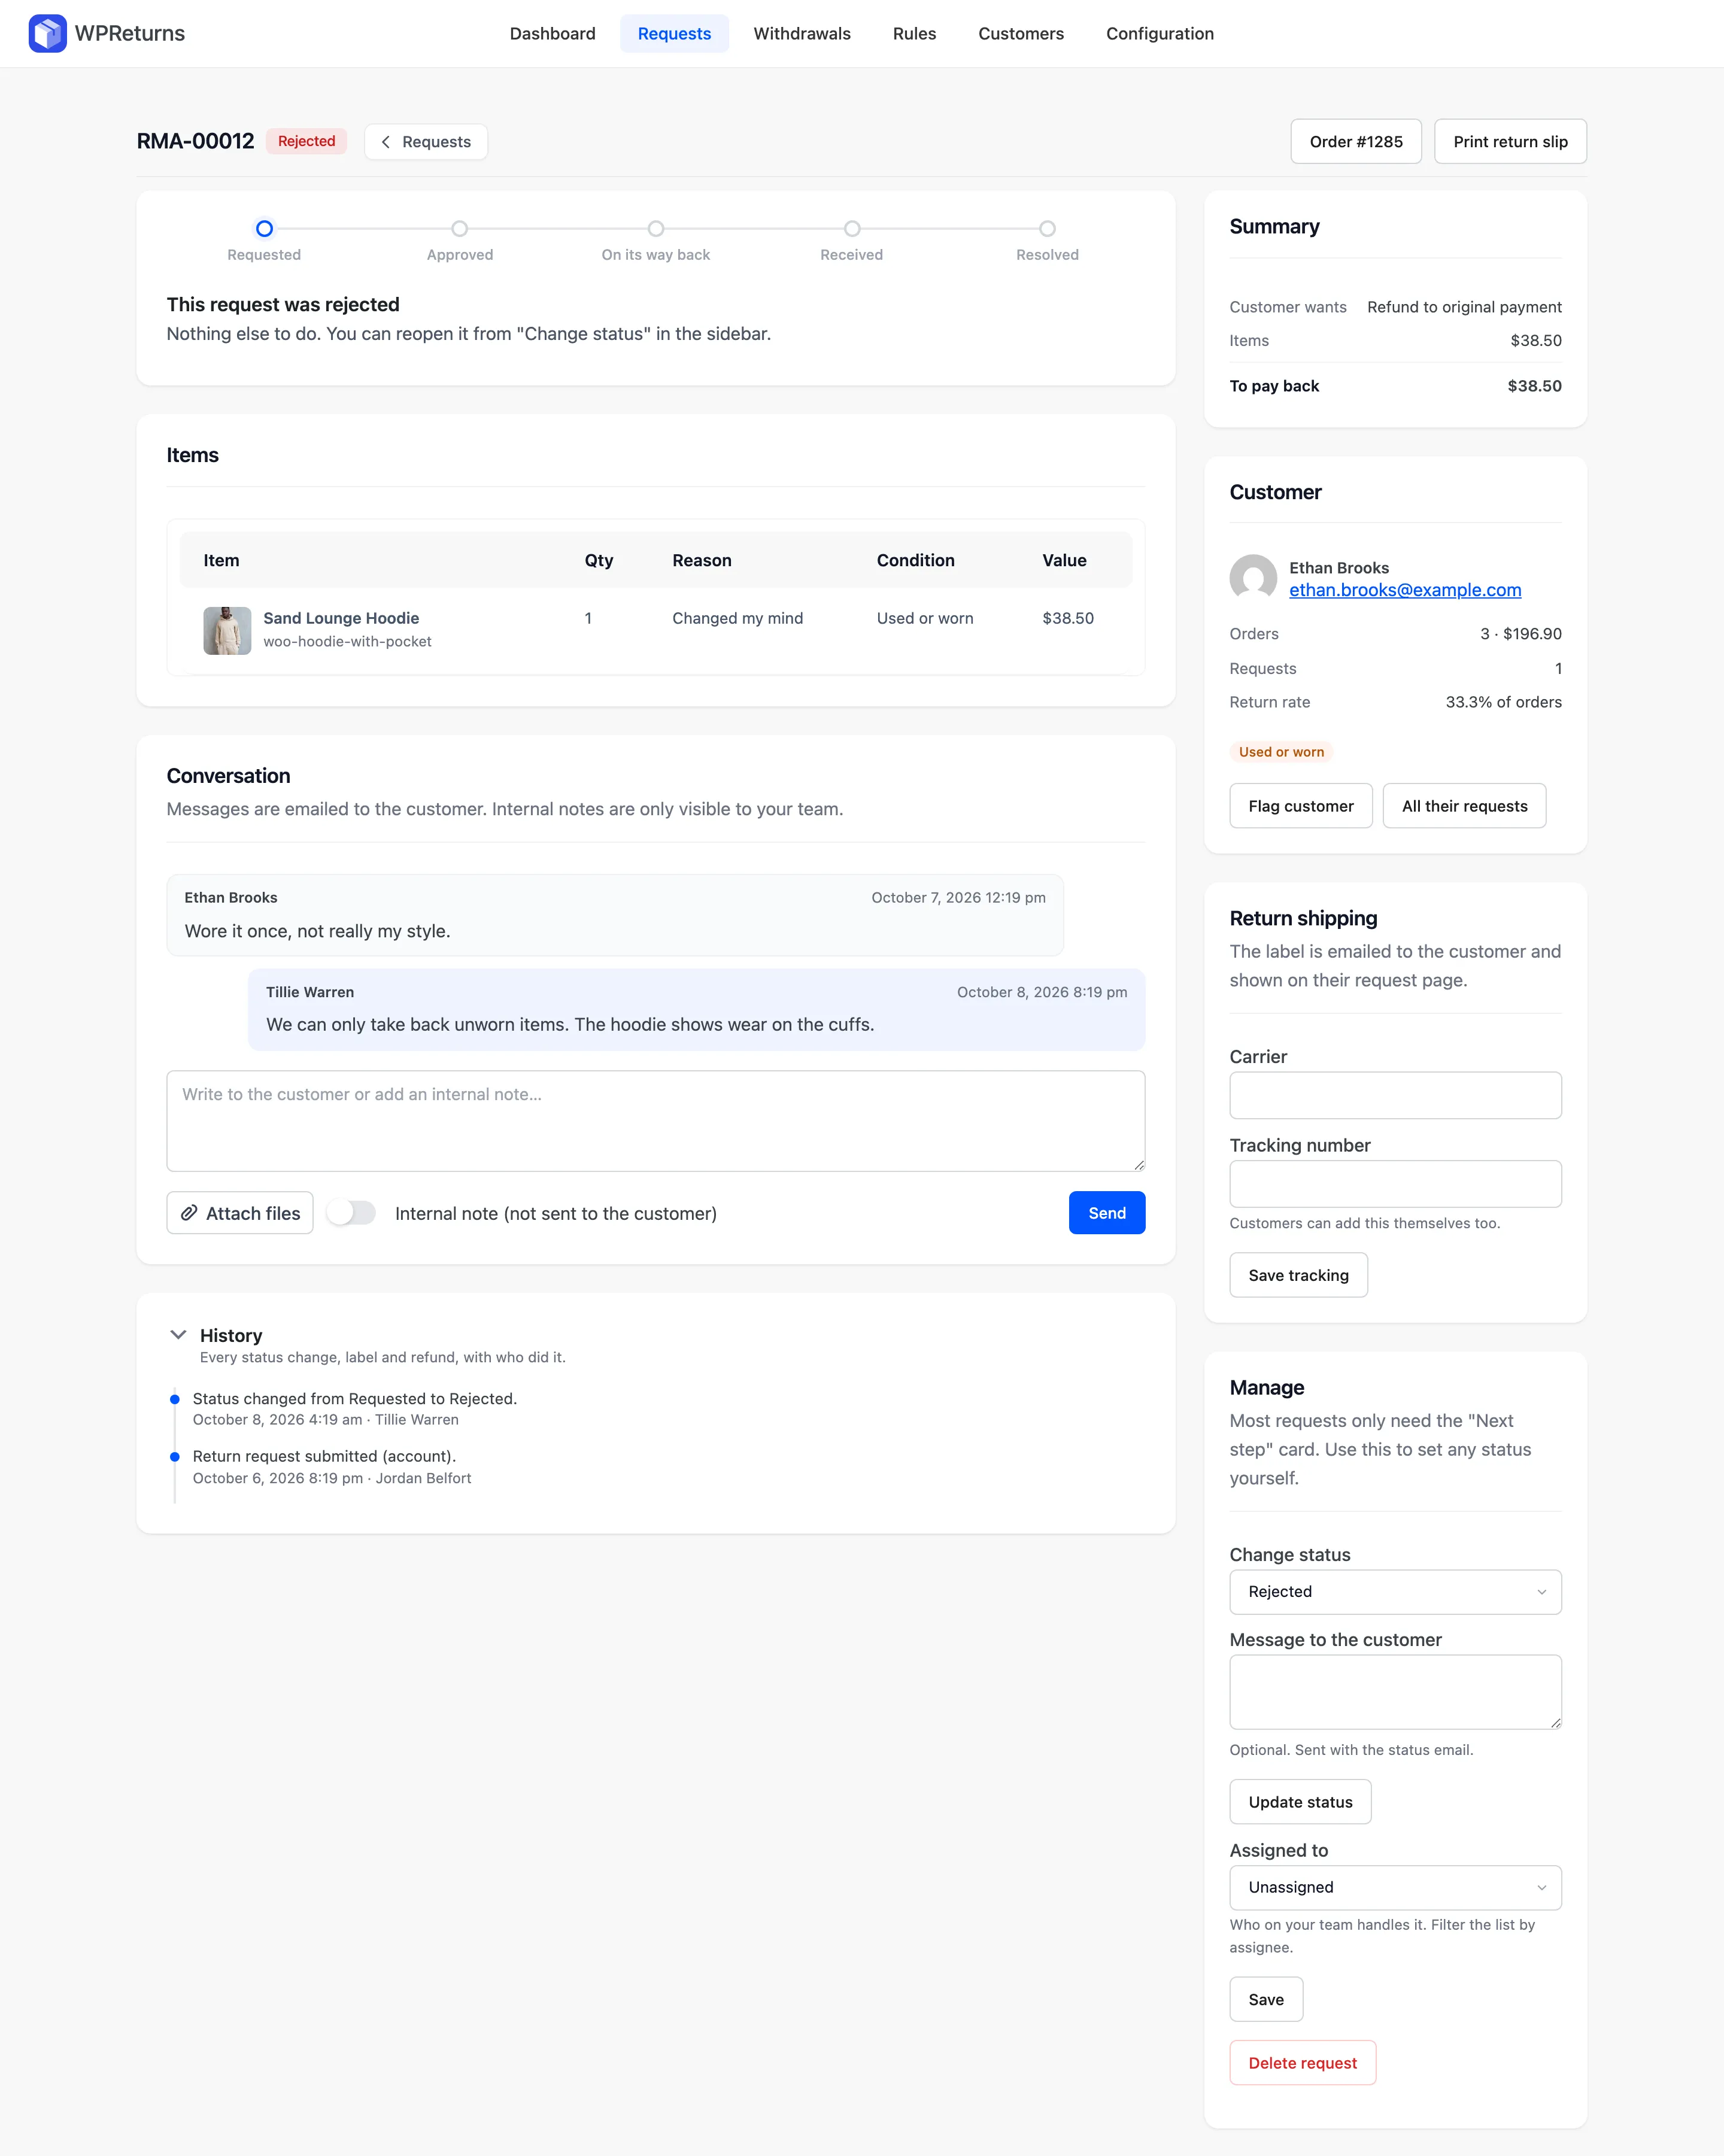
| Rejected or Canceled | This request was rejected (or canceled) | None. Reopen from Change status in the sidebar |
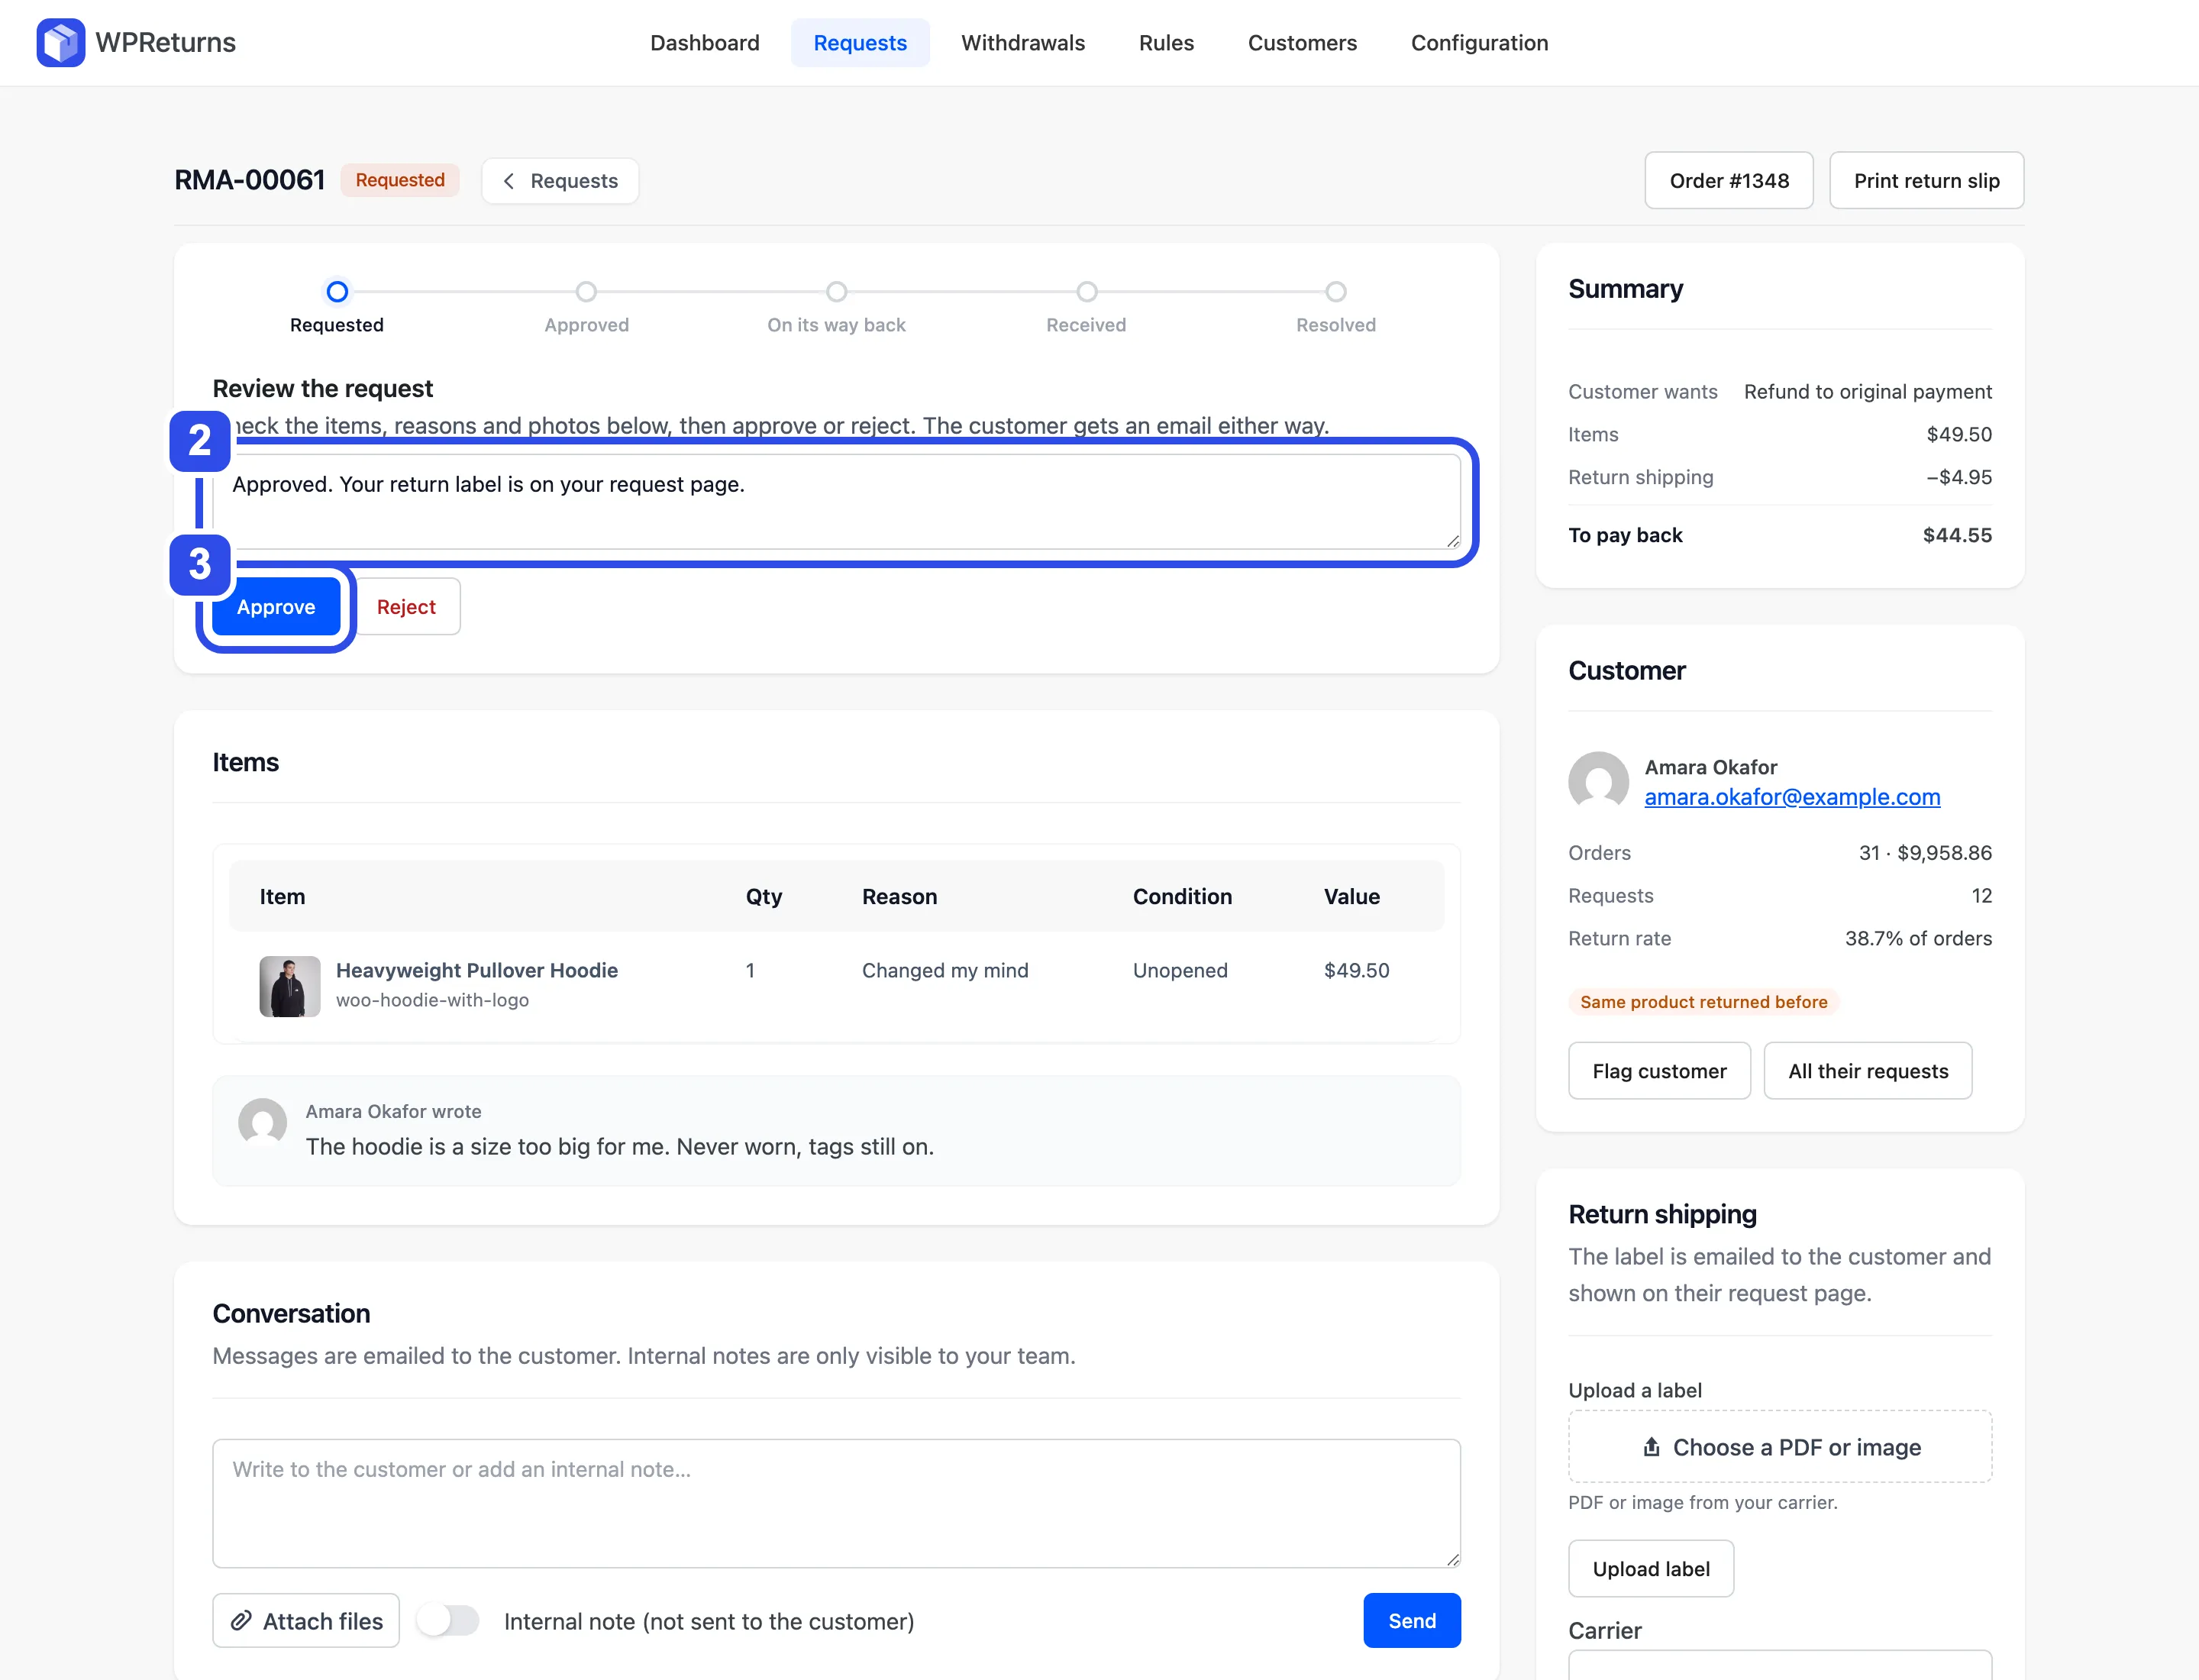
The customer gets an email for approval and for rejection. Text in the message box goes into that email and into the conversation.
Approve or reject a request
Section titled “Approve or reject a request”- Check the items, reasons, conditions and photos.
- Optionally type a message in Message to the customer (optional), such as how to pack the items or why you are rejecting.
- Select Approve or Reject.
A rejected request closes at once and shows your message in the conversation. The customer gets the rejection email.
A cancellation request for an unshipped order goes the same way. Approving it refunds a paid order and cancels it in WooCommerce.
Rules in Pro can approve or reject requests on arrival. See Rules.
Receive the parcel and restock
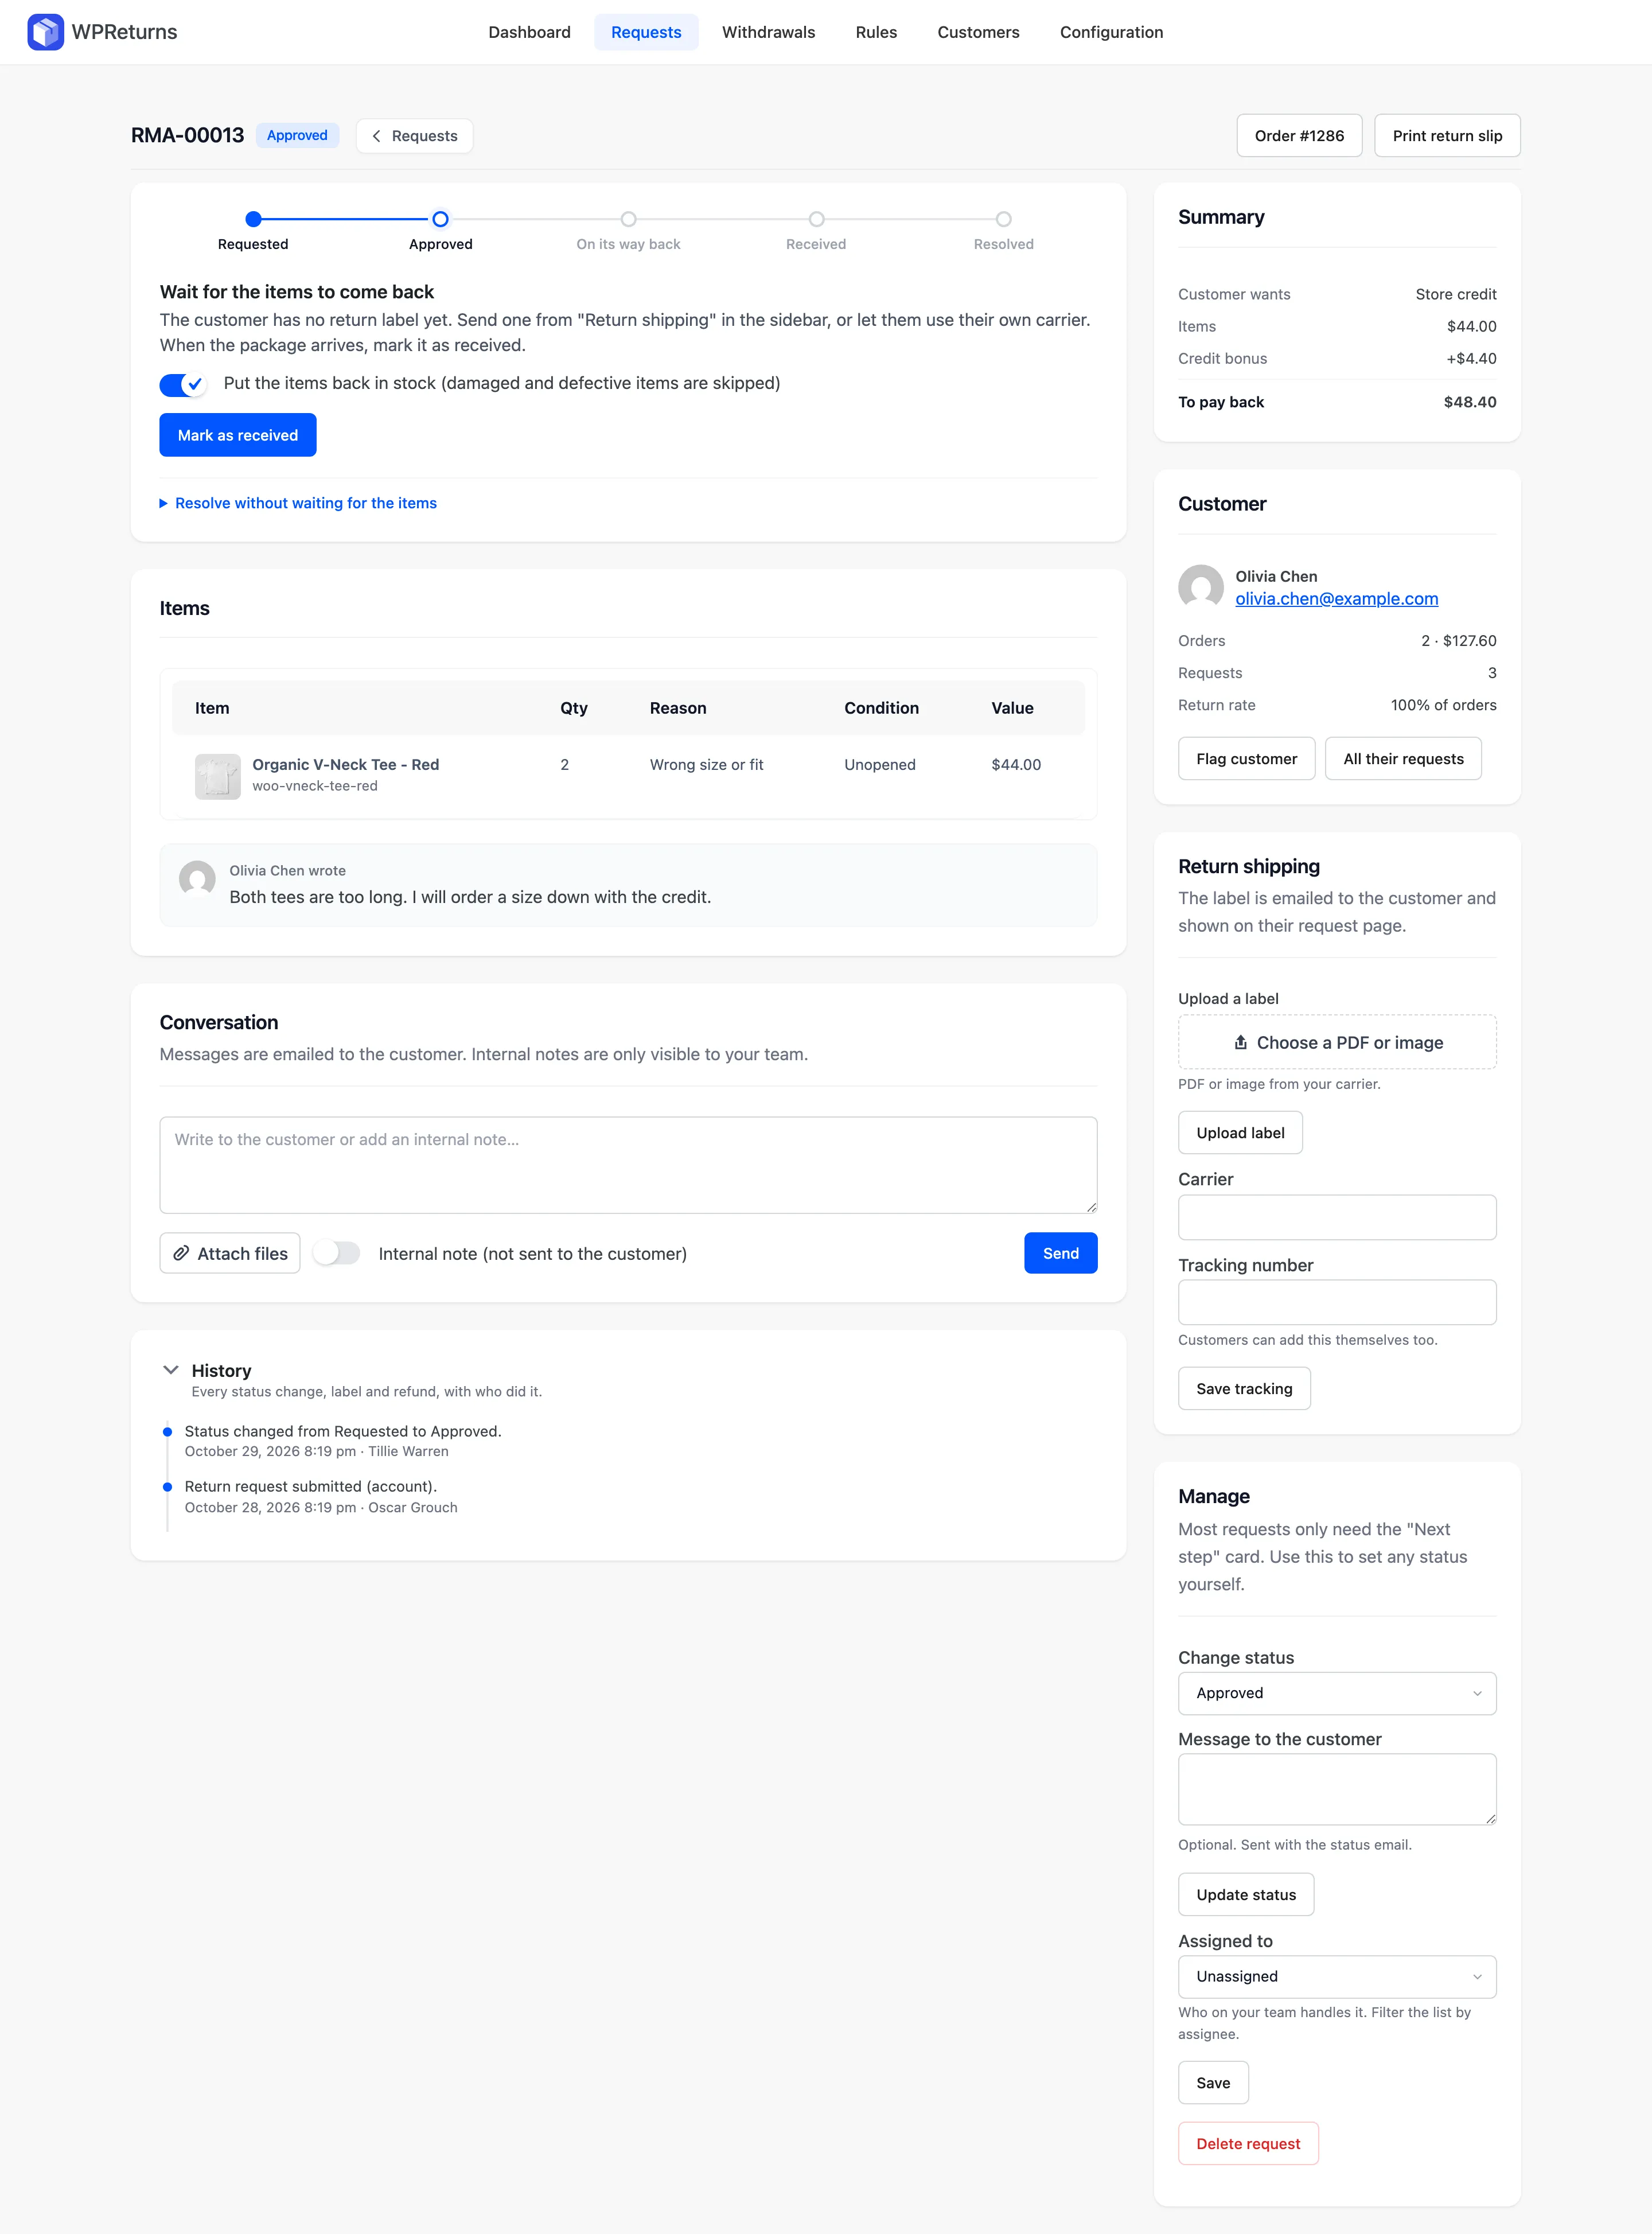
Section titled “Receive the parcel and restock”After approval the card reads Wait for the items to come back. Until a label exists, it reminds you to send one from Return shipping in the sidebar. The customer can also use their own carrier.
- When the parcel arrives, check the items.
- Leave the Put the items back in stock (damaged and defective items are skipped) switch on to restock.
- Select Mark as received.
Restocking uses WooCommerce stock and logs each item. The switch starts on when Restock is on in the Resolutions tab. A log line reads “Restocked Linen shirt × 1.”
Once a label is uploaded, the request shows Awaiting return and the step bar moves to On its way back.
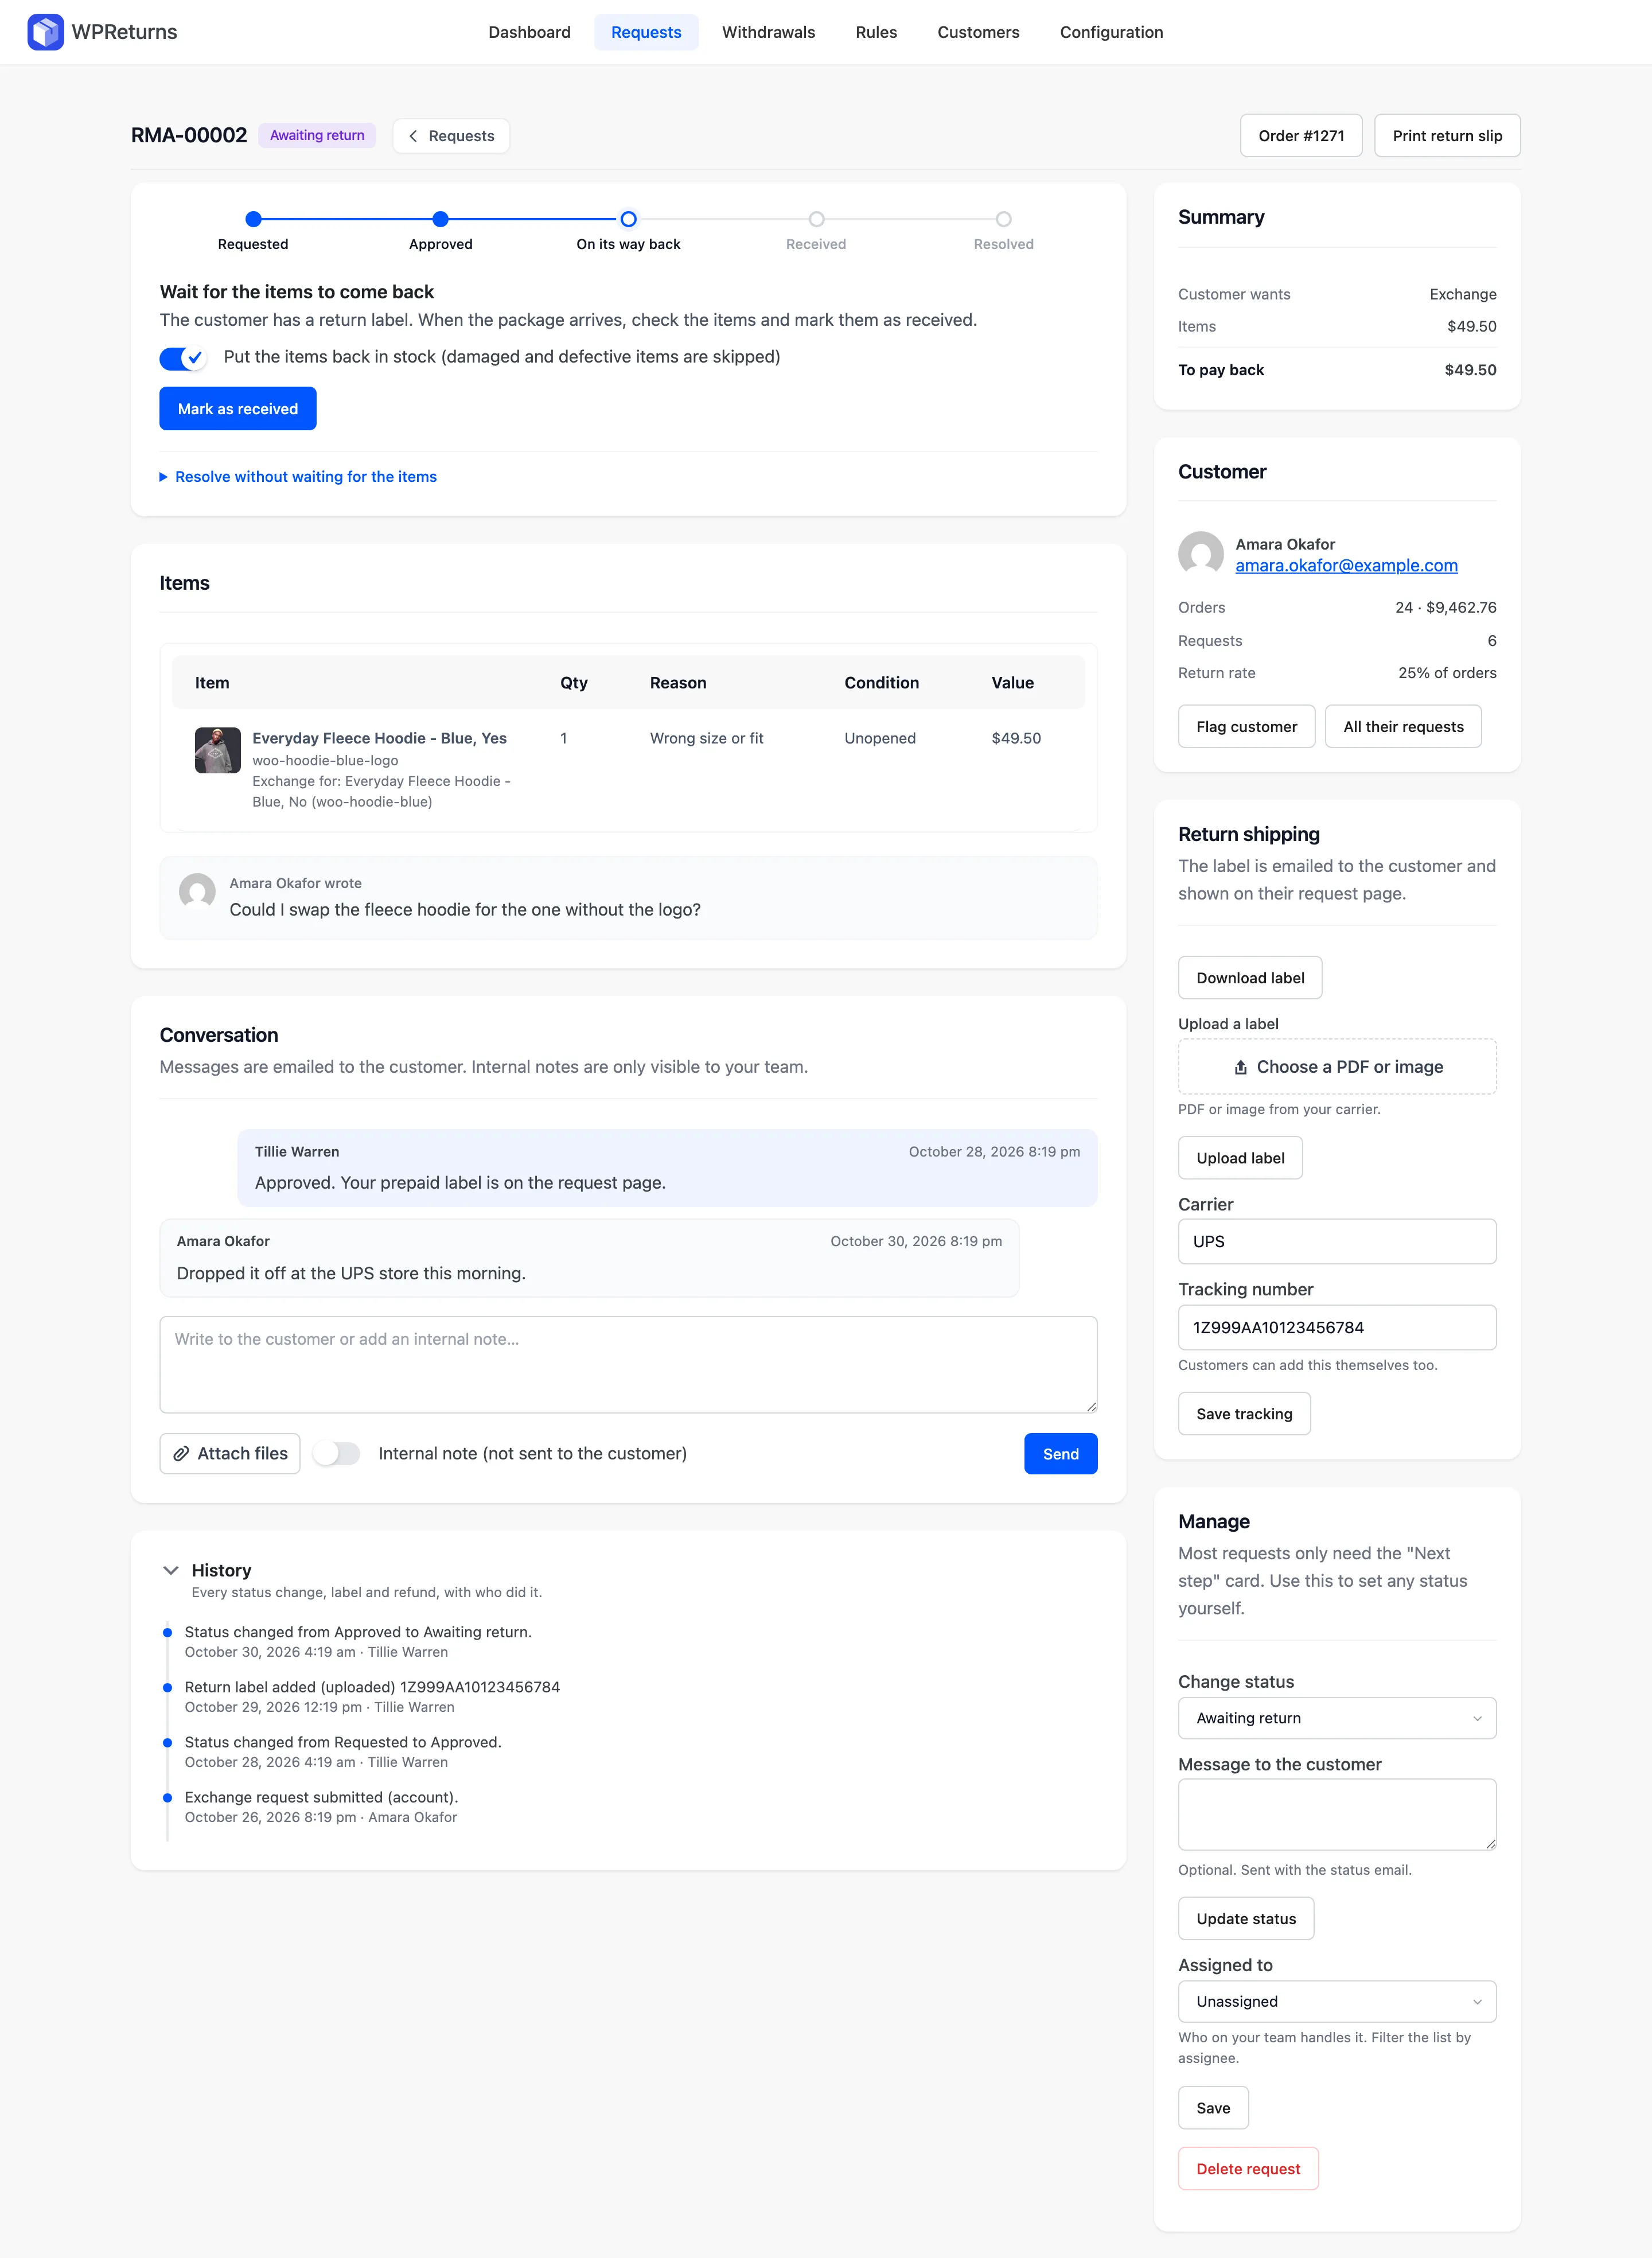
To refund before the parcel arrives, open Resolve without waiting for the items. This suits EU withdrawals and goodwill refunds.
Resolve the request
Section titled “Resolve the request”Once the items are in, the card reads Items received: resolve the request with the resolution form.
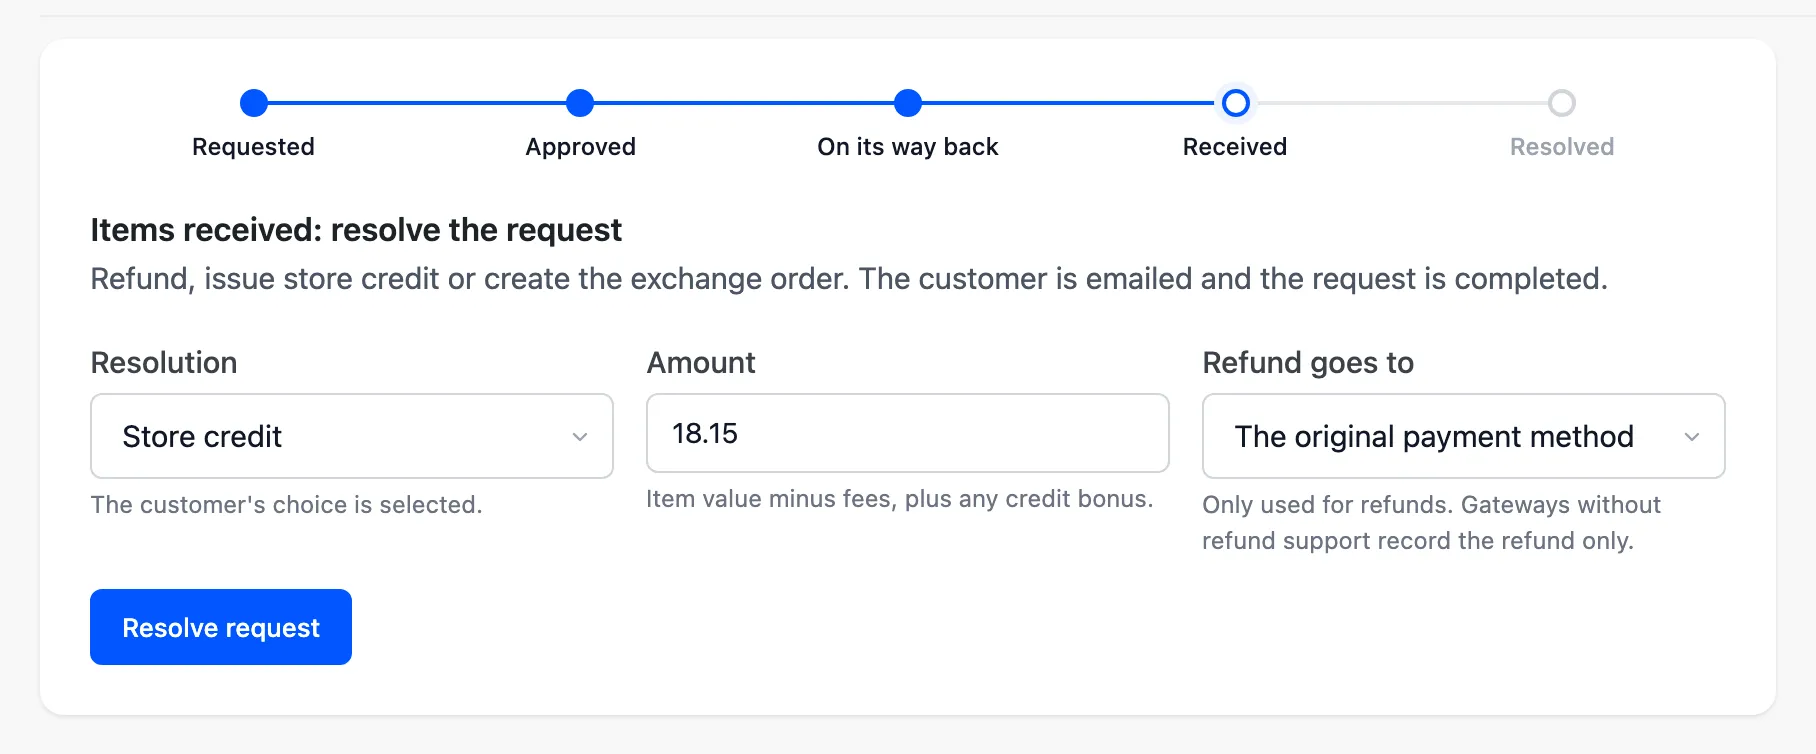
The resolution form has these fields.
| Field | What it does |
|---|---|
| Resolution | What the customer gets. It starts on the customer’s choice. |
| Amount | Item value minus fees plus any credit bonus. You can change it. |
| Refund goes to | The original payment method, The customer’s DevDiggers Wallet (Pro, with Wallet) or Record only (I pay it back myself). Only used for refunds. |
| Store credit goes to | A coupon or The customer’s DevDiggers Wallet. Shown only when Wallet is active. |
Select Resolve request and confirm. WPReturns carries out the resolution, emails the customer and completes the request. See Resolutions for what each option does in WooCommerce.
For withdrawals, the form reminds you that you may wait for the goods or proof of sending before refunding (Article 13(3)).
Only users with the Process refunds capability see the form. Others see “Someone with the “Process refunds” permission needs to resolve this request.”
Items and photos
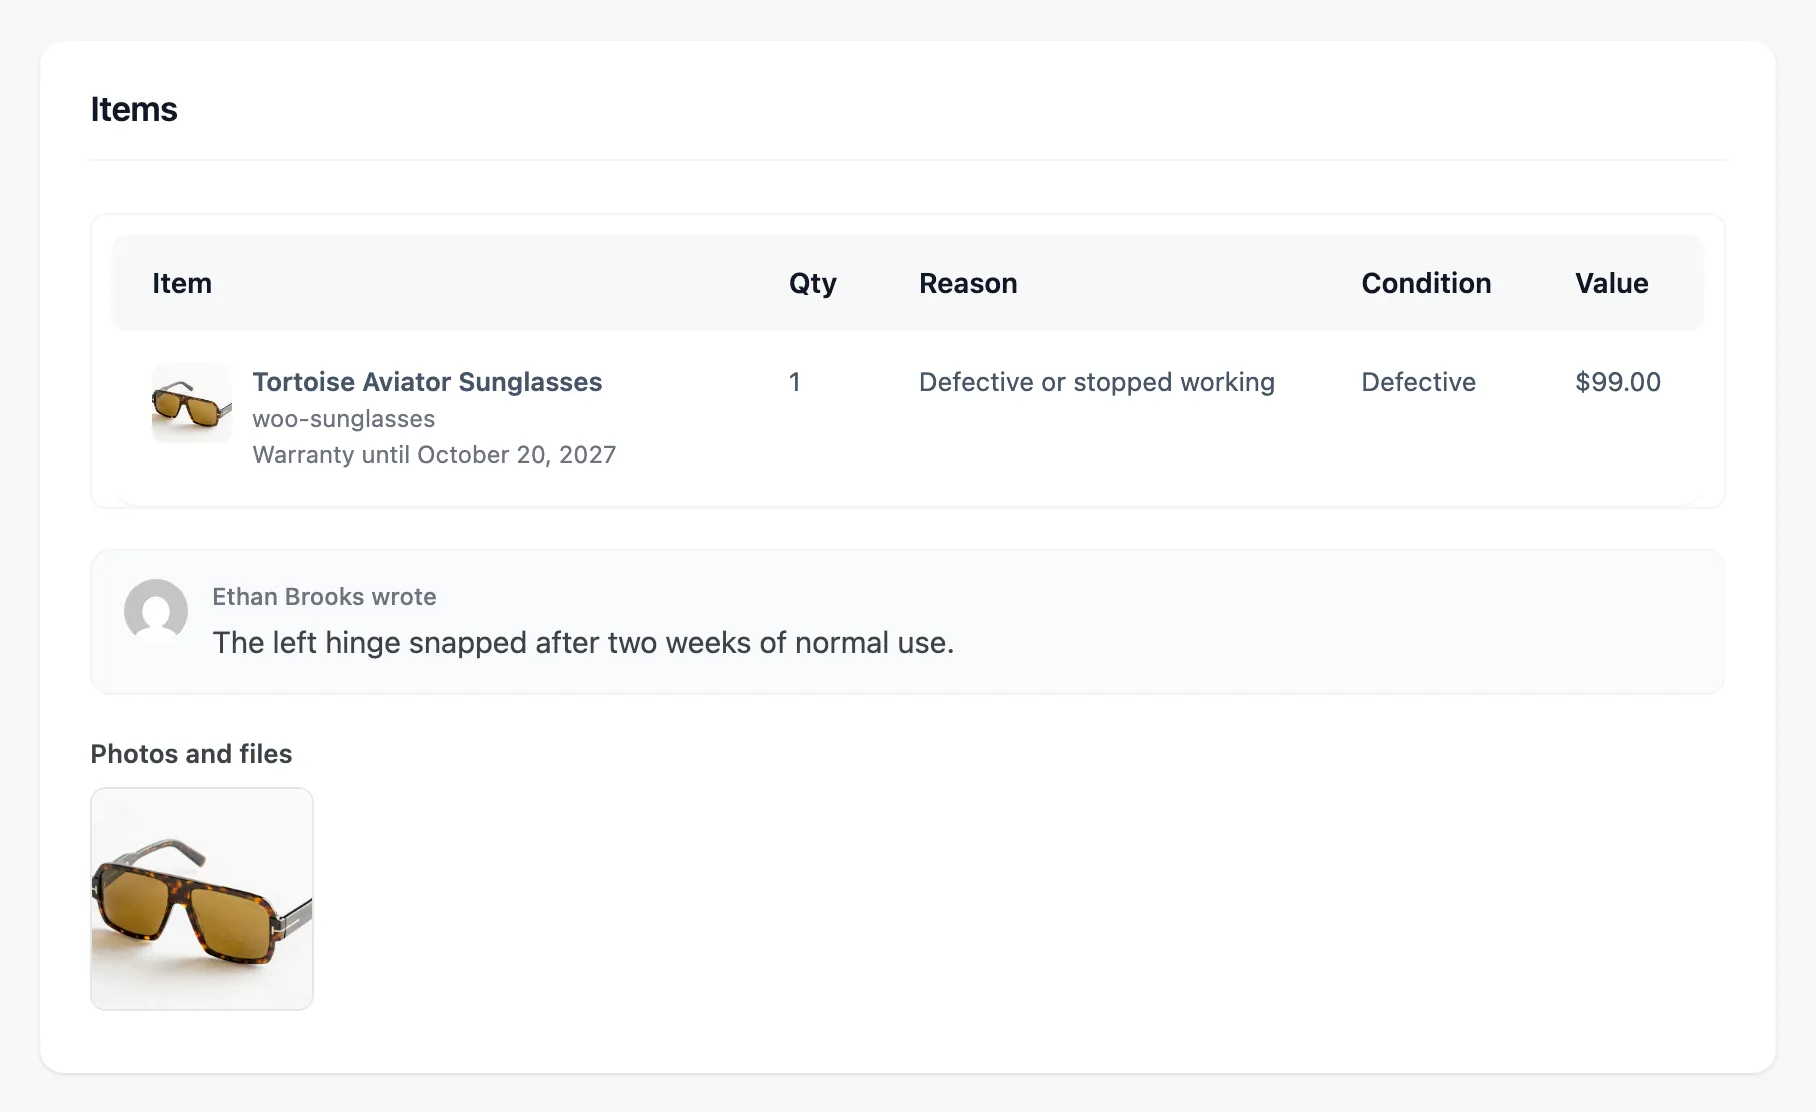
Section titled “Items and photos”The Items table lists Item, Qty, Reason, Condition and Value for each line. The SKU sits under the product name. Extra lines show “Exchange for: …”, “Warranty until …” and “Restocked: 1” when they apply.
The customer’s note appears as a card (“Jane Cooper wrote”). Photos and files shows every file the customer uploaded. Files open through a protected link.
EU withdrawals add a Withdrawal statement card with Name given, Confirmation email and Received (UTC).
Conversation and internal notes
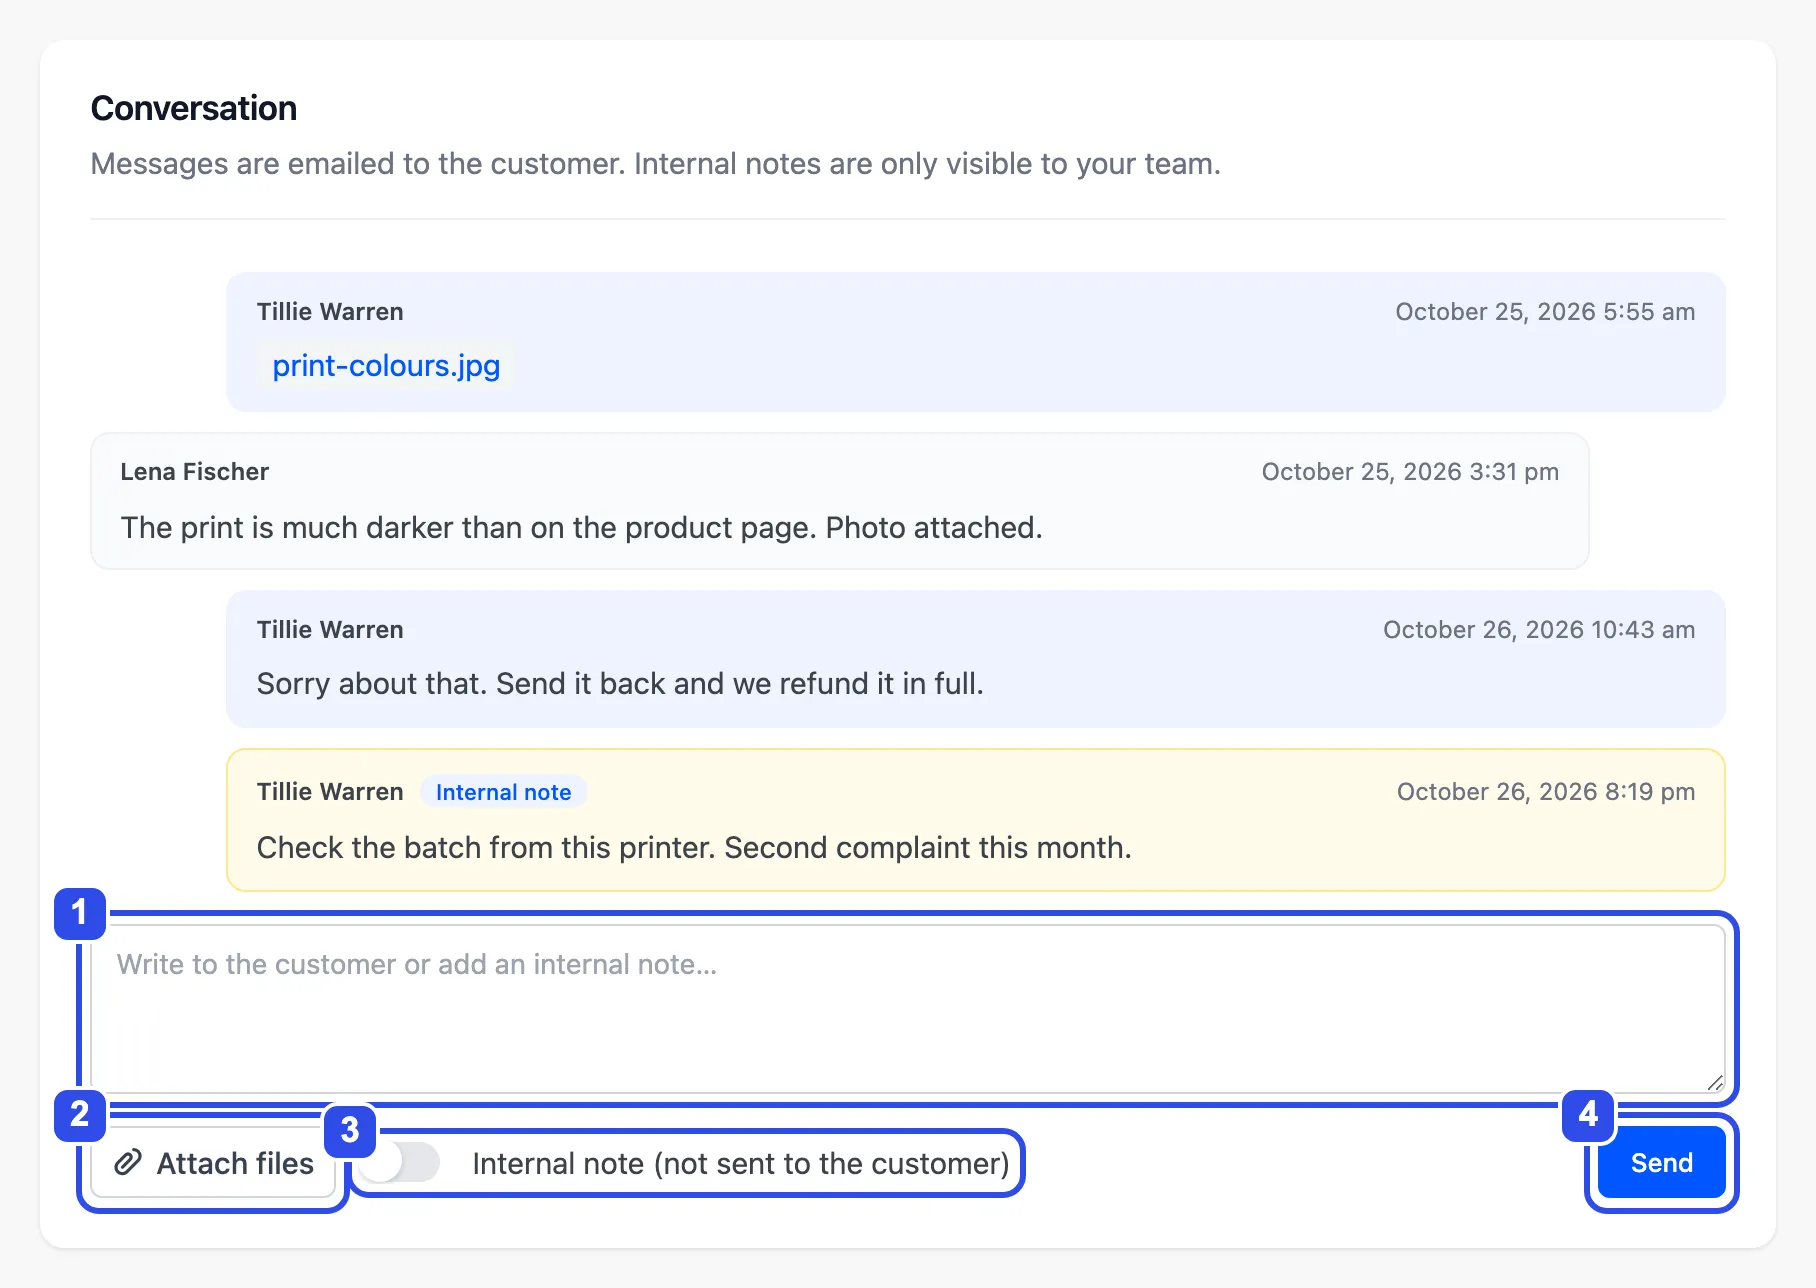
Section titled “Conversation and internal notes”The Conversation box mixes customer messages and your replies. Messages are emailed to the customer. Internal notes stay with your team.
- Type in the box at the bottom.
- Use Attach files to add files.
- Switch on Internal note (not sent to the customer) for a team-only note.
- Select Send.
Internal notes show on a yellow card with an Internal note badge.
Customers can only open their own attachments. Internal note attachments open for staff only.
History
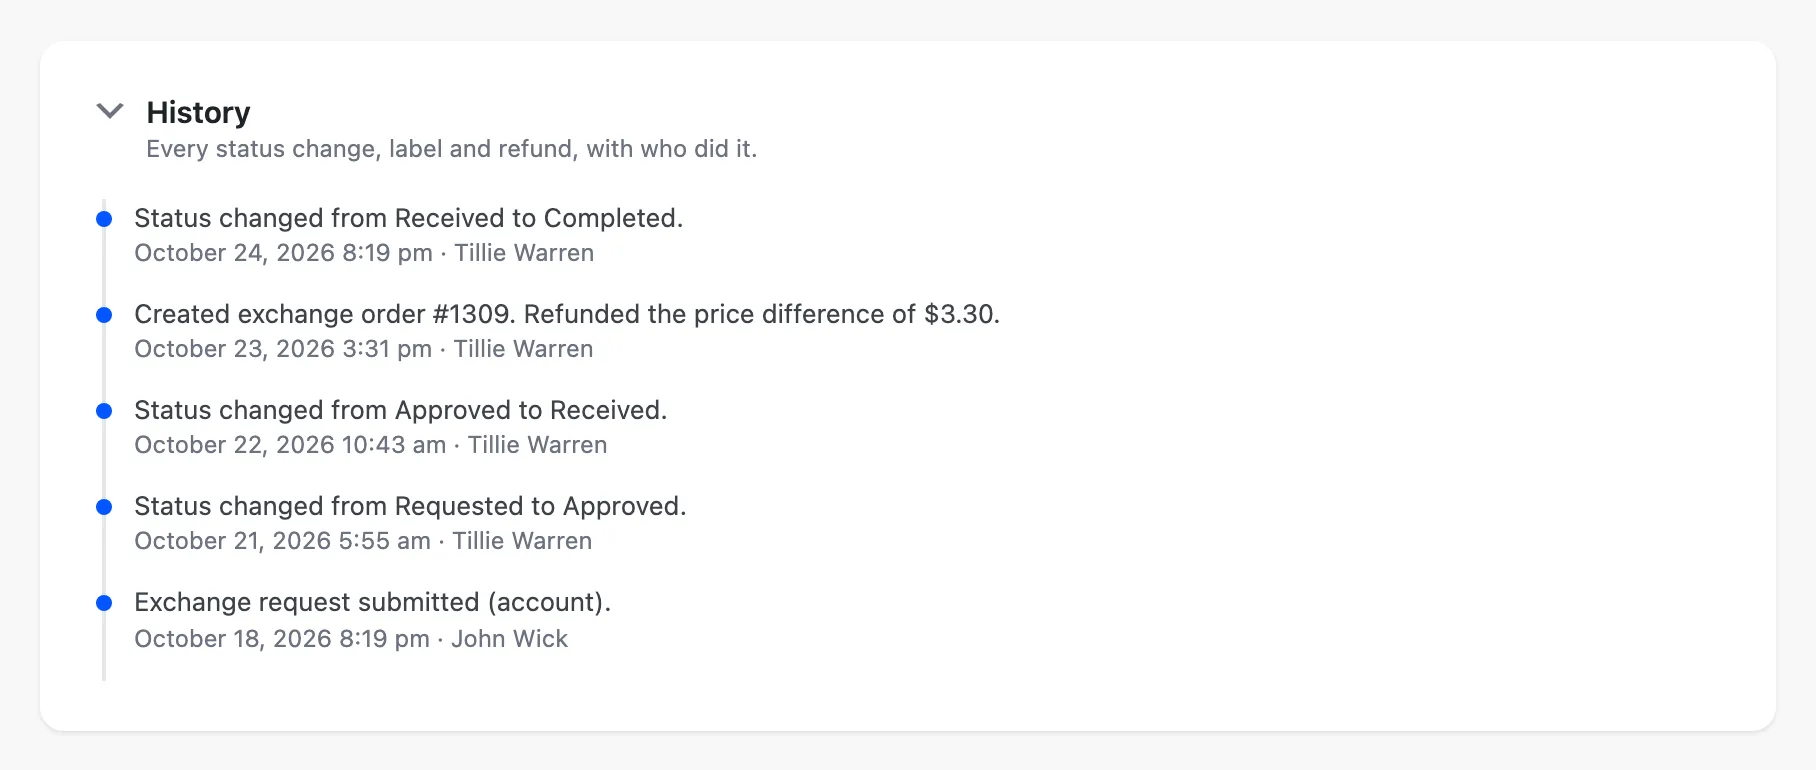
Section titled “History”History lists every status change, label, restock and refund with the date and who did it. It is collapsible. Entries come from the plugin, the customer, staff and automation.
Sidebar
Section titled “Sidebar”| Section | What it holds |
|---|---|
| Summary | Customer wants, Restocking fee, Return shipping, Credit bonus, To pay back or Paid back |
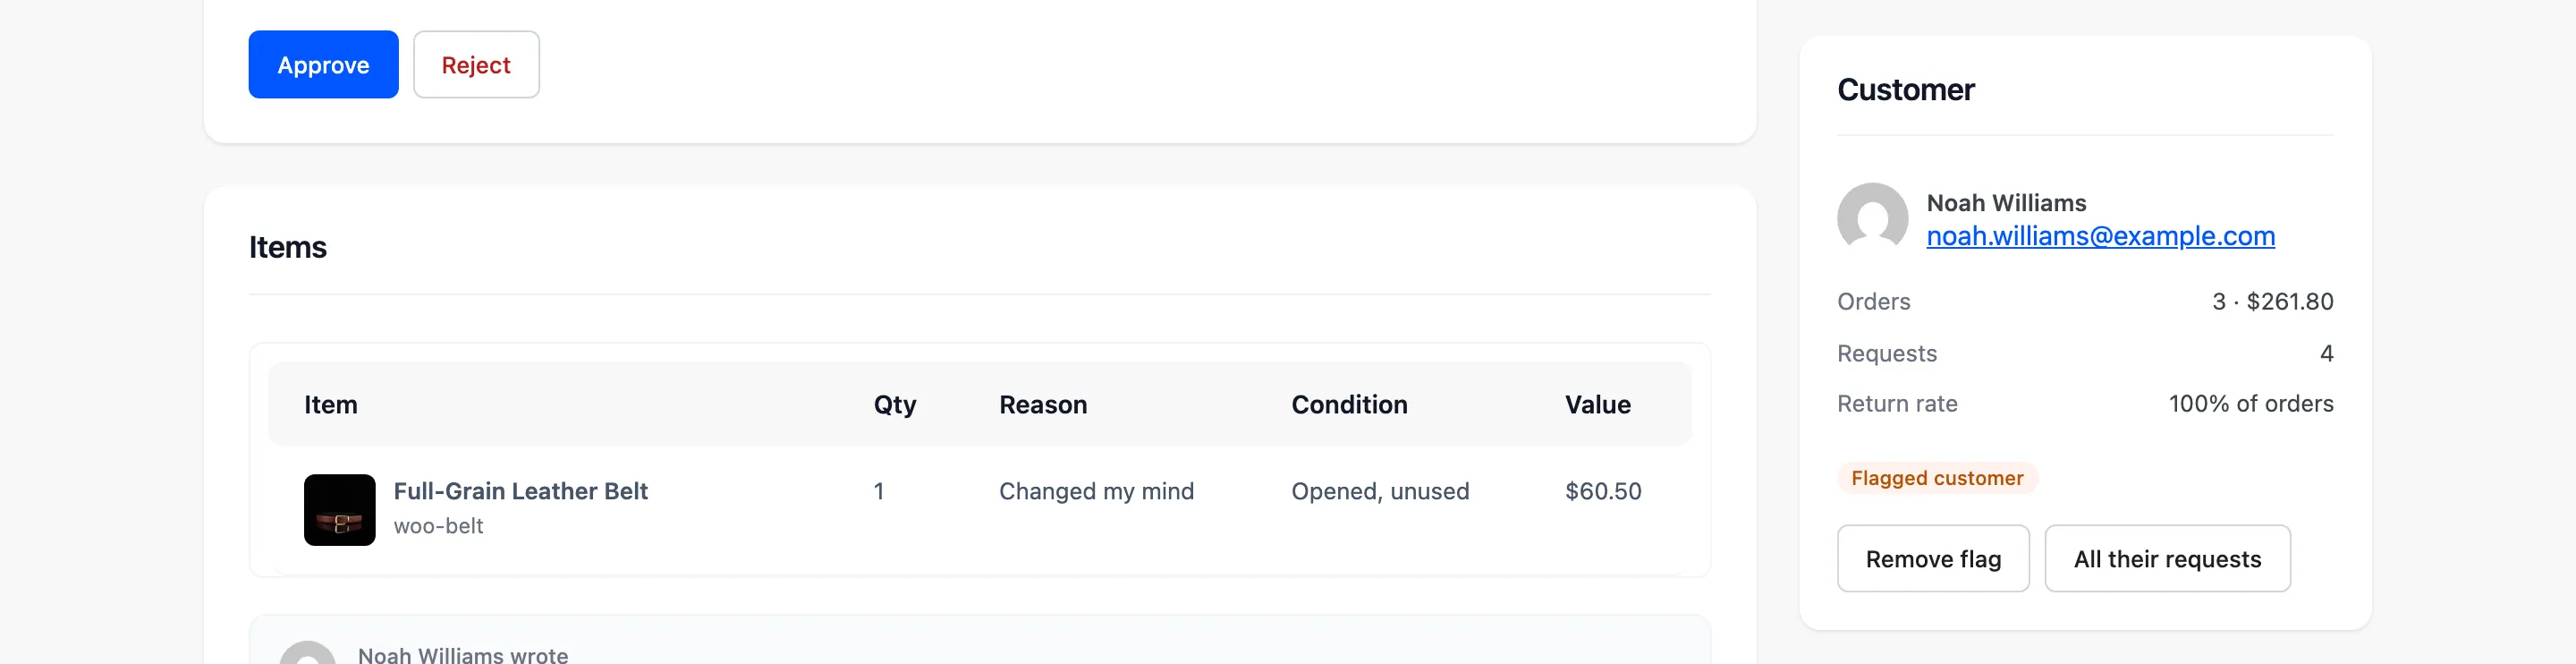
| Customer | Name, email, Orders (count and spend), Requests, Return rate (“26.1% of orders”), Flag customer or Remove flag and All their requests. Return rate and flags need Pro. |
| Return shipping | Download label, Buy return label or Buy a new label (Pro), Upload a label, Carrier, Tracking number, Save tracking |
| Manage | Change status with an optional Message to the customer and Update status, Assigned to (Pro) with Save, Delete request |
A flagged customer shows a Flagged customer badge in the Customer section.
Assigned to only lists users who can manage return requests. Assigning anyone else is refused with “That user cannot manage return requests.”
Return labels
Section titled “Return labels”Upload a label takes a PDF or image from any carrier. Choose a PDF or image opens the media picker. Select Upload label to attach it.
With EasyPost or Shippo set up in Pro, Buy return label buys one label for all items in the request. The label cost shows as “Label cost: $7.40”. See EasyPost and Shippo.
Either way the request moves to Awaiting return. The customer gets the Return label ready email and a download button on the request page.
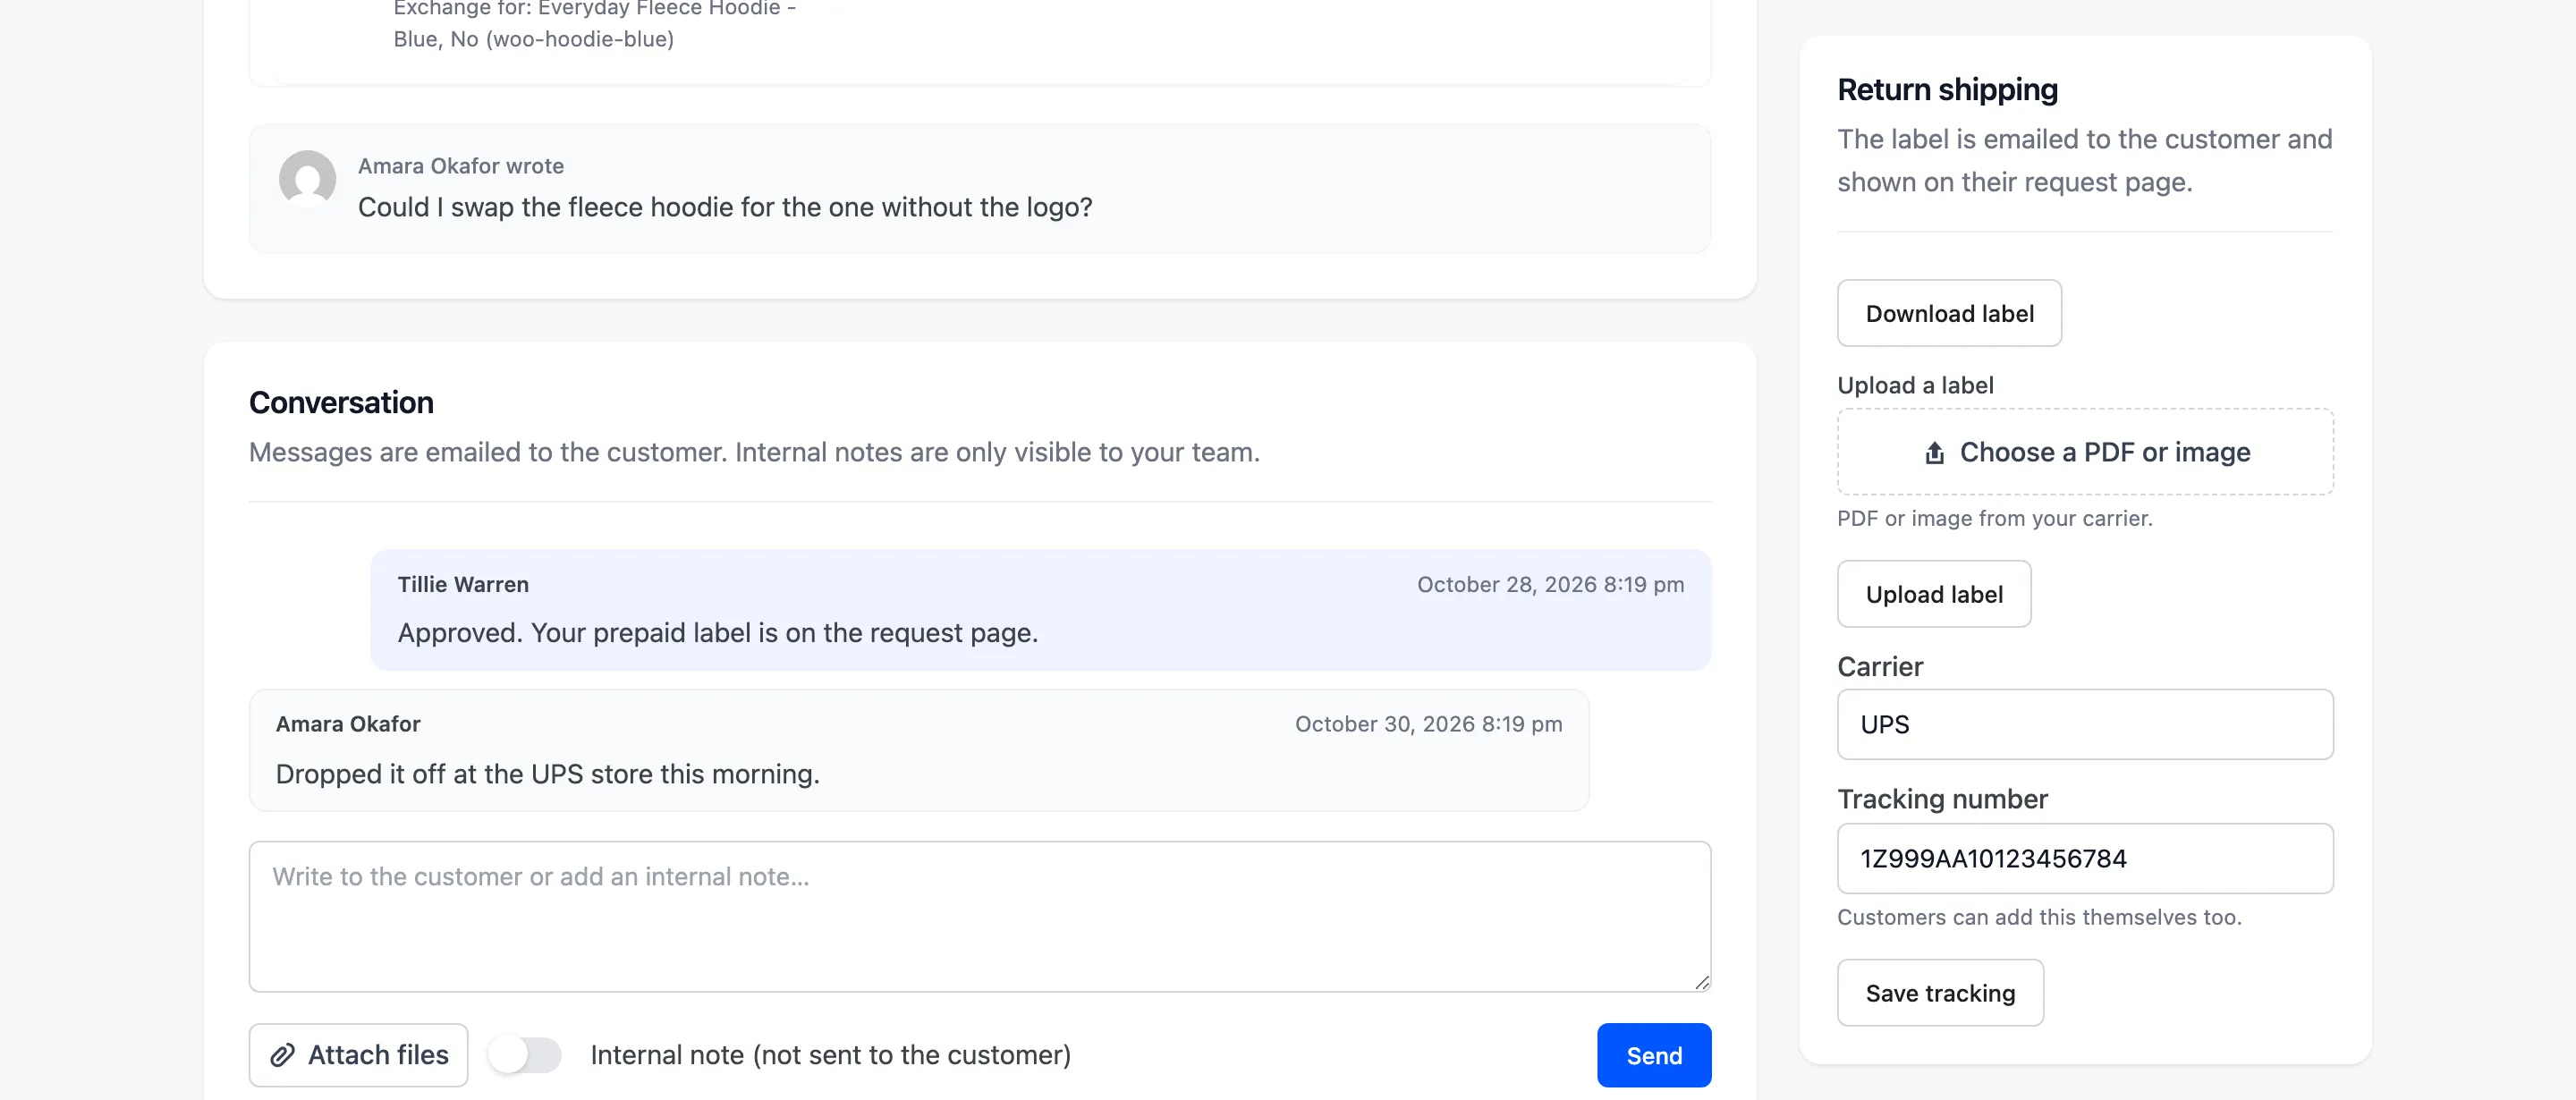
Customers can add the carrier and tracking number themselves. Yours go in with Save tracking.
Print return slip
Section titled “Print return slip”Print return slip in the title bar (Pro) opens a printable slip with the RMA number and a QR code for your warehouse.
Change the status yourself
Section titled “Change the status yourself”Most requests only need the Next step card. Change status sets any status, including custom ones.
The optional Message to the customer goes out with the status email. Statuses under Restricted statuses need the Process refunds capability.
Delete request removes the request, its messages and its files. It asks you to confirm first. Only users who can manage settings see it, and EU withdrawals never show it.
Withdrawal statements cannot be deleted. A delete attempt on one returns “Withdrawal statements cannot be deleted. They are the record that the customer withdrew.”